Tuesday, October 30, 2012

New Release Day for The Alley Way Stamps

It's the most wonderful time of the month...the new release blog hop for The Alley Way Stamps (TAWS)!

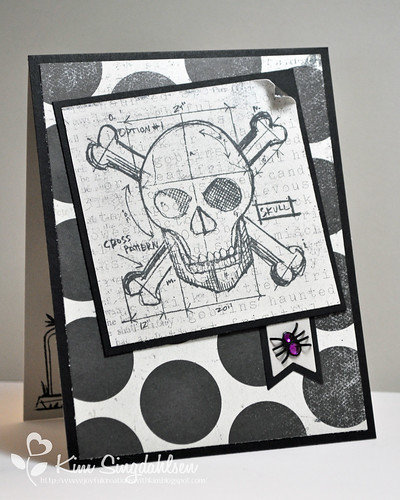
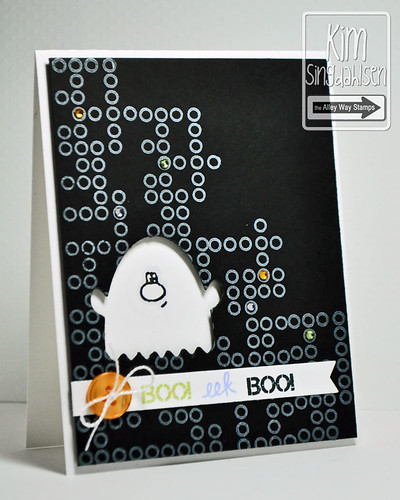
This is a particularly fun release as it includes quite a mix of styles and occasions - a fun border/background set (since it's Halloween today, be sure to check out my Halloween card here using the borders), a photo frame set and a Christmas set - all of which are in the fun and unique style of TAWS!!

Since I already used Background Checks, for today I played with Framed and Jolly Holiday.

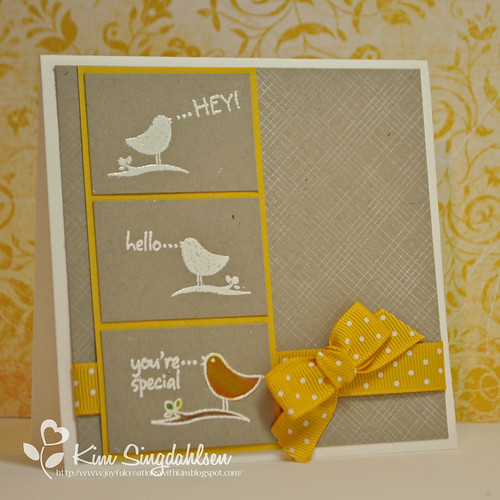
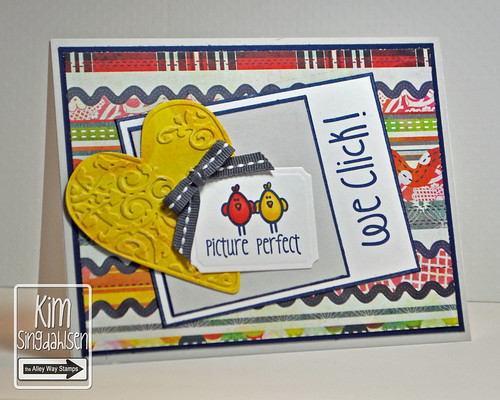
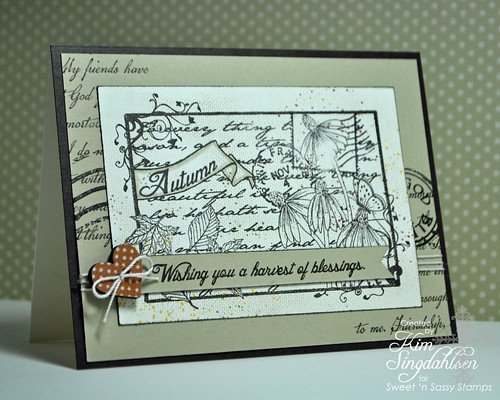
I love the photo frame - you could put ANYTHING inside the frame.  And...this is the big one but there's a small one too!  (FYI: the sentiments and frame are from the new Framed set, but the little bird is from last month's Trees Company.)

We Click!
What I particularly love about this stamp is the size.  I am not a big user of dsp - and definitely not overwhelming patterned paper like above.  But I could add this big frame and the bold patterns just became a nice accent.
(My sketch for this card came from Sketchbook Saturday - picture below.)

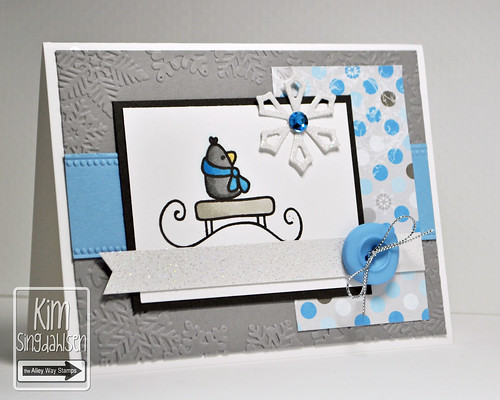
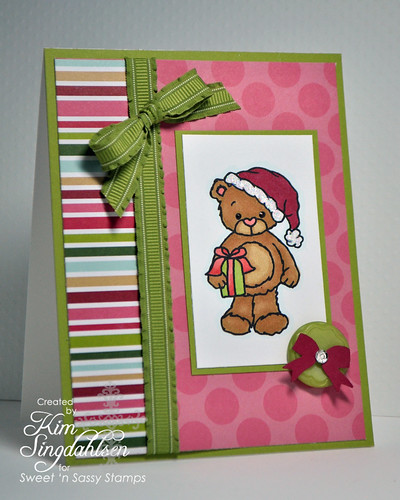
In a totally different mood...check out this charming little guy from Jolly Holiday.  Isn't he sweet?

Winter Wonder

This is already one of my favorite all-time Christmas sets.  This guy is cute - but there's also the most charming Santa that I have ever seen.  I'm sure you've seen him on this hop (if not, check out this post on the TAWS blog.)

(My sketch for this card came from Merry Monday - picture below.)
Be sure to head to Lyndal's blog next!
Here's the official IMPORTANT stuff:
One person is going to win ALL 3 NEW SETS!!! So if you want that person to be you.. all you have to do is comment on all the hop posts and head over to the TAWS blog to find out how you can get additional entries. 
Here are the DT Blogs to visit

Alison
Annette
Arielle
Audrey
Danielle
Jessica
Kim <===You Are Here
Lyndal
Tracy


We Click!
  • Stamps: TAWS Framed, Trees Company
  • Paper: Basic Grey June Bug, Stampin' Up Night of Navy
  • Ink: Stampin' Up Night of Navy, Copics
  • Accessories: Cuttlebug heart cut and emboss, Stampin' Up Basic Gray ribbon
  • Challenge: Sketchbook Saturday

Winter Wonder
  • Stamps: TAWS Jolly Holiday
  • Paper: Bo Bunny Powder Mountain, Stampin' Up Bliss Blue (long retired) and Going Gray, Papertrey Smokey Shadow, Best Creations glitter white
  • Ink: Papertrey Ink Smokey Shadow, copics
  • Accessories: Embossing folder (no name on it, sorry! - but it has a fun frame in the middle which is covered by my image and the embossed strip is actually part of the folder), Bo Bonny button, Spellbinders snowflake


My First Ever Scary Card

I just had to do a quick post today to show you my first ever scary card.  For my entire crafting career, I have either made for the church (absolutely NO creepy stuff allowed!) or for my young children.  Now that I have teenagers, I HAD to buy the new Tim Holtz Halloween Blueprint set!

Tim Holtz Skull

I didn't do much decorating on the card because teenagers really don't care.

I did ruin the scary effect by using this stamp on the inside...


This is from an Inkadinkado set that is all humorous tombstomes - perfect for my sarcastic teen!!

Gotta run - I'm actually being social (that's unusual).  I have a dozen ladies showing up in an hour for a luncheon.  And...if my husband - who has been sent on an emergency trip to the grocery store for onions - gets home while I am typing - this would be MY tombstone!!

Monday, October 29, 2012

the Halloween mystery...

It's almost Halloween and today I want to share a project I have up on the Heidi Swapp blog this week.This photo is of my youngest on his first Halloween , he looked so cute as Robin at just 10 months old.
My project  is a little bit special as I have something hidden......
I started with a base Of Vintage Chic pattern paper and added some Digi downloaded Halloween words from Heidi's shop.

 My base for my photo is a Mini Vintage file folder.
 
 
 Sneaking in some Halloween flair buttons from Greatest View.
 
 
love these Instaframes and black velvet Colorshine.

 and now to my hidden surprise....
 
 I created a pop up bat with my new toy- my Cameo.!


I have a tutorial up on the Heidi Swapp blog explaining how I created my pop up bat!


DON'T FORGET about my  *GIVEAWAY* here for a chance to win a spot in Heidi Swapps online class.

Photobucket

Halloween costume: garden gnomes

Looking for a last minute Halloween costume?


My darling and creative daughter-in-law, Ashlee, put together these garden gnome costumes for their annual "friends" Halloween party. I think they are fantastic! (*Ashlee, we want to borrow them next year!)

My son, Patrick, has been growing out his beard. I HATE it! He gets a ton of compliments on it though, so apparently I'm the only one. I definitely prefer him clean-shaven or he looks great with a simple goatee. I have to admit, he looks the part of a garden gnome. (Hopefully he'll at least trim it after Halloween. :) please, oh please!)

GIRLIE GNOME:
dress (thrifted)
apron (made using an apron she got as a wedding gift as the pattern)
black shirt and tights
striped socks
red Toms
hat* (from felt)

GUY GNOME:
graduation gown (thrifted and shortened)
belt (black fabric tube with elastic insert, buckle is cardboard with yellow cardstock and the black rectangles filled in with a marker)
black shirt and polyester thermals
black rain boots
hat* (from felt)

*HAT:
Supplies:
1/2 yard of 60" felt
matching thread
measuring tape or yard stick

Instructions:
Cut an isosceles triangle from the felt measuring 12" at the bottom and 18" high. Put right sides together and stitch along the long edge using a 1/2" seam. Turn right side out and push the point out.

(Ashlee made three hats from the 1/2 yard of felt.)

A FUN ACTIVITY:
It was a Halloween tradition that Ashlee and her friends would watch the Michael Jackson "Thriller" music video, and recreate the dance in the street outside their condo. How fun would it be to see a bunch college-age kids all dressed up and dancing in the street? Apparently the neighbors disagreed and kept calling the police. I didn't know my daughter-in-law was such a wild girl (wink, wink)!

Happy Trick-or-Treating!

Sunday, October 28, 2012

Background Check with TAWS

It's a sneak peek day for The Alley Way Stamps and I get to show you a fun new set called Background Check.  It's a variety of wonderful borders that can easily be extended to an entire background!  Given it's Halloween week - I had to go with one more little ghostie...

Boo!  Eek!  Boo!

The strip of dots is actually only four dots across - a full strip is on the four left of the card.  Then I just kept adding strips, moving down a little bit each time.

I hope you are watching the sneaks at The Alley Way Stamps blog.  It's a fun release month - the three new sets are completely and totally different.  The first peek was last Friday and then one more tomorrow - followed by a fun and inspirational hop on Wednesday!  (I just realized Wednesday is Halloween and I should have saved this card for the Hop - ooops!!)

My colors come from the color throwdown.


  • Stamps: The Alley Way Stamps Background Check (released Nov. 1), Ghoul-Friend (words) and Fa-La-La (face from an ornament)
  • Paper: black and white
  • Ink: ColorBox Frost White, Stampin' Up Celery, Amethyst, copics to match Pumpkin, Amethyst and Celery for the gems (see my side bar for a downloadable match list)
  • Accessories: Papertrey Orange Zest button and Ghost die, My Favorite Things Fishtails LAYERS die.

Mango and Cardamom Lassi

A lassi is a traditional Indian beverage made with yogurt, very much like a smoothie. There are many versions of lassis, both sweet and savory.  This version is a sweet lassi sweetened with mango and sugar and lightly spiced with a little bit of aromatic citrusy cardamom. 

This is a creamy, sweet, and refreshing drink.  It pairs very well with spicy food and also makes a great breakfast or post-workout drink.

 Mango and Cardamom Lassi
Adapted from Quick & Easy Indian Cooking
by Madhur Jaffrey
Serves 2-3

1-1/4 cups plain yogurt (I used Greek yogurt)
1 cup chopped, ripe mango
3 tablespoons sugar, or to taste
1/4 teaspoon ground cardamom seeds, plus more for sprinkling on top
8 ice cubes

Combine all the ingredients in an electric blender and blend.  Some ice pieces may remain.  Pour into 2 or 3 glasses and serve.  Garnish with additional cardamom, if desired.


Theme: Everything's Better with Yogurt


my favorite [simple] things: Halloween 2012

I'm sharing a few of my favorite things about Halloween this year.


We have our own little "Vampirella". :) You gotta love the toothless grin of a six-year-old. When Ella brought home her school pictures, she scowled as she handed them to me, "I look like a vampire!" I smiled. She was right. I even regressed back to perfectionist-mode and thought about doing a re-take. Nope, this is just how we'll remember her.


This sweet little story about our granddaughter, Madi. We got a little laugh out of it. Beauty truly is in the eye of the beholder. :)


A little Pinspiration for you--some of my favorites, both old and new.
1. Love this playful print. 2. What a fun countdown for the entire neighborhood, and the saying is great. 3. These little bats look quick and easy to make. I saved my eighteen count egg cartons so we can make them. 4. Mummy Oreo cookie pops. What kid--or adult--wouldn't love them? My friend, Mykel used this same technique and made ghosts from Nutter Butters for the preschool kids, and used mini chocolate chips for the eyes. Too darling! 5. A perfect little something for a friend or neighbor. You can download the tags for free. 6. This saying made me smile. And I love the design and fonts. I may have to try this project with my Silhouette. Go check out the other designs too. 7. These little signs would add a perfect touch to my Halloween mantle. This is a free download too. 8. Ella's lunch on Halloween. She'll LOVE it! 9. I saw this banner last year, and it's still one of my favorites (free download).

Halloween Hugs,

A Few of My Favorite Things...

This is a weekend of farewells.  Yesterday was my last post for Dynamic Duos and today I say goodbye to the Sweet 'n Sassy Design Team.

I have had the honor and joy of serving on the Sweet 'n Sassy Design Team for the past year but, very sadly, this is my last official day.  As we all know, life often has surprising and exciting new plans for us and with the changes in my life, I simply do not have the time to give my Sweet 'n Sassy cards the focus that they deserve.

I love Sweet 'n Sassy Stamps and wanted to give you a few samples of what I so love.

First, Rhubarb and Cocoa...two of my favorite  characters!!  Here's Rhubarb all dressed up for Christmas!!  Cocoa is an absolutely charming mouse with his own line of stamps.

Rhubarb's Christmas

Second, Sweet 'n Sassy Stamps do cute well, but they also have a variety of lovely and elegant stamps.   (Thanks to my friend Kris for this color/layout inspiration.)

Harvest of Blessings

Third...Christian stamps!!  Many of their stamps are beautiful enough to stand alone.  There are also a large array of gorgeous florals and birds and wedding and baby sets and more, each of which includes Christian sentiments.

Trust in him


I do love Sweet 'n Sassy Stamps and they will continue to be an important part of my own card making! 

Rhubarb Santa:
  • Stamps: Sweet 'n Sassy Rhubarb's Christmas
  • Paper: Stampin' Up Lucky Limeade and Raspberry Ripple, TPC Studio Sweet Christmas dsp
  • Ink: Memento Black, Copics
  • Accessories: Stampin' Up Lucky Limeade ribbon, Papertrey Ink Simply Chartreuse button, Martha Stewart bow punch
  • Challenge: Sketch from Technostamper


Harvest of Blessings:
  • Stamps: Sweet 'n Sassy Autumn Collage, Friendship Background, Vintage Postcard
  • Paper: Stampin' Up Very Vanilla, Early Espresso, River Rock
  • Ink: Stampin' Up Early Espresso, River Rock and little sprinkles in Cajun Craze, Summer Sun and Old Olive
  • Accessories: Prima Wood Buttons
Trust in Him:
  • Stamps: Sweet 'n Sassy Our Refuge
  • Paper: Stampin ' Up Crushed Curry, Authentique Essentials dsp
  • Ink: Stampin' Up Early Espresso
  • Accessories: Stampin' Up Crumb Cake seam binding and scallop border punch, unknown embossing folder (sorry...there's no name on it!)


Saturday, October 27, 2012

Heidi Swapp (Mo) tography class *GIVEAWAY*

                                               ***GIVEAWAY CLOSED***


I am excited to be announcing  a *GIVEAWAY* on my blog for the Heidi Swapp and
 Jessica Sprague {Mo}tography online class. Heidi and Jessica are teaming up to show us how to get the best out of our camera phones WITH video lessons!


 This class is for both i-Phone and Android users and only $19 so if you do not win a free spot why not sign up anyway?!

Jessica explains more about the class on her blog here and is giving away phone wallpaper and a blog badge (below) to get you excited about joining the online fun!


There are 5 spots to give away- each of the Heidi Swapp Media team members is giving away a class!

So how can you WIN a spot on MY blog .....There are 5 ways to -

1. Leave a comment  on my blog  letting me know you are interested-make sure I know how to contact you.
2. Pin the blog badge to pinterest and come back and leave me a comment letting me know.
3.Tweet this give away and let me know via the comments.
4.Share this giveaway on Facebook, tagging @HeidiSwapp! Then, come back and comment again telling me you did!
5. Lastly, feel free to Instagram this giveaway! Tag me @kimjeffress and use the hashtag #Motography. You will automatically be entered to win when you do!

WOW thats 5 chances to win just on my blog alone, don't forget the other girls on the media team have the same *giveaway* happening as well....YIPEE more chances to win!

  *I will announce the winner on Sunday 4th November*
Photobucket

Pink Saturday:) Breast Cancer Awareness Edition!


OK, So ya'll must know how special this one is to me:) That's why this one is so late in the day going up...I knew it had to be special and I had to be in the right frame of mine...
Read: rested...
I have tried to do a lot of that this week, rest I mean...if you know me at all, or have stopped by at all recently, than you know that the last few weeks have been a little intense to say the least...AND it all culminated last weekend in our local Race for the Cure!!!
Of which I just happen to be the Survivor Tent/Activity Chair:)
SO...Here Goes...

Our theme this year was:
"The Cures...Our Road to the Sweet Life"

Cures is plural on purpose because breast cancer is a heterogeneous disease and so more than one cure needs to be found!


First of all I do not do it alone...I am sure that this does not surprise you...I have a great committee of dedicated women! 
Here are a few shots of set up...We have a large race  with over 2000 survivors and so a large tent...
The largest in the race village:)


I really love the fenced in area:)


Here is an example of the cards that we had made for our survivors to write on...the cards have our theme on them and then in the cupcake they say I race for___________and in the corner say


A smaller version of course...it is part of my email signature:)
We have them hang them all over the front of the fence out in front of the tent!


Hanging the banner:) It's a gingerbread house:)


A shot of the inside as the morning begins...in the forefront you see the portrait makers on the one side and survivors on the other...Students from MICA in Baltimore, volunteer their time to do this for us:)

We also have photo key chains, and coffee and food, we had a make it take it in the form of scarves! That was fun too.
We had a DJ that also donated his time...He kept the place rockin' 
We even had three reigning beauty queens! One of them is a committee member:)


One of our committee members brought an empty poster in to the elementary school and the students signed it and sent their best wishes!


From the outside on set up day...


More setting up:)


Getting there!


It begins...In this one you can see the CUPCAKE truck parked inside the fence:)) yes, Icedgems donated 2000 of their pink ribbon mini cupcakes to our survivors and, as it turns out, to many others! You can also see the word IMPACT on a canvas in the front of the photograph...the fence has a bump out in the front of it that houses four canvasses each with a different word on them. The survivors are invited to sign them and throughout the year they are displayed at different functions. In fact, the ones from previous years are displayed inside our tent...
At the two entrances we are set up to hand out sticky Komen running ribbons to each survivor, one for each year of survival, pink mardi gras beads, and a Pink Rose to each Survivors also...This year we also included a book mark with our theme written on it.


The Parade of Pink culminated in the HUGE Survivor Photo as the Sun came up!

and so I will leave you with this...


linking 


Hey! Hello! You're Special!


This is my third post today!
Click here for Dynamic Duos.


I was browsing the early pages of my stamp index - (yes, I stamp every single stamp that I buy into an index AND I do it by category...I've stopped buying sets with a variety of sentiments because it takes too long to stamp some in the birthday section, some in the thanks, etc!)  My early pages go back at least a decade - and I ran across a Hero Arts set that is perfect for a girlfriend.  She is in hospice care and I am trying to send a card a day.  There's so little that I can do - but I can try to give her a smile!

This set had three birds that I wanted to use so I was thrilled when I saw that Less is More is a sketch challenge with three squares.

I do have to say that this card has gone slightly beyond my personal definition of CAS.  I think it's just the kraft background.  I know that most CAS definitions say that "white space" is just "open space", but most of my CAS cards are white so this doesn't feel right to me.  However, I did try it with white and silhouetted birds but it just wasn't "warm" enough to send to my friend.  So I thought of the CASual Friday challenge to use kraft.  Kraft and yellow was my solution!

Hey! Hello!


  • Stamps: Hero Arts Tiny Bird Messages, Envelope background
  • Paper: Stampin' Up Crumb Cake and Crushed Curry
  • Ink: Versamark, Colorbox Frost White (the background(
  • Accessories: Zing embossing powder, Stampin' Up Crushed Curry ribbon, Derwent Inktense pencils