Sunday, June 30, 2013

Bachelor's Special! Blog Tour and Giveaway!

What should a woman do when sparks fly in the kitchen?  Ignite the fire!  Especially if it's a man as sexy as businessman Chet Castle creating the friction. :)
Author Christine Warner has created a recipe for romance that's spicy hot in her debut novel Bachelor's Special that you don't want to miss!  And her blog tour is just around the corner, running June 10th through July 5th, 2013.

A little but about Bachelor's Special...
Jill Adgate wants three things from life: a successful catering business, a family, and the love of an exceptional man. What she has is no job, a mounting pile of bills, and her outspoken best friend—who sets her up on a blind date with the man who inadvertently ruined Jill’s life.
Chet Castle is a businessman who has everything, except the ability to trust. Burned by a money-hungry fiancée, he refuses to get involved in any relationship that has a shelf life longer than a head of lettuce.
Intrigued by her ambition—and determined to get her in bed—Chet offers Jill the chance of a lifetime: work as his live-in chef and he’ll help her get her catering business off the ground. When sparks fly in the kitchen, Jill realizes what’s cooking is a recipe for disaster…
A bit about Christine: 
Christine Warner is living her dream in Michigan along with her husband, three children, one laptop and a much loved assortment of furry friends. 
Besides laughing and a good round of humor, she enjoys spending time with her family, cooking, reading, writing but no arithmitic.  A confessed people watcher, she finds inspiration for her stories in everyday activities.  She loves to read and write about strong heroes and determined, sometimes sassy, heroines.
A girl gone wild, at least where social media is concerned, she enjoys meeting other avid readers and writers on facebook, twitter and her website.
OK, so wow! what a fun read! Pick this one up and take it to the beach:) You won't regret it:) I am providing the links farther down...
These two have some sparks going let me tell you and the bathing cap! lol...

Here is an excerpt:
Laughter swelled Chet’s chest. He stopped short when he looked
into Jill’s upturned face, enjoying the fact he could inspect her so
closely and she didn’t know. Blinded by the soup, she was at his
mercy.
Thick, yellowish-orange liquid covered her skin, hiding the
sprinkle of fine freckles dotting her nose. Black eyelashes spiked
from the moisture, and her parted lips revealed the whiteness
of her teeth. The apron she wore reminded him of something a
housewife would wear on a fifties sitcom. Undeniably cute and
damn sexy. All she needed was a set of pearls.
She’d be the type of girl he’d bring home to his mother.
Hold up, Castle! You don’t play the girlfriend game. His blood
raced as her tongue darted out and she licked her lips again. The
twinge of his groin reminded him once more that a fling with the
lovely Jill would be on his list, but nothing more.
Still holding her wrists, he leaned forward and flicked his
tongue out to taste the drop of soup forming on the tip of her chin.
Jill’s body went quiet at his touch. The pulse beating against
the soft skin of her inner wrist burst forward at a quick tempo.
Her button-down shirt pulled with each quick breath she took.
“Damn, you’re right. Tastes great.” A salty quality mingled
with the rich flavor of the soup. A dash of Jill mixed in to add a
more potent flavor.
“I told you I’m an awesome cook.” Her husky voice lowered
further.
“I particularly like your presentation.” He matched her tone,
his heartbeat erratic.
She tried to step back, but her butt connected with the
counter. If she took a half step forward she’d be pushed against
his chest. Not that he minded.
“Let me loose. I’d like to wipe my eyes.” A giggle slipped past
her lips.
“Not yet. I’m not sure you've learned your lesson.”
“I guarantee you I have.”
Her struggled swallow caught his attention. “Nervous?”
Jill shook her head as if trying to clear away the thick soup.
“Never.”
He laughed. “I’m going to have more soup.”
“Can’t, it’s all on my…” She stiffened in his arms and a soft
sigh, almost a whimper, caught in her throat.
His attraction grew tenfold. He lowered his head, brushing
her lips with his own before pulling back. His heart pounded

against his chest, bongo drums in a heady rhythm. This situation had escalated into a major turn on.

How about a 


for this one!

The links:

And now for the giveaway:)
 http://www.rafflecopter.com/rafl/display/1cb55463/" rel="nofollow">a Rafflecopter giveaway


Yotam Ottolenghi's Falafel with Spiced Chickpeas and Fresh Vegetable Salad

Falafel is one of the first things I wanted to make when I first opened up my copy of Jersualem.  Those little fried balls made from dried chickpeas and various spices were beckoning me like crazy.  As much as I dreamt about eating hot crunchy falafel sandwiched in a warm pita I was feeling rather unmotivated for the hours of cooking and cleanup the recipe required.

 Last week I gave myself the necessary pep talk to work my way through the recipe, little by little.  I soaked the chickpeas one night, made the spiced chickpea and veggie salad the next day, and then mixed and fried the falafel on the third day.  It was a long process with endless chopping, mixing, and washing dishes BUT the final product was in fact everything I hoped it would be!  The falafel were delicious on their own.  I also enjoyed them with a warm drizzle of tahini and the spiced chickpea and veggie salad on the side.  Other times I loaded the falafel, tahini, and salad into a warm pita and enjoyed it that way. 

A few quick notes about both recipes.  The directions for the falafel say to use either a meat grinder or a food processor and mix until the falafel mixture is finely chopped but not mushy or pasty.  Pay special attention that the falafel mixture actually holds together.  The falafel balls are hard to shape and don't really hold their shape well unless you achieve the right consistency.  Also, regarding the salad, you may want to go heavier on the chickpeas.  The recipe calls for 1/2 cup dried chickpeas. The chickpeas in the veggie salad were pretty much nonexistent.  I would actually increase the chickpeas to at least 1 full cup. I think the key is to actually detect the chickpeas in the salad. Other than that, both recipes are perfectly delicious and worth the time and cleanup involved.  I'd definitely recommend them both!


Falafel
Adapted from Jerusalem
by Yotam Ottolenghi & Sami Tamimi
Serves 4

1-1/4 cups dried chickpeas
1/2 medium onion, finely chopped
2 cloves garlic, crushed
1 tablespoon chopped flat-leaf parsley
2 tablespoons finely chopped cilantro
1/4 teaspoon cayenne pepper
1/2 teaspoon ground cumin
1/2 teaspoon ground cardamom
1/2 teaspoon baking powder
3 tablespoons water
1-1/2 tablespoon all-purpose flour
about 3 cups canola/sunflower oil, for deep-frying
1/2 teaspoon sesame seeds, for coating
salt

Place the chickpeas in a large bowl and cover with cold water at least twice their volume.  Set aside to soak overnight.

The next day, drain the chickpeas well and combine them with the onion, garlic, parsley, and cilantro.  For the best results, use a meat grinder for the next part.  Put the chickpea mixture once through the machine, set to its finest setting, then pass it through the machine for a second time.  If you don't have a meat grinder, use a food processor.  Blitz the mix in batches, pulsing each for 30 to 40 seconds, until it is finely chopped, but not mushy or pasty, and holds itself together.  Once processed, add the spices, baking powder, 3/4 teaspoon salt, flour, and water.  Mix well by hand until smooth and uniform.  Cover the mixture and leave it in the fridge for at least 1 hour, or until ready to use

Fill a deep, heavy-bottomed medium saucepan with enough oil to come 2-3/4 inches up the sides of the pan.  Heat the oil to 350F.  

With wet hands, press 1 tablespoon of the mixture in the palm of your hand to form a patty or a ball the size of a small walnut, about a scant 1 ounce (you can also use a wet ice-cream scoop for this).

Sprinkle the balls evenly with sesame seeds and deep-fry them in batches for 4 minutes, until well browned and cooked through.  It is important they really dry out on the inside, so make sure they get enough time in the oil.  Drain in a colander lined with paper towels and serve at once. 


Spiced Chickpea & Fresh Vegetable Salad
Adapted from Jerusalem
by Yotam Ottolenghi & Sami Tamimi
Serves 6-8

1/2 cup dried chickpeas
1 teaspoon baking soda
2 small cucumbers (10 oz/250g total)
2 large tomatoes (10.5oz/300g total)
8-1/2 ounces/240g radishes
1 red pepper, seeded and ribs removed
1 small red onion, peeled
2/3 oz/20g cilantro leaves and stems, coarsely chopped
1/2 ounce/15g flat-leaf parsley, coarsely chopped
6 tablespoons olive oil
grated zest of 1 lemon, plus 2 tablespoons juice
1-1/2 tablespoon sherry vinegar
1 clove garlic, crushed
1 teaspoon sugar
1 teaspoon ground cardamom
1-1/2 teaspoon ground allspice
1 teaspoon ground cumin
Greek yogurt (optional)
salt and black pepper

Soak the dried chickpeas overnight in a large bowl with plenty of cold water and the baking soda.  The next day, drain, place in a large saucepan, and cover with water twice the volume of the chickpeas.  Bring to a boil and simmer, skimming off any foam, for about an hour, until completely tender, then drain.

Cut the cucumber, tomato, radish, and pepper into 2/3-inch dice; cut the onion into 1/4-inch dice. Mix everything together in a bowl with the cilantro and parsley.

In a jar or sealable container, mix 5 tablespoons of the olive oil, the lemon juice and zest, vinegar, garlic, and sugar and mix well to form a dressing, then season to taste with salt and pepper. Pour the dressing over the salad and toss lightly.  (Take care when dressing the salad.  I found I only needed about half of the dressing).

Mix together the cardamom, allspice, cumin, and 1/4 teaspoon salt and spread on a plate.  Toss the cooked chickpeas in the spice mixture in a few batches to coat well.  Heat the remaining olive oil in a frying pan over medium heat and lightly fry the chickpeas for 2 to 3 minutes, gently shaking the pan so they cook evenly and don't stick.  Keep warm. 

Serve this salad on a plate, in a large circle with the warm spiced chickpeas on top.  You can drizzle some Greek yogurt on top to make the salad creamy.  You can also serve this salad with falafel.

Theme: Got A Pulse?

Merry Monday: Snow Much Joy

It's been a long time since I have done a Christmas card and I had promised myself that this year I would do better.  There are great challenges out there to help - my favorite being Merry Monday.  I have been playing along sporadically - but the year is half over and I need to buckle down!!

This card uses a Hero Arts snowman that came out a year or two ago.  I liked every card that I saw him on and I finally got the set this year.  But then, for months, no one had the snowman die - it was out-of-stock no matter where I looked.  I had just decided that perhaps it was retired and I had missed it, but finally...it was available...maybe he's just still a very popular guy!!  (I have a clear set called Snow Much Joy.  There's also a wood-mounted stamp with a sleepy little snowman that also fits the die.)

Snow Much Joy


  • Stamps: Hero Arts Snow Much Joy
  • Paper: Stampin' Up Cherry Cobbler, Pool Party, Papertrey Ink Summer Sunrise, Fancy Pants Wave Searcher Bucket
  • Ink: Memento Black, Copics
  • Accessories: Hero Arts Snowman die, MFT Fishtail dies, Cuttlebug embossing, Stampin' Up Cherry Cobbler twine, Ranger Glossy Accents (on the berries)

Saturday, June 29, 2013

Catered Crop: There is Sunshine in My Soul

The current challenge at Catered Crop is So Shapely: using die cuts and punches.

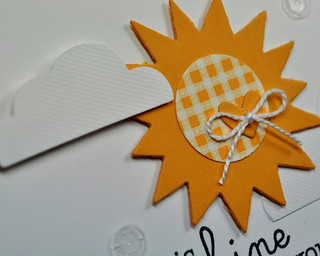
I wouldn't have thought that would be a problem - I use die cuts and punches every day!!  But it's funny that when I needed to make them the focus I had a tough time with an original idea.  Finally, as I was happily indexing and putting away a recent stamp order from My Favorite Things I ran across a "sunshine" sentiment which led me to pull out a variety of dies...

There is Sunshine
I wanted to show you a close-up with a little shadow on it because there is fun texture plate at My Favorite Things called the Grosgrain Texture Board.  It's technically to be used on a long strip of paper with the texture vertical to mimic grosgrain ribbon.  When you don't have matching ribbon, make it out of paper.  I just needed a little extra something on my clouds - so I added the texture at an angle.  (I do find that it works best if you lightly spritz the paper with water first.)

There is Sunshine close

As usual, Linda has curated a fabulous Pinterest board - head over to Catered Crop for some fabulous ideas for dies and punches!
  • Stamps: My Favorite Things Cheerful Blessings
  • Paper: Papertrey Ink Summer Sunshine CS and dsp
  • Ink: Memento black
  • Accessories: My Favorite Things Sunshine and Flat Bottom Cloud dies, clear sequins, heart punch, MFT Grosgrain Texture Board

Friday, June 28, 2013

hello Summer

Over on the Pebbles blog I shared this card this week using their new Lakeside collection.


Photobucket

Feedly "follow" button

Just a couple of days ago, I did a Goodbye Google Reader post and one of the questions was about a Feedly Follow button.  I had talked about a Feedly button months ago and promised to tell you when they had an official button - but I hadn't looked in awhile.  Guess what?  They have a follow button!!

Here are a variety of Publisher Tools for Feedly.  One of them is "Add a feedly button to your site"!

You do need to use your feed URL (instead of just your blog address).
  • For blogger, it's your blog address plus "/feeds/posts/default".  For example, my blog feed address is http://joyfulcreationswithkim.blogspot.com/feeds/posts/default.
  • For other blog types, I don't know the details, but if you have your own blog in feedly (I LOVE to see my own posts come up in feedly) - you can check it:
    • Bring up just your own blog in feedly by clicking on it in the left column
    • On the main screen, right click on your blog name and select Inspect Element - a bunch of techie stuff will come up at the bottom of the screen
    • The highlighted part of the techie stuff is your blog name.  Scan across it until you find data-feedid="feed/.
    • The address after that starting with "http up until the next " is your feed URL.
The feedly button creator asks you to pick a button, give your feed URL, and then it asks you to click on the button to make sure it works.  I was slightly confused here as it sends you to feedly - you do have to hit the back button in your browser after that to go back to the button creator.  But then the code is there and it tells you how to add it to each type of blog!


For those of you struggling to get around feedly (or bloglovin or anything else new) - just remember - there is a learning curve to each of these.  I did an intro to Feedly in March which will help but know that Feedly has literally gotten millions of new customers since the Google Reader announcement and they have done an admirable job of updating their product to recognize the needs of those millions.  

Some of the things that I said feedly didn't do - it now does!!  For example, you can pin to Pinterest directly from feedly.  It also only worked in certain desktop browsers, there are more options now - details here.

And a few things have moved around, for example, you used to add blogs via a tiny little magnifying glass on the right side of feedly; now they have an obvious "+Add Content" on the left side.

The biggest thing to make you happier in feedly on your desktop is the magic j/k key to move between posts.  (iPad is easy - just swipe).  Feedly has keyboard shortcuts.  One of those is the "j" button.  When you bring up your first post to read and are done reading it, just hit "j" on the keyboard and the desktop will swipe to the next post!!  (Or use "k" to go backwards.)


It is a pain and I have a sinking feeling there is more to come from Google (see the annoying Follow button details on this post).  I really mourn the loss of these simple tools used by so many of us who would much rather be crafting or seeing what others have crafted than dealing with techie stuff.  But there are usually workarounds to everything (e.g. you don't really need the Follow button) and we'll keep figuring it out together!


Don't read below this line unless you are having problems - it will only be confusing!!
--------------------------------------------------------------------------------------------------

ETA: I've gotten a few e-mail questions already this morning and that's fine - if I can help, I would love to - but know that I'm a crafty person, not techie - I just happen to like tracking down problems!!  The bigger problem is that I'm leaving for the weekend and will only have my iPad along so won't be able to research things very well.  If I do have any updates based on problems I'm hearing about - I'm going to try to post them right here with updates to this post instead of doing a whole bunch of new posts.

1. A new Feedly user is getting a blank screen when trying to bring up Feedly.  Feedly posted this about people using the Chrome browser:
If you try to load http://cloud.feedly.com from a desktop browser and you get a blank page, it is most likely because a proxy is blocking it or one of your extensions is blocking it. Please go to chrome://extensions and temporarily disable and re-enable your extensions.
I actually had this blank screen happen recently when I was paying a college tuition bill - so this is Chrome specific, not Feedly specific. It's like Chrome is a little too aggresive about stopping things!!? Click on the three little lines in the upper right corner of your Chrome browser. Then click on Tools and Extensions.  After that, I don't what you are going to see because it entirely depends on what you have loaded on your PC - hopefully feedly's words above will give you some guidance about disabling and re-enabling!!

2. Using Internet Explorer.  Originally feedly didn't work at all on IE - I actually switched to Google Chrome just because of feedly, but I have to tell you that I have come to love Chrome.  However, feedly recently posted this - if anybody does it this way, let us know what you think -
We added a pure web access to feedly. You can point any browser tohttp://cloud.feedly.com and load your feedly. Including IE and Opera.

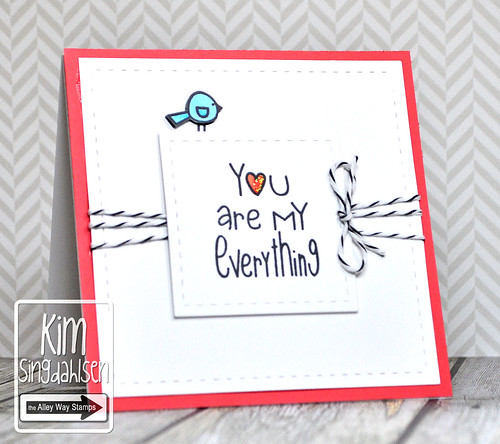
The Alley Way Stamps: You Are My Everything

Very sadly, this is my last post as part of the design team for The Alley Way Stamps.  I LOVE their stamps and the hardest thing about not being part of the team is that I've seen the new stamps for the next three months and they are fabulous.  (Or maybe that's a good thing because I can manage my budget around buying new stamps.)  Sneak peeks for July started yesterday on their blog.

For today, I am re-inspiring you for the current BE Inspired challenge.  I love the fresh colors and the "sweet" photo for this challenge.


To keep my card sweet and simple, I pulled out Lighter Than Air.  I used coral and turquoise with just a hint of "sugar" on the heart!

You Are My Everything

  • Stamps: The Alley Way Stamps Lighter Than Air
  • Paper: Papertrey Ink Berry Sorbet
  • Ink: Memento black, Copics
  • Accessories: L'il Inkers stitched squares, Divine Twine Black Licorice, Fruit Punch Stickles

Thursday, June 27, 2013

CAS(E) this Sketch: Miss You Like Crazy

It's time for another great sketch from CAS(E) this Sketch!  This one has lots of wonderful space for you to use your imagination and creativity!


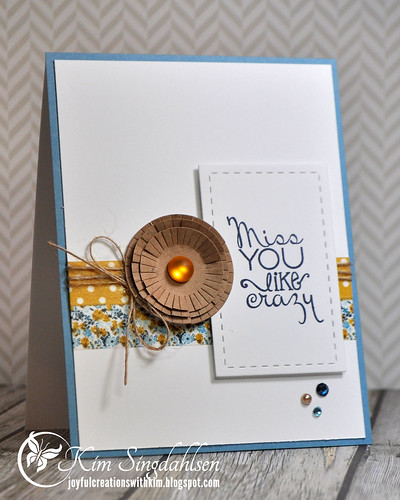
I did switch up the sentiment on my card.  I had a sentiment that I wanted to use in the bigger panel, so I added a little bit of bling where the sentiment was supposed to go!  Remember, these sketches are a starting point - you are welcome to change them up!

Miss You Like Crazy

I look forward to seeing everything that you do with this sketch!

  • Stamps: Verve Hope Blooms
  • Ink: Stampin' Up Night of Navy
  • Paper: Stampin' Up Marina Mist
  • Accessories: MME Washi, Maya Road Kraft Layerable Flowers (I used a circle die to make various sizes), L'il Inkers stitched rectangles, May Arts twine, Martha Stewart Bright Large Gemstone Stickers, misc smaller gems


Wednesday, June 26, 2013

It's Time to Say Goodbye to Google Reader

This is my second post today. It's just a short scroll down for OWH.

If you are still reading blogs in Google Reader, you are going to want to sat goodbye to it in the next few days and get your blog reading list moved over to a new reader.  Google Reader shuts down Sunday.

Remember, where you read is your choice - it doesn't matter what your favorite blogs use - you can read from the place that you prefer!  You can read in:

1. Blogger Dashboard - but I have some bad news for you*
2. Feedly
3. bloglovin'
4. And many, many more - Feedly and bloglovin are just the most mentioned in the card community.

Feedly and bloglovin' have handy-dandy tools to move your reading lists over to them - just one click and it's done!  I have chosen Feedly because (1) the entire post shows so I don't have to click in and out of Feedly to read and (2) they have an iPad app.  (If you want more info, find the label on my sidebar for  Feedly/blogloving/Google Reader for lots more details including a Feedly tutorial.)

FYI: Feedly has recently integrated with Pinterest. Yay! They have not yet added a "search all your blogs" function as Google Reader had but it is on their top 10 list!

*I don't know what is going to happen with Blogger Dashboard.  It's been very easy to get your favorite blogs there by clicking on their Follow button.  Guess what? New blogs can't add the Follow button...the gadget is no longer available in blogger.  The Follow button still works on existing blogs...I just tried it to be sure.  But Google, in their infinite wisdom, hasn't made an official announcement yet.

If you do read in Dashboard, I'm sure you know that you can add blogs manually...just copy their address over to your dashboard and add it.  For that matter, you can manually add to bloglovin and Feedly too because not every blog has added their follow buttons.  Truth be told, I've never used a button.  I find a new blog, copy the address and add it to my reader!!


If you just don't know what to do yet - be sure to at least use the "Takeout" option with Google Reader.  I have not used it so have absolutely no advice - but it's meant to make a copy of your reading lists, your categories, your saved items etc so you can eventually import it to another reader.


Operation Write Home: A Challenge, A Sketch & Freedom

I have the ultimate thrill of having a card up at Operation Write Home for the Midweek Throwdown Challenge.  They selected this card as part of their clean and simple with a little texture challenge.    I hope you check out this challenge!

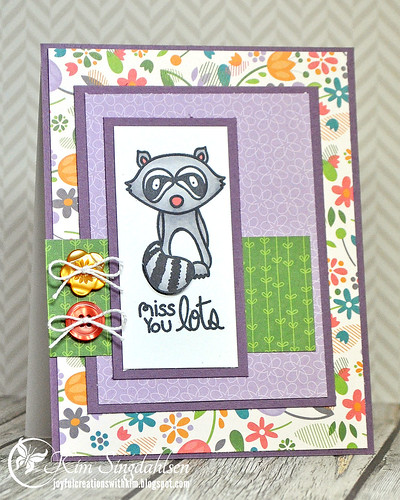
Besides being an amazing cause (that you should be sure to check out if you have lots of cards stashed away) they also go out of their way to keep it fun and challenging for all of us cardmakers.  Today's challenge is a CAS challenge.  On Sundays they have sketch challenges.  I used this week's sketch on these cards for a soldier to send home to a little boy and to a little girl.

Miss You Lots boy

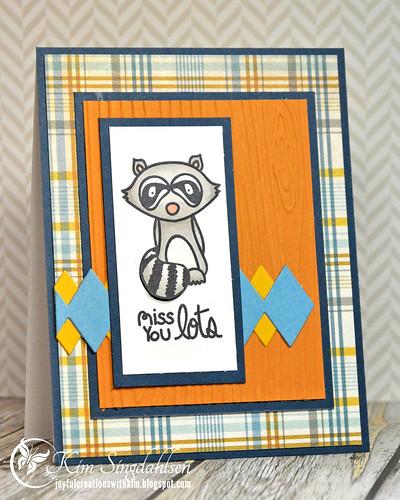
Isn't this sweet little raccoon face just perfect for a Miss You card?

Miss You Lots girl

OWH challenges are nice in that they provide measurements.  It's not required to use exactly the same size, but it certainly makes for a quick and easy card.  Other than the diamond border on the boy's card, I cut everything else based on the dimension of the sketch.

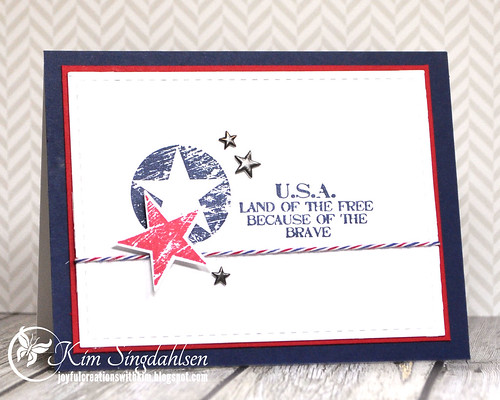
I don't usually tuck multiple cards into one post, but there is another challenge this week that is just perfect for AnyHero cards.  Operation Write Home wants blank cards that they send in bulk to soldiers who then use them to write home to their loved ones (like the cards above) and they want AnyHero cards which are notes directed to the soldiers with personal notes of thanks and gratitude.  This week's challenge at CASology is "free" - a perfect chance for an AnyHero card.  I've made a number of these and will add personal notes before I send them to OWH to distribute.

Because of the Brave

Miss You Raccoon for a Boy:
  • Stamps: The Alley Way Stamps Deep in the Woods, Delicate Doilies (sentiment)
  • Paper: Stampin' Up Midnight Muse, More Mustard, Marina Mist, Crushed Curry, My Mind's Eye Lost & Found 3 dsp
  • Ink: Memento black, Copics
  • Accessories: Stampin' Up woodgrain embossing folder, My Favorite Things Harlequin die
Miss You Raccoon for a Girl:
  • Stamps: The Alley Way Stamps Deep in the Woods, Delicate Doilies (sentiment)
  • Paper: Stampin' Up Perfect Plum, Lawn Fawn Bright Side 6x6 paper pad
  • Ink: Memento black, Copics
  • Accessories: Papertrey Ink buttons: Summer Sunrise, Berry Sorbet
Land of the Free, Because of the Brave:
  • Stamps: Impression Obsession star and circle star, My Paper Moon Because of the Brave
  • Paper: Stampin' Up Night of Navy, Real Red
  • Ink: Stampin' Up Night of Navy, Real Red
  • Accessories: Basic Grey star stickers, Divine Twine Airmail, star punch, L'il Inkers stitched rectangles

Tuesday, June 25, 2013

Chocolate Chip Cookie Dough Sandwich Cookies


Chocolate chip cookie dough stuffed between two chocolate chip cookies makes for one heavenly and decadent sandwich cookie.  These cookie sandwiches are going down as legendary in my house. Everyone went absolutely crazy for them and for good reason.  These are pretty much perfect in every way! The best part: you don't have to worry about any raw egg in the cookie dough.  The cookie dough filling is egg-free!  Do yourself a favor and make them the next time you're in the mood for a little treat.  Just make sure you have someone to share them with or things might get ugly.


Chocolate Chip Cookie Dough Sandwich Cookies
Adapted from The Cookie Dough Lover's Cookbook
by Lindsay Landis
Makes 20-24 sandwich cookies

For Cookies:
1-1/2 sticks unsalted butter, room temperature
2/3 cup granulated sugar
2/3 cup light brown sugar, packed
2 eggs
2 teaspoons vanilla extract
2 cups all-purpose flour
1/2 teaspoon baking soda
1 teaspoon salt
1-1/2 cups mini semisweet chocolate chips

For Cookie Dough:
1 stick unsalted butter, room temperature
1/2 cup light brown sugar, packed
1/4 cup all-purpose flour
1/2 cup powdered sugar
1/4 teaspoon salt
1/4 cup heavy cream
1 teaspoon vanilla extract
1/2 cup mini semisweet chocolate chips

For the cookies:  In a large mixing bowl, beat together butter and sugars until no lumps remain, 1 to 2 minutes.  Beat in eggs and vanilla, scraping the sides of the bowl to make sure all ingredients are incorporated.  Add flour, baking soda, and salt and mix until smooth.  Stir in chocolate chips.  Cover and refrigerate at least 1 hour or overnight.

Once cookie dough has rested (1 hour or overnight):  Roll chilled dough into smooth, tablespoon-sized balls, about 1 inch in diameter.  Flatten balls slightly into 3/4-inch thick disks.  Arrange about 2 inches apart on parchment-lined baking sheets.  Bake 9 to 11 minutes, or until edges are lightly golden.  Let cookies cool on baking sheet about 5 minutes, then transfer to a wire rack to cool completely.

To prepare the cookie dough filling:   Beat together butter and brown sugar in a large bowl with an electric mixer on medium speed until light and fluffy, 2 to 3 minutes.  Mix in flour, powdered sugar, and salt on low speed until incorporated.  Slowly add heavy cream and vanilla and beat until fluffy, about 2 minutes.  Stir in chocolate chips.

To assemble cookie sandwiches:  Sandwich 1 heaping tablespoon of filling between two cookies.  Press cookies lightly until filling spreads to edges.  Repeat with remaining cookies.  Sandwiches can be stored, refrigerated in an airtight container, for up to 3 days.  Let them sit at room temperature for 30 minutes before serving.

Papertrey Blog Hop: A Touch of Gold

This month's blog hop at Papertrey Ink is to use a touch of gold.  Sometimes I pull gold out at Christmas, but other than that, I don't use it much.  So I also relied on their inspiration photos with the aquas and teals.

Hello from the Heart


I do wish that I would have popped the hello as it gets a little lost.  I didn't have any adhesive that was small enough so I started cutting little pieces off of foam squares, but quickly decided I didn't have the patience for that!  The brad was heated, then I used a tweezer to dip it in embossing powder, then heated it again so that it is the same gold as the rest of the embossing.

  • Stamps: Papertrey Ink Wonderful Words mini: Hello
  • Paper: Papertrey Ink Aqua Mist, Best Creations glitter paper
  • Ink: Papertrey Ink Aqua Mist, Hawaiian Shores, Versamark
  • Accessories: Papertrey Ink Hello die, Zing Gold Embossing Powder, misc heart brad


Monday, June 24, 2013

My hometown

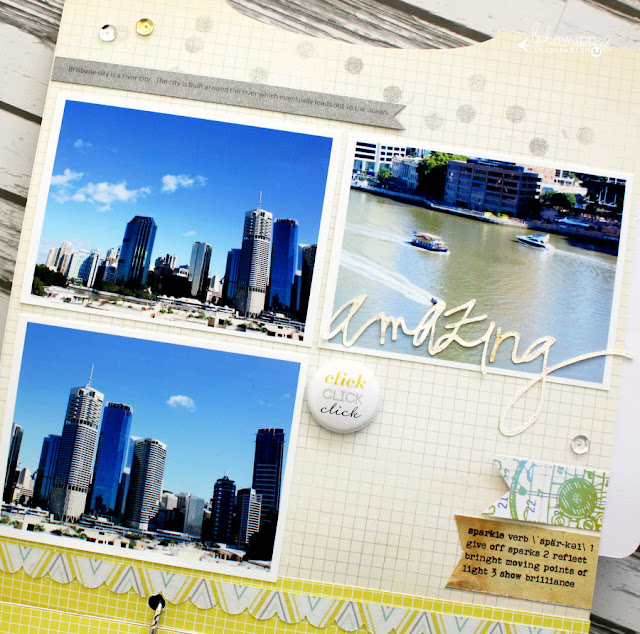
Over on the Heidi Swapp blog we are celebrating and showing off our hometown's.  I decided to create an altered book for my project. I have a step x step  which you can see on the Heidi Swapp blog showing how I deconstructed my book that I found at a second hand bookshop. I remember going to the Expo travelling up from Sydney by bus so this book was the perfect touch.


Once opened this is what is inside.


On the left  I added this quote from our previous premier Anna Bligh who made this speech during the floods here in Brisbane and the State of Queensland two years ago, it was  very heart wrenching but also very inspiring.


On the right I added some large jump rings by using my scissors to poke a hole through the back cover of the book, and then layering my pages to create a flap book


I goggled this map of Australia and printed it off and added it to some No Limits pattern paper.


I began by using a Vintage Chic Memory file, trimming it to fit within the book. The chipboard word is from ScrapFX and I sprayed it with Tinsel ColorShine.


It opens to reveal these spread.


The Flair is from Greatest View.


I then added a Mini Fotosleave for extra pages and photos showing  the main tourist attractions on the Brisbane River.


Another ScrapFX chipboard this time I spritzed it in Gold Lame ColorShine.


I used my iphone to photograph my favourite place to shop, I layered over some Color Magic hearts and Clear Pop tabs to embellish.


Next I used a  Serendipity Mini Memory File  to house some fun places for kids to visit. On the front cover  I made another photo Collage of the Art Gallery and Museum found at South Bank on the Brisbane River. I love the pop of colour created by the misted chipboard letters.


The Memory File opens to reveal firstly a  page about the Planetarium here in Brisbane.


I added in photos from my boys favourite  park, it has a huge wooden frame playground  and we visit there quite often. I added in a video of my son and his little friend playing using a QR code and the little chipboard ‘friends’ are spritzed in Gold Lame Colorshine.


Brisbane is gateway to the beautiful Sunshine Coast and Gold Coast both an hours drive North and South of Brisbane so I wanted to include that in my project as well.


I then showcased photos from the Gold Coast by matting them with the yellow stripped paper from the Sugar Chic paper pad.

 
Heading North now I added some photos from the Sunshine Coast where we visit every Summer to the beautiful beaches.
 

Flipping the page there are some more favourite spots on the Sunshine Coast.

 
A quaint little town called Montville  filled with cute handmade gift and Toy stores, sweet little cafes over looking stunning mountain views.


Then a favourite of young and Old- Steve Irwins Australia Zoo. Any international visitor we have we always take them to the zoo to see the crocodile show and a host of Australian animals. My boys love it!


Last but no means the least, every town has their favourite sporting teams right! Here I have included two major sports grounds  in Brisbane , The Gabba which is the home to Australian Cricket and Suncorp Stadium, home to the state Rugby League club the Maroons and city team Brisbane Broncos

 
I know I have only skimmed the surface of what Brisbane has to offer, I'm glad there is room to add more pages as I go. If you would like to play along and share your favourite hometown places be sure to hashtag #hshometown on instagram!
Photobucket