Showing posts with label Vegetarian. Show all posts

Sunday, December 22, 2013

Roasted Red Pepper Hummus in Cucumber Cups


These little cucumber cups stuffed with roasted red pepper hummus are the perfect little red and green appetizers for Christmas.  Not only are these little bites festive, but they're so healthy you don't have to feel guilty about popping them in your mouth.  At all!  They're also incredibly tasty.  The cucumber cups are crunchy and fresh and the hummus is creamy and smooth with hints of garlic and red pepper.  This would be a great addition to any holiday table! 

Roasted Red Pepper Hummus in Cucumber Cups 
Recipe by Giada De Laurentiis
Makes 4-6 servings

1 (15-ounce) can cannellini beans (white kidney beans), rinsed and drained
½ cup diced, jarred roasted red bell peppers
1 tablespoon tahini (sesame seed paste)
1 large garlic clove, peeled
2 teaspoons fresh lemon juice (from ½ small lemon)
1/2 teaspoon ground cumin
½ teaspoon kosher salt, plus extra, to taste
Pinch cayenne pepper (optional)
2 hot house cucumbers, ends trimmed
Fresh parsley, cilantro or mint leaves

In a food processor, combine the beans, peppers, tahini, garlic, lemon juice, cumin, salt and cayenne pepper, if using. Blend until smooth, scraping down the sides of the bowl if needed. Season with salt, to taste. Transfer the hummus to a small bowl.

Run the tines of a fork down the length of each cucumber several times, turning to make ridges about 1/8-inch deep in the skin all the way around. Cut cucumbers crosswise into 1-inch rounds, for a total of at least 12. Using the smaller end of a melon baller or a round measuring spoon, scoop out the center of each cucumber round to form a hollow. Use a small spoon to fill each cup with hummus, mounding slightly over the top. Tuck a small fresh parsley, cilantro or mint leaf into the side of the filling as a garnish.

Arrange the cups on a platter and serve.
 MERRY CHRISTMAS AND HAPPY NEW YEAR!

Sunday, November 10, 2013

Brie and Crispy Bread Salad with Cranberry Dressing

Brie cheese is so heavenly and creamy and smooth and delicious.  If I happen to spot a recipe using Brie then it's pretty much guaranteed I'm going to feel compelled to make it.  Such is the case with this recipe for Donna Hay's Brie and Crispy Bread Salad with Cranberry Dressing

This recipe is for those of you, who like me, look for a way to make a sensible meal out of bread and cheese.  And by sensible I mean that I convinced myself this salad was healthy because it called for spinach and contained fruit.  Because really...all that brie cheese was just a little over a serving, right?  And that bread, well we have to have some carbs every once in awhile, right?  

However you rationalize it, this salad was delicious.  It hits a multitude of flavor and texture combinations and is very comforting and satisfying.  Plus, it is rather festive with the cranberry dressing.  Perfect for this time of year!

Brie & Crispy Bread Salad with Cranberry Dressing
Adapted from Donna Hay website
Serves 4

Salad
2 pieces flatbread*
olive oil, for brushing
250g brie, sliced
2 cups arugula or spinach leaves

Cranberry Dressing
¼ cup roughly chopped sweetened dried cranberries
2 tablespoons olive oil
2 tablespoons red wine vinegar
salt and pepper, to taste

*Note: I couldn't find flatbread so I used good quality country bread and grilled it in a pan


Every Sunday @ Kahakai Kitchen


Theme: In Season

Sunday, October 27, 2013

Pine Nut Brown Butter Pasta

Pine nuts.  I never really cared for them until I had them toasted in a pan with butter and salt.  Then I fell in love with them.  A special deep kind of love.  I wanted to put those toasty buttery pine nuts on everything and I found myself craving them.  If a recipe called for pine nuts I was sold.

So to say I loved this pasta dish is an understatement. It was absolutely delicious and and as a bonus, extremely simple and straightforward.


Pine Nut Brown Butter Pasta
Adapted from Off The Shelf
by Donna Hay
Serves 4-6

Cook one pound of pappardelle or fettucine until al dente, then drain. Melt 5 -6 tablespoons of butter in a frying pan then add 1/2 cup pine nuts to the pan and simmer until the pine nuts are golden.  Add pepper and salt and toss through the hot pasta.  Finish with grated Parmesan and serve as a simple meal or side dish.


Theme: Potluck

Saturday, October 26, 2013

Pinto Bean Breakfast Patty Melts {The New Southwest #Cookbook Spotlight}


I am a big fan of bean burgers.  I've made chickpea burgers, black bean burgers, fava bean burgers, and now pinto bean burgers and I've loved them all. The good news is that everyone else in my house loves bean burgers almost as much as me so it's a total win-win situation.  

As soon as I spotted this recipe for Pinto Bean Breakfast Patty Melts in The New Southwest Cookbook I knew it would be my choice for Week Two Blogger's Choice.  These pinto bean burgers are seasoned with a heavy dose of cumin, black pepper, coriander, and garlic so they are mighty flavorful.  Crunchy on the exterior and creamy on the inside this is one powerhouse of a breakfast that will keep you full way into the afternoon. They were a big hit at my house!

Check back on Monday, October 28th for a cookbook review and a chance to win your very own copy of The New Southwest. You don't want to miss it!

Pinto Bean Breakfast Patty Melts
Adapted from The New Southwest by
Meagan Micozzi of Scarletta Bakes
Serves 7

2 tablespoons extra virgin olive oil, divided, plus more for frying
3/4 cup diced yellow onion
1 cup grated zucchini 
2 jalapenos, stemmed and minced
2 tablespoons minced fresh garlic
3-1/2 cups cooked pinto beans
(about 2-1/2 cans if using canned)
3/4 cup plain dry breadcrumbs*
2 large eggs, beaten
2 tablespoons ground cumin
2 tablespoons black pepper
1 teaspoon ground coriander
1 teaspoon salt
7 slices Monterey Jack cheese
7 English muffins, sliced, toasted

Note: I had to use a little over a cup of breadcrumbs to get the mixture to come together.  Also, I think the 2 tablespoons of black pepper in the recipe might be a typo.  We love black pepper but I only used 1 tablespoon just in case.

Heat 1 tablespoon of the oil in a large heavy-bottomed skillet over medium heat.  Add the onion and saute until golden, translucent, and fragrant, approximately 5 minutes.  Add the zucchini, jalapenos, and garlic and saute for just 2 more minutes.  Remove pan from heat.

Meanwhile, place the beans in a large bowl and mash with a fork or potato masher.  (Use a fork for chunky, uneven consistency.)  Stir in the breadcrumbs, eggs, cumin, black pepper, coriander, and salt.  Fold in the cooked onion mixture.  Using a half cup measure, portion off and form seven patties.  Freeze them on a wax paper lined cookie sheet to firm them up.  They can be kept frozen at this point and you can cook them as needed or you can store them in the refrigerator if not using right away.

Once ready to cook and assemble your melts, heat 1 tablespoon of oil in a large heavy-bottomed lidded skillet over medium heat (I prefer cast iron). Add the patties and cook for 3 to 4 minute on each side, applying pressure to the top of the patties to flatten once you have a cooked side facing up.  Note that you may need to work in batches so as not to overcrowd your pan, so you may need to refresh your oil between batches and wipe the pan clean.

Once patties are crisp on the outside and cooked through, top each with a slice of cheese, replace the lid on the pan and steam just 30 to 60 seconds to melt the cheese.  Remove each patty melt to a toasted English muffin bun and serve immediately.

Every Sunday @ Kahakai Kitchen


This post is part of The New Southwest Cookbook Spotlight sponsored by Hippocrene and hosted at girlichef.

If you'd like to keep tabs on who's making what from the The New Southwest, then head on over to The New Southwest event page over at girlichef.
If you missed last week's "host choice" recipe, Mushroom and Leek Migas, please drop by The New Southwest event page.  You will find links to each person's post, see their results, their spin, and their thoughts on that recipe.  Also, check it all week long for updates on what people are making this week!

This post is part of The New Southwest Cookbook Spotlight sponsored by Hippocrene and hosted at girlichef.
- See more at: http://www.girlichef.com/2013/10/ChiaCupcakes.html#more

If you missed last week's "host choice" recipe, Mushroom and Leek Migas, please drop by The New Southwest event page.  You will find links to each person's post, see their results, their spin, and their thoughts on that recipe.  Also, check it all week long for updates on what people are making this week!

This post is part of The New Southwest Cookbook Spotlight sponsored by Hippocrene and hosted at girlichef. - See more at: http://www.girlichef.com/2013/10/ChiaCupcakes.html#more

Sunday, October 20, 2013

Raspberry Breakfast Parfaits


Weekday mornings are crazy and hectic, aren't they?  I spend about two hours getting the kids ready for school and dropping them off.  No matter how hard I try there is always some sort of crisis like last minute permission slips that need signed, money that is due (does anyone actually carry cash anymore ???), and my personal favorite...Surprise, I forgot today was picture day!  Either way, it never seems to run smooth when you have kiddos and I've learned there is really nothing you can do to brace yourself for it.  You just have to go with it, one step at a time.  

Once my kiddos head out the door I'm in a mad dash to get myself ready so I can make it to the gym for class at nine o'clock.  I usually end up grabbing a banana or some kind of granola bar because they are easy, but they're also kinda boring.  Other times I'll make a batch of hard boiled eggs on the weekend so I can enjoy a hard boiled egg with a piece of toast.  Lately I've been into yogurt parfaits because they feel like a decadent breakfast treat and goodness knows they are definitely more colorful and pretty than a monochromatic piece of toast.      

There are a million different variations on yogurt and/or breakfast parfaits.  Use what you like. I like this breakfast parfait because it blends the fruit into the yogurt which means I don't have to mix the fruit into the yogurt when I eat it.  I also like this recipe because it relies on a bag of frozen fruit, which is nice if your favorite fruit isn't in season.  Raspberries are at the top of my list, but you could literally go with anything here. There are also a lot of different muesli mixes and granola mixes out there.  I like the combination of raspberry with a little bit of chocolate so I went with a granola mix made from oats and bits of dark chocolate. These parfaits are definitely going to get my morning off to a great start!


Raspberry Breakfast Parfaits
Adapted from Donna Hay website
Serves 4

One bag frozen raspberries (about 250g - 350g), thawed
2 cups (500 grams) Greek yogurt
1 tablespoon confectioner's sugar
1 cup (130 g) toasted muesli or granola
1/3 cup honey


Theme: Up & At 'Em

Thursday, October 17, 2013

Mushroom & Shallot Migas {The New Southwest #Cookbook Spotlight}


For the next few weeks I'll be participating in The New Southwest Cookbook Spotlight hosted by my good friend, Heather of girlichef. The New Southwest: Classic Flavors with a Modern Twist is a brand new cookbook written by fellow food blogger, Meagan Micozzi. Meagan's adventure with southwestern inspired cuisine began when she relocated to Arizona and found comfort and inspiration in the local foods, flavors, and ingredients. Meagan created her food blog, Scarletta Bakes, to chronicle her adventures with southwestern food.  Her blog is now wildly popular for it's innovative approach to southwestern cuisine. If you've been reading her blog for long then you are probably already in love.  If you haven't been introduced yet then please go ahead and check her out. It's a love at first sight kinda thing.


This week we are all making Migas, an egg dish starring leftover bread or tortillas.  Traditional Migas feature fried tortilla strips, tomato, onion, and jalapeno.  Meagan's Mushroom & Leek Migas feature fried tortilla strips, mushrooms, leeks*, and Manchego cheese.  I chose to make Meagan's migas for dinner one evening and they were an all-around hit!  Everyone raved about how they loved the crunch of the fried tortilla strips, the meatiness of the mushrooms, and the nutty flavor of the Manchego cheese.  We topped our migas with our favorite Pico de Gallo and it was a perfect veggie-packed meal.  So simple but very pleasing.  I'll definitely be making this again!

Stay tuned for more. There will be more recipes, as well as reviews, and several chances to win your very own copy of The New Southwest!  Click HERE to read about the Cookbook Spotlight and see a list of all the participants. A big thank you to Meagan for such a beautiful cookbook, the folks at Hippocrene, and to Heather of girlichef for giving me the opportunity to participate in this spotlight.


Mushroom & Shallot Migas
Adapted from The New Southwest 
by Megan Micozzi of Scarletta Bakes 

4 five inch corn tortillas
1-1/4 cups vegetable oil, divided
a little pat of butter*
1/4 cup heavy cream
salt and pepper to taste
8 ounces baby bella mushrooms, brushed clean and sliced (about 2 -1/2 cups)
2 shallots, sliced*
2 tablespoons minced fresh garlic
1 cup shredded Manchego cheese

Notes: The recipe calls for 1 leek, ends removed, and chopped.  I really don't care for leeks so I used two shallots sliced thinly.  Also I used only enough vegetable oil to fry the tortillas.  Instead of oil I used a little butter to saute the mushrooms and shallots and cook the eggs. 

To prepare the corn strips:  Cut the tortillas in half and then slice them into thin strips (1/2" to 3/4" wide).  Heat 1 cup of vegetable oil in a large in a large, heavy-bottomed saute pan (I prefer cast iron) over medium-high heat.  Working in batches, fry the tortilla strips for 1 to 2 minutes, flipping pieces as they fry and removing the crispy, browned strips to a paper towel-lined baking sheet to drain and cool.

Whisk the eggs and heavy cream together in a large bowl and season liberally with salt and pepper.  Set aside.

In a medium-sized skillet melt a bit of butter.  Saute the mushroom slices for approximately 3 minutes or until tender and fragrant.  Add the shallots and saute for 1 more minute.  Add the garlic and saute for 1 more minute.  Pour in the egg mixture and cook, stirring constantly in a circular motion until eggs begin to solidfy.  Just as eggs begin to solidfy, stir in the fried tortilla strips.  Continue cooking, stirring frequently, until eggs are light, fluffy, and cooked through.

Remove from heat, top with cheese, and serve immediately.  Goes very well with a good pico de gallo (as pictured above).

This recipe from The New Southwest by Meagan Micozzi copyright 2013, used with permission from Hippocrene Books.

*recipe from The New Southwest by Meagan Micozzi copyright 2013, used with permission from Hippocrene Books.
- See more at: http://www.girlichef.com/2013/10/MushroomLeekMigas.html#more


This post is part of The New Southwest Cookbook Spotlight sponsored by Hippocrene and hosted at girlichef. - See more at: http://www.girlichef.com/2013/10/MushroomLeekMigas.html#more

Sunday, October 13, 2013

Roasted Sweet Potato Pasta

One glimpse in my pantry would quickly reveal that we are a family of pasta lovers.  I pretty much buy pasta like it's my job.  In fact, buy might not even be the best word to describe it.  It's more like collect.  If you have 23 boxes of pasta in your pantry that qualifies as a collection, right? 

My collection of pasta always comes in handy for quick weeknight meals like this Roasted Sweet Potato Pasta.  This recipe was kinda like love at first sight for me.  I simply fell in love with all the colors in this dish: pops of green from the spinach, red from the tomato, and orange from the sweet potato.  Just looking at all that color makes me happy.  Of course, adding two kinds of cheeses helps any situation.  Tangy feta cheese and salty Parmesan make everything better.  Stir it all into some lovely linguine and you have yourself a wonderful and quick fall meal that goes very well with a glass of white wine.


Roasted Sweet Potato Pasta
Adapted from Donna Hay
Serves 4-6

3 sweet potatoes, peeled and chopped
3 Roma tomatoes, halved
olive oil*
1 pound of spaghetti or linguini
5 - 6 ounces baby spinach leaves 
salt and pepper
5 - 6 ounces feta cheese
lemon juice and olive oil, to serve
Optional: Sage, dried or fresh for adding to the roasted veggies
*reserve some of the pasta water

*Note: I used quite a bit of olive oil when roasting the veggies. It was easily between 1/4 and 1/2 cup.  I also tossed the veggies in a combo of dried sage, salt and pepper.


Preheat oven to 400F.  Place the sweet potato and tomato, cut-side up, in a baking dish.  Drizzle with oil and bake for 35-45 minutes or until the sweet potato is soft and golden.

Cook the pasta in a large saucepan of salted boiling water until al dente.  Reserve a little of the pasta water so that you can mix it in later for a creamier texture.  Drain pasta and combine with the sweet potato, tomato, spinach, Parmesan, reserved pasta water, salt and pepper.  Place in serving bowls, top with the feta and drizzle with lemon juice and oil to serve. 

Theme: Pantry Magic!

Sunday, September 15, 2013

Spicy Sweet Potato Wedges with Lemongrass Mayo

Please don't think of these as regular everyday sweet potato fries.  They are so much more than that!  These sweet potato wedges are mixed with a very lively combination of coriander (lots of it) and red chile pepper.  All that spicy flavor makes for a very savory and mouthwatering crust on the sweet potato wedges.  These wedges are delicious all on their own, but they pair very well with this bright and fresh lemongrass mayo.  I thought these wedges were very satisfying and comforting without weighing you down.  I'm absolutely addicted to them and can't wait to make them again!


Spicy Sweet Potato Wedges with Lemongrass Mayo
Adapted from Plenty
by Yotam Ottolenghi
Serves 4

3 medium sweet potatoes  (about 2 pounds)
4 tablespoons olive oil
1-1/2 teaspoon ground coriander
1 teaspoon salt
1 fresh red chile, finely diced

 Lemongrass Mayo

1/2 lemongrass stalk
1/2 cup mayo
grated zest and juice of 1 lime
1/2 inch fresh ginger, peeled and grated
salt and pepper, to taste

Preheat the oven to 400F.  Wash the sweet potatoes but don't peel them. Cut each lengthways in half.  Cut again lengthways into quarters and then once more in the same way so you are left with eight long wedges.

Place them on a roasting pan that has been lined with parchment paper and brushed lightly with some of the oil.  (Note: I didn't use the parchment paper and my wedges stuck slightly.  I worry that the parchment would impede the browning/caramelizing process so I would fore-go it next time as well. Toss the wedges with the remaining oil and sprinkle with a mixture of the ground coriander, finely diced red chile, and salt.  Roast for about 25-30 minutes or until the sweet potato is tender and golden brown.  Remove from the oven and allow to cool slightly.

To make the dipping sauce:
Very finely chop the lemongrass or grind finely in a spice grinder.  (Note: I found a jar of sliced lemongrass in the Asian section of my supermarket.) Whisk with all of the other ingredients for the dipping sauce and set aside. When ready to serve, place the wedges on a large, flat serving dish. Serve with the sauce on the side.
Theme: You Made Me Love You!

Sunday, September 8, 2013

Broccoli and Gorgonzola Pie


You know those recipes that feel like they were written specifically for you?  This Broccoli and Gorgonzola Pie is one of those recipes for me.  This pie is packed with everything I crave on a regular basis: flaky buttery pastry, loads of broccoli, robust Gorgonzola cheese, and a luscious creamy mustard sauce.  My friend, Michelle of Ms. enPlace, shared this pie last week and I've craved it ever since. It's total heaven!

Funny enough, I put off making this pie for two reasons. The biggest reason being that no one else in the house cares for broccoli, mustard, or blue cheese.  

Translation: Mom will have to eat the entire pie herself! 
 Danger: Mom will eat the entire pie herself!

Secondly, I'm a complete novice when it comes to puff pastry. 

 Confession: Pastry dough is my least favorite task in the kitchen.

However, last week I had the pleasure of using puff pastry for the very first time and would you believe it....I actually enjoyed it! I always figured puff pastry would be difficult to work with, but it is as simple as opening the package, thawing out the dough, and rolling/shaping it to the desired size.  There's simply nothing to it!  The puff pastry doesn't fall apart or tear and it's not even difficult to transfer or move around. I can honestly say I don't mind working with puff pastry at all.  In fact, I look forward to the next time!


As for this pie....I did end up eating it all by myself.  Every single delicious bite.  It was worth every single calorie.


Broccoli and Gorgonzola Pie
Adapted from Plenty
by Yotam Ottolenghi
Serves 6

One sheet of puff pastry
1 head of broccoli, cut into florets
2 tablespoons butter
2 shallots, minced
2/3 cup heavy whipping cream
1/3 cup water
1/3 cup chopped scallions
3 tablespoons dijon mustard
salt and pepper to taste
2 ounces Gorgonzola, crumbled
1 egg, beaten

Note: I did make quite a few changes to this pie to lighten it up.  The original recipe calls for two sheets of puff pastry and a whole lot more cheese, which I'm sure is quite delicious.  That recipe can be found here


Preheat the oven to 400F.  Roll out the puff pastry until it is 1/8" thick and large enough to line a 10-inch loose bottomed tart pan.  Line the tart pan with the puff pastry and trim off the excess pastry (reserve excess pastry to decorate the top of the pie).  Place tart pan (with the puff pastry inside of it) in the freezer for 10 minutes to chill.  

Remove the tart pan from the freezer.  Line the pastry with parchment paper and fill it with baking beans.  Bake blind for 15 to 20 minutes, or until light brown.  Remove the paper and beans and return to the oven to bake for about 5 minutes, or until the bottom of the shell is golden  Leave to cool down.

While the tart shell is baking, prepare the filling.  I steamed my broccoli, but you can cook the broccoli florets in a large pan of boiling water for about 2 minutes, or until tender but still firm.  Drain in a colander, rinse well with cold water and leave to dry. 

Melt the butter in a pan and fry the shallots on gentle heat for 10 to 15 minutes, or until soft but not colored.  Add the cream, water, scallions, mustard, salt and some black pepper.  Cook over low heat until mixture thickens and then remove from heat.  

To assemble, spread the shallot mixture over the bottom of the pastry case.  Scatter the broccoli on top and gently press into the shallot mix.  Dot with Gorgonzola.  Decorate the top of the pie with the remaining pieces of puff pastry.  Feel free to cut out shapes or strips.  I just cut my leftover pastry into squares and the placed the squares on top. 

If you wish, glaze the decorative puff pastry with a little beaten egg and bake for about 30 minutes, or until the pastry is golden brown.  Allow to cool a little before removing from the pan.


Theme: New To Me!

Sunday, September 1, 2013

Surprise Tatin


I chose to make this Surprise Tatin because it represents my week perfectly. My week was full of surprises.  Injuries on bicycles, rashes, stuffed noses and sore throats, spilled milk, lost permission slips, last minute school projects, broken air conditioners, and broken bones.  It was just one surprise after another.

It seemed very fitting to make Ottolenghi's Surprise Tatin.  After all, you wouldn't expect potatoes to be the star of a tatin, would you? 

This is really a carb lover's type of dish.  Caramelized onions, oven-roasted tomatoes, sliced new potatoes, and slices of goat cheese get layered into a cake pan with a layer of puff pastry on top.  As the tatin bakes it becomes very caramelized.  The real magic happens when you invert the tatin onto a serving plate and reveal the dark caramel color.  This is a very comforting and savory tartin and calls for a crisp green salad on the side.  It's definitely perfect for those days when you just need the comfort of carbs!


Surprise Tatin
Adapted from Plenty
by Yotam Ottolenghi
Serves 4

1-1/2 cups cherry tomatoes
2 tablespoons olive oil, plus extra for drizzling tomatoes
salt and black pepper
1 lb new potatoes (skin on)
1 large onion, thinly sliced
3 tablespoon sugar
2 teaspoon butter
3 oregano springs
5 ounces aged goat cheese, sliced
1 puff pastry sheet, rolled thinly

Preheat the oven to 275F.  Halve the tomatoes and place them skin-side down on a baking sheet.  Drizzle over some olive oil and sprinkle with salt and pepper.  Place in the oven to dry for 45 minutes.

Meanwhile, cook the potatoes in boiling salted water for 25 minutes.  Drain and let cool.  Trim off a bit of the top and bottom of each potato, then cut into 1-inch tick disks.

Saute the onion with the oil and some salt for about 10 minutes, or until golden brown.

Once you've prepared all the vegetables, brush a 9-inch cake pan with oil and line the bottom with a circle of parchment paper.  In a small pan cook the sugar and butter on a high heat, stirring constantly with a wooden spoon, to get a semi-dark caramel.  Pour the caramel evenly over the bottom.  Pick the oregano leaves, tear and scatter on the caramel.

Lay the potato slices close together, cut-side down, on the bottom of the pan.  Gently press onion and tomatoes into the gaps and sprinkle generously with salt and pepper.  Spread the slices of goat cheese evenly over the potatoes.  Cut a puff pastry disc that is 1 inch larger in diameter than the pan.  Lay the pastry lid over the tart filling and gently tuck the edges down around the potatoes inside the pan.  (At this stage you can chill the tart for up to 24 hours).

Preheat the oven to 400F.  Bake the tart for 25 minutes, then reduce the temperature to 350F and continue baking for 15 minutes, or until the pastry is thoroughly cooked.  Remove from the oven and let settle for 2 minutes only.  Hold an inverted plate firmly on top of the pan and carefully but briskly turn them over together, then lift off the pan.  Serve the tart hot or warm.  


Theme: Pies & Tarts

Sunday, July 28, 2013

Potato and Red Pepper "Cheesecake"

Smartphones.  We have a love/hate kinda relationship.  I believe there is a time to use your phone and lots of other times when you shouldn't. When I say lots of other times I really mean a good majority of the time.  For example, you're out to dinner with friends, family, etc.  Your phone does not belong on the table.  You're in the waiting room at the doctor/dentist office having a conversation with your husband.  Newsflash: I don't really want to hear that conversation.  You're in the checkout line and you're holding everyone up because you're messing around your phone.  My reaction might not be so nice.  Of course, I might be the only one who feels this way but I really do expect people to practice consideration when using their phones.

On the flip side, my iphone really comes in handy when I'm at the grocery store.  I use my phone to look up recipes nearly every time I'm at the store.  It's been a real lifesaver.  Recently, I bought my first cooking related iphone app, Ottolenghi, and it has also really come in handy.  When I needed something for this week's IHCC theme, Eggscellent, I found this tasty Potato and Red Pepper "Cheesecake" right on the app. 

I've been wanting to try a savory cheesecake for a long time so I decided to give this a go.  It was really tasty, but it was almost verging on being a little too rich or decadent.  I think you definitely need to serve it with a little salad on the side.  Otherwise, we really liked it.


Potato and Red Pepper Cheesecake
Adapted from Ottolenghi iphone app
Serves 4 - 8

about 1/3 cup olive oil
4 large red peppers, halved and seeded
1 garlic clove, crushed
3 large round white or round red potatoes (about 1-1/3 pounds, peeled and cut lengthwise into 1/4-inch slices)
1 cup crumbled feta cheese
2/3 cup cream cheese
3 eggs
1/4 cup heavy cream
1/3 cup pitted and halved black olives
2 tablespoons fresh oregano leaves
salt and black pepper

Preheat the oven to 425F.  Line a 9-inch baking dish (round, square, any shape will do) with parchment paper and brush with olive oil.

Mix the peppers together with the garlic, 2 tablespoons oil, 1/4 teaspoon salt, and a good grind of black pepper.  Spread out on a baking pan and roast for 25 minutes.  Remove and set aside to cool.  Reduce the oven temperature to 300F.

Bring a saucepan of salted water to a boil.  Add the potatoes, cook for 5 minutes, then drain.

Heat 2 tablespoons olive oil in a large skillet and add the potatoes.  You may need to fry them in two batches, so the pan does not get overcrowded.  Fry for 4-5 minutes, turning once to give both sides a light crispy surface.  Remove and set aside.

Place the feta, cream cheese, eggs, cream, and some black pepper in a mixing bowl and beat with a whisk until smooth and thick.

Cut each of the roasted pepper halves into two or three strips, about 1-1/2 inches wide, and place them and the potatoes in the baking pan --they should lean against each other, almost standing on their sides.  Put the olives into the gaps between the pieces and sprinkle with half the oregano.

Pour enough of the cream mixture into the pan to leave some of the vegetables exposed.  Bake for 30 minutes, or until the custard sets.  Five minutes before the end of cooking time scatter the remaining oregano on top.  Remove the cake from the oven and set aside to cool to room temperature. 

Remove the cake from the pan and cut into four wedges.  Brush the top and side of each piece with the remaining olive oil and serve.
Theme: Eggscellent!


Sunday, July 21, 2013

Salsa Mexicana Classica (Pico de Gallo) and Taco Loco in Cabo San Lucas, Mexico

Back in April my husband and I took a trip to Cabo San Lucas, Mexico for our tenth wedding anniversary.  We landed at the airport early in the day, and it was still a little too early for check in, so we decided to check out downtown Cabo.  Our original plan was to go to Sammy Hagar's Cabo Wabo Cantina, but on our way there we found a gem of a restaurant, Taco Loco.
Taco Loco is inside Plaza de los Mariachis, right in front of the Cabo Wabo Cantina.  I'm not sure how Sammy Hagar keeps his place in business, because the aromas coming from Taco Loco cannot be ignored.
If the aromas don't draw you in, then the charming outdoor ambiance surely will.  There are little wooden tables and festive music as you dine outside, right in the middle of the marketplace.
You might buy a necklace, bracelet, and earrings from this sweet little lady.  Or, you might even eye up a hammock while you're drinking and dining (as my husband did).
You will, for sure, be approached by several mariachis.  Believe me, you don't want to pass up a performance.  The mariachis were very happy, extremely entertaining, and always had us laughing.  Felipe (pictured above) was our absolute favorite.  Felipe has a fantastic sense of humor and a zest for life that is unparalleled.  When he performs he gives it his all...and then some.  He sang me a version of Van Morrison's Brown Eyed Girl  (even though I have blue eyes) that had us laughing so hard we cried.  Felipe was probably the happiest person I'd ever met in my life.  I think I'll remember him forever.
Taco Loco's food is fresh and delicious. We sampled so many delicious dishes (fish tacos, shrimp tacos, grilled shrimp, chicken burritos, bean and cheese nachos, and some of the most delicious margaritas).  However, my very favorite thing was the salsa bar.  When the waiter delivered your plate he would give you a bowl for salsa and toppings.  Or, you could simply take your plate over to the salsa bar and load up.  There was a rainbow of salsas and toppings to chose from!  
Lucky for me, I happened to try their Pico de Gallo on our first day there because it was CRAZY good! I'd never been much of a salsa/pico fan before, but this stuff was life-changing!  It was screaming with fresh flavor and just the right amount of heat. I found myself craving it enough that I had to go to Taco Loco for a daily fix.  Each visit I would fill my salsa bowl to capacity and put that pico on everything I possibly could.   

I vowed to make Pico when I came home from vacation, but I wanted to wait until I could get my hands on some fresh summer tomatoes.  This recipe comes from the king of Mexican cooking, Rick Bayless, and it is pretty spot on.  It takes some time to chop all the ingredients, but it is so worthwhile.  This seems like a simple, already done-that kind of recipe, but a bowl of salsa like this is very inspiring.  You will find yourself wanting to put this salsa on everything.  

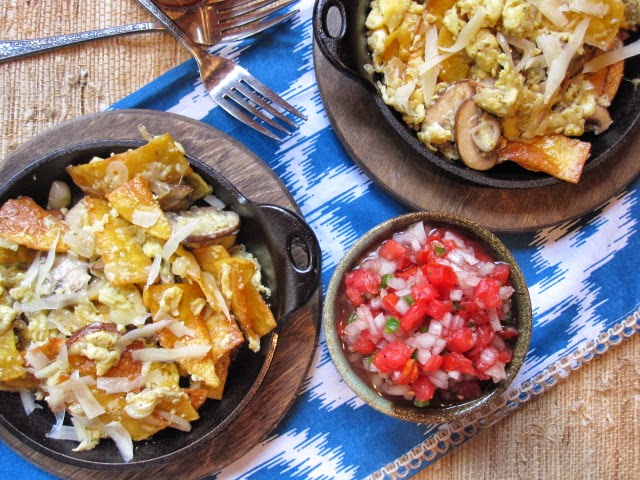
I turned a rather boring meal of grilled chicken, white rice, and smashed black beans into a real fiesta by adding a scoop of this salsa.  Later that night, I made a plate of nachos with chicken, beans, cheese and salsa on top, which the kids went crazy for.  Then in the morning I topped my scrambled eggs with the salsa.  My bowl of salsa was empty in no time.  Now I'm back to stalking my tomato plants and dreaming of Cabo!


Salsa Mexicana Classica
(Essential Tomato-Serrano Salsa)
by Rick Bayless
found on Epicurious
Makes 2 cups


12 ounces (2 medium-small round or 4 or 5 plum) ripe tomatoes 
Fresh serrano chiles to taste (roughly 3 to 5, 1/2 to 1 ounce total, or even more if you like it really picante), stemmed 
A dozen or so large sprigs of cilantro 
1 large garlic clove, peeled and very finely chopped (optional)
 1 small (4-ounce) white onion
1 1/2 teaspoons fresh lime juice 
Salt, about 3/4 teaspoon


Core the tomatoes, then cut in half widthwise and squeeze out the seeds if you wish (it will give the sauce a less rustic appearance). Finely dice the flesh by slicing it into roughly 1/4-inch thick pieces, then cutting each slice into small dice. Scoop into a bowl. 

Cut the chiles in half lengthwise (wear rubber gloves if your hands are sensitive to the piquancy of the chiles) and scrape out the seeds if you wish (not only will this make the salsa seem less rustic, but it will make it a little less picante). Chop the chiles as finely as you can, then add them to the tomatoes. Carefully bunch up the cilantro sprigs, and, with a sharp knife, slice them 1/16-inch thick, stems and all, working your way down from the leafy end until you run out of leaves. Scoop the chopped cilantro into the tomato mixture along with the optional garlic. Next, finely dice the onion with a knife (a food processor will turn it into a sour mess), scoop it into a small strainer, then rinse it under cold water. Shake to remove the excess water and add to the tomato mixture. Taste and season with lime juice and salt, and let stand if you have a little time, for the flavors to meld before using or scooping into a salsa dish and serving.


Theme: Potluck!