Thursday, June 30, 2011

Frozen Treats Week#4: Zoku Quick Pops Cookbook Review, Homemade Fudge Pops, and Peanut Butter Quick Shell

A few weeks ago I bought some new tools for my Zoku Quick Pop Maker, along with the new Zoku Quick Pops Cookbook.  Last year when I first bought the Zoku Quick Pop Maker I had some trouble unmolding my pops and I was hopeful that the Zoku book would include great recipes and helpful hints to solve my problems.  The book itself is full of information about the quick pop maker, as well as the accessories.  It provides lists of ingredients that work well with the Zoku, as well as tips about creating layers, adding extras, adding fruit, and making quick shells.  
 Zoku Quick Pops
Softcover
95 pages

The chapters with recipes include:
Fresh & Fruity:  Includes all sorts of fruity favorites like watermelon, caramelized banana, black raspberry, and pink mojito.

I Scream for Quick Pops!:  This chapter includes lots of ice pops made out of ice cream. Some of the ones I'd like to try are the Tartufo, Butter Pecan, Pistachio, Cookie Dough, and Cookies & Cream

Bake ShopFun recipes based on all your favorite baked goods like pumpkin pie, strawberry shortstops, key lime pie, and even a carrot cake quick pop.

Coco Loco:  Recipes to satisfy your chocolate cravings.  Everything ranging from the classic fudge pop, to nutty chocolate pretzel pops, s'more pops, peanut butter & jelly pops and malted milk ball pops

All in all, I'd say this is a very kid-friendly cookbook. My four year old son carries it around constantly, begging me to make him every quick pop in the book.  I finally got him to narrow down his choices and he settled on the fudge pops.

Oh, Fudge!
Adapted from Zoku Quick Pop Cookbook
Yields 6  
1 cup water
2-1/2 oz. bittersweet chocolate
1/3 cup sugar
1 pinch salt
1/3 cup 2% milk
1 tablespoon half & half
In a medium saucepan over low heat, whisk together the water, chocolate, sugar, and salt until the chocolate has completly melted (do not boil) and chocolate granules have dissolved, about 5 minutes (test by dipping a clean spoon into the mixture; if you don't see many chocolate specks, it's ready to come off the heat).  Let cool slightly (about 10 minutes).  Whisk in the milk and half & half.  Refrigerate until cool.
Insert sticks into the pop maker molds and pour the cooled chocolate base until you reach the fill line.  Let freeze completely, then remove pops with the Super Tool and enjoy.  Repeat with remaining pops.  Alternatively, you can fill standard pop molds and store in the freezer until frozen.
Peanut Butter Quick Shell
Adapted from Zoku Quick Pop Cookbook
Yields 2/3 cup

1/3 smooth peanut butter
1/3 cup refined coconut oil

In a double boiler over barely simmering water, whisk together the peanut butter and coconut oil until warmed through and mixed thoroughly.  Remove from the heat and let cool completely before using.

How to Store:  Pour quick shell into airtight, microwave-safe container; store in the fridge for up to three weeks.  Quick shell will harden when cold so you will need to reheat it in short increments at half power or sit the container in a bath of hot water for a few minutes.

Notes/Results:  I have to say that I have mixed feelings about the Zoku book.  The book itself is beautiful and done well, but the recipes weren't my favorite.  The fudge pop came together quickly and had a good flavor pre-freeze.  However, after freezing in the Zoku, the fudge pops had a very strange texture.  They looked great, and they unmolded wonderfully, but they didn't taste great.  To be completely honest, we pitched them.  Yes, they were that bad.

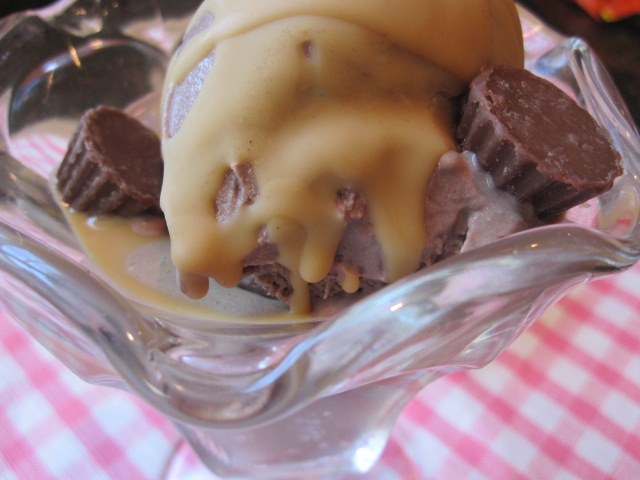
We were positive that we would be crazy about the peanut butter quick shell, but after mixing equal parts peanut butter and coconut oil, the peanut butter flavor wasn't as pronounced as we would have liked it to be.  It's not to say that we didn't like it at all, but I probably wouldn't make it again.  I do have to admit that it was really fun to make the peanut butter quick shell.  It was definitely fun to pour the quick shell over the ice cream and watch it harden. 

I'm going to give the book a second chance and try the chocolate quick shell, as well as some of the other quick pop recipes.


Wednesday, June 29, 2011

his hero

A while ago my youngest got stuck in the mud, his bigger brother thankfully came along to help him....hopefully a  metaphor for life!
I have used some gorgeous Jenni Bowlin papers and embellies here, a new fav of mine.


Till next time...

June French Fridays with Dorie Roundup

I dove into June's French Fridays with Dorie recipes with wild abandon.  Every single one of the recipes sounded wonderful to me: Warm Weather Vegetable Pot Au Feu, Roasted Rhubarb, Jam and Cola Ribs and the one that I wanted to make most of all....Mozzarella, Tomato, and Strawberry Salad.  Funny how things work out because I never got around to the Mozzarella, Tomato, and Strawberry Salad.  I meant to make the salad and I darn sure bought tons of strawberries, but the kids gobbled them up faster than I could put the salad together.  Seeing the kids eating piles of fresh strawberries makes me happy so I just let it be.

Dorie's Warm Weather Vegetable Pot Au Feu was absolutely amazing.  I was lucky enough to get all the vegetables fresh from the farmer's market: baby potatoes, asparagus, carrots, and spinach. On top of all the veggies and the light broth sat a perfectly poached egg.  I was truly in love with this soup.  I found it refreshing and extremely pleasant, light and yet hearty, and I really looked forward to having a bowl for lunch throughout the week. 

The minute I gazed upon this Roasted Rhubarb I was in love.  Just look at all that gorgeous pink syrup! I can't help it.  This definitely appeals to the girl in me. When I took my first bite it was like a heavenly explosion of tart juicy love.  I wanted to run to the computer and post this roasted rhubarb right away.  Who knew roasted rhubarb was such a terrific treat begging to be shared?  My original plan was to serve the roasted rhubarb on top of plain vanilla ice cream later in the evening for dessert. That never happened.  I pretty much ate it straight from the pan.  Myself.  Later that night I served my family plain vanilla ice cream.  Shhh!! 
Last up are Dorie's Cola and Jam Ribs.  I have a rib recipe that I love and I don't usually tinker around with rib recipes for that reason.  However, the ingredients in Dorie's recipe had me curious and I've read a lot of success stories regarding cola and barbecue so I thought I give it a go.  Dorie's ribs are rubbed with salt, pepper, ground ginger and Chinese five spice and then marinated in apricot jam, orange juice, and lemon juice.   They bake in the oven for around 2 hours and towards the final baking time they are basted with Coca Cola.  Very different from my standard recipe.

Let's just say that Dorie's ribs rival mine.  I loved these just as much, possibly even more, than my standard recipe.  They were fall off the bone tender with a nice bright citrusy flavor.  We really licked those bones clean.
Each of this month's recipes was a home run.  I usually select a favorite recipe for the month, but in this case I think all of them are winners and each recipe is one that I will enjoy again.  Can't wait for next month!


The chairs in blue :o)


I have two chairs I bought about 6-7 years ago in CA at a thrifty  for $1.99 each! They have great lines and came complete with super cool gold crushed velvet fabric. I have covered the fabric with other fabric over the years and decided it was time to do the job properly. When I say properly I mean as properly as I can given I have ZERO skills in doing this but I am willing to give it a go and see what comes of it :o) 


I am in the process of learning that this is dangerous work which makes me want to do it even more!!!!


I have to redo the webbing. We were all sinking in the seat. I could not find the kind shown here but did find some jute that I am sure will work just as well.


The curviness is what attracted me to the chairs. I like curvy stuff!


More danger!!!!!


The fabric Katy chose for the chairs. It did not photograph well. It is really lovely!


All the choices in fabric for PILLOWS!!!!!

Please wish me luck!!!!!!

Kim :o)

Tuesday, June 28, 2011

My Favorite Color Combo

I had decided last night that I was NOT going to play along with the Splitcoast Color Challenge.  I already had a post up (this is my second today!) and I absolutely HAD to get my craft corner cleaned up.  The piles are starting to get high and everytime the cat jumps on the table, they all start to collapse.  So...this morning was dedicated to cleaning.

But, I made the mistake of looking at the challenge - and it's one of my favorite combos ever!!  Suede and Crumb together are perfect and the pop of Melon is just stunning.  I guess I will clean later!!


I looked through recent sketch challenges and found this one by clean&simple that I thought would give me the best pop on the Mambo!


This is the first time that I had used the sentiment.  It's a fairly new set at All That Scraps called Great Greetings by AmyR Stamps.  She has some GREAT sentiments.  This one is particularly nice because it has the large sentiment, plus the smaller tag line and they are separate so you can use different colors.  (Of course, you will have to find your stamp-a-ma-jig to make them line up!) 

I think I can hear some of you thinking, "I'm not getting that set, I can't use my stamp-a-ma-jig."  Not true!!  Here is Stamp-a-Ma-Jig 101.  Left click on it to make it big, then right click to either save it or print it.


  • Stamps: AmyR Stamps Great Greatings (at All That Scraps)
  • Ink: Stampin' Up Soft Suede, Crumb Cake
  • Paper: Stampin' Up Soft Suede CS and dsp, Melon Mambo CS and dsp, Crumb Cake CS
  • Accessories: Cuttlebug border embossing folder, Stampin' Up Birds and Blooms Sizzlits (flower) and Butterfly Embosslit, linen thread, misc button

My Dream Birthday

Today is my last day as guest designer over at the Sweet 'n Sassy blog.  You will have to pop over there to get all the details on this card based on my dream birthday!

Monday, June 27, 2011

Fun in the sun!


The family and I took a jaunt down to Atlanta and Orange Beach, Alabama to visit with family and it was so lovely! Lots of food, fun and sun. Missed you all here :o)


The only photo of the kids that turned out :o(


Beautiful clouds!!!!


Too many of these buggars!


Sunset on the last day...


My mom and me :o)


Hope you all have a fun vacation planned this summer!!!! Now that I am home I am ready to start the projects!!!!!!


Kim :o)

Summer Reading...What a Pleasure...

I don't know about you but I love to read...I have several reading challenges going and I tend to get the next book out, from my favorite authors as they come...much to my DH's chagrin...I do most of my reading these days on my trusty Kindle...Love this thing! As I finish a book, it even gives me the option to send a notice to that effect to Twitter and Facebook! Which, of course, I do!


Just recently, I have been reading a couple of collections of short stories written by some of my favorite authors that have gotten together to promote newer authors within the realm of their genre...Thrillers...Steve Berry, James Rollins, and Gayle Lynds, just to name a few...sprinkled throughout are lesser known and newer authors...A great read! The first one is called Thrillers...There are three!
I also love a great beach book...and yes, I do take my trusty kindle to the beach...there are special covers for that! 


You see, it is all enclosed in a splash and sand proof cover that I can read through and work the buttons too! Handy...


Here is my everyday cover...

So, what are you reading this summer?? And what do you read it on?


LIM: A Sketch Challenge

After monogram week last week, Less Is More took pity on us and gave us a nice basic sketch - what a relief!!!


I was born and raised in South Dakota of German/Swedish descent, so I was trained from the cradle that there was one "sin" above all others....but I am now going to sin....wait for it....I am going to brag!!  I like my card!  (Was that too much?  Was it over the top?  Am I too full of myself??!!!)

I have no great reason for liking it.  I've seen the die cut flower with buttons done before - it's certainly not original to me.  There are probably even cards like it already posted on the Less Is More blog (but I never look until I submit!).  I like the freshness of the white, the pop of the colors and I really love the daintiness of the little 4 1/4" square.  It all makes me smile!


Now I am off for an exciting day of emptying out my son's 5th grade classroom!!  His teacher (who will also be his 6th grade teacher) won a $10,000 classroom makeover.  So my husband and I are off to pack up the old classroom.  Sadly, the son for whom we are doing this can't come.  But it's a good reason...both kids are volunteering at Vacation Bible School.  (You'll have to come back later when I post pictures of my 6'2" teenager dressed up like a Panda Bear!)

  • Stamps: SU Tiny Tags sentiment
  • Ink: only black
  • Paper: Papertrey Harvest Gold, Raspberry Fizz, Orange Zest
  • Accessories: Papertrey buttons to coordinate with paper, Papertrey flower die, Stampin' Up Tag Die, Papertrey Harvest Gold ribbon, crochet thread, Cuttlebug embossing folders

SCS CAS: Red, Black and White

Todays' Splitcoast Clean and Simple Challenge is to use Red, Black and White.  I had just received an order from Papertrey Ink that included Gracious Vases - an absolutely perfect set to do in a clean and simple challenge!!


I stepped up the simple little vases with a coat of Smooch Pearlized Top Coat so they have a subtle shimmer.  The flowers have a small dot of black Stickles in the center. 

There are two lessons that I have learned from many wonderful cardmakers:
  • "Three" is a more pleasing number than two.  So, adding three vases is more visually pleasing than just two vases and I had to have three gems!
  • Create visual triangles.  This is completely related to the first point as it simply means you want three embellishments, points of color, etc. at three different points.  This helps the viewers eye travel across the card. After I had the vases and ribbon on my card, it looked unbalanced.  Simply adding the three red gems gave me three points of red color and I had my triangle!!
These are simple artistic principles, but they make a huge difference in any and all cards that I make!
  • Stamps:  Papertrey Ink Gracious Vases
  • Ink: Memento black and copics
  • Paper: black and white
  • Accessories: misc black and red ribbon, Smooch Pearlized Top Coat, Martha Stewart glitter glue, gems colored with copics

Sunday, June 26, 2011

Alex..

It was my good friends 30th birthday recently and I decided to make a couple of framed layouts of her two children as a present. This one I can share now. I have used my final sketch as part of the creative team  at Creative Scrappers for this layout and lots of yummy CORE'DINATIONS cardstock.

 That tag and banner are from here.

Till next time...

colourQ Patriotic Glitter Dots

As much as I love the colourQ Color Challenges, I wasn't going to play along this week as the color scheme was very patriotic and summery and I had done all of my patriotic cards for our church card ministry. 


But then I was wandering the aisles of Michaels yesterday and they had their own line of glitter dots (on sale!) - and one of the packages had the PERFECT colors for this challenge!


The Paper Players challenge that came out today was a sketch - and with the three stripes it was the perfect backdrop to this patriotic card.


  • Stamps: Studio G small clear set (in the $1 bin at Michaels but at least a year ago)
  • Ink: Stampin' Up Brilliant Blue, copics
  • Paper: Stampin' Up Brilliant Blue, Tempting Turquoise, Poppy Parade, Bashful Blue
  • Accessories: Star punch, Michaels brand Glitter Shapes, Nestabilities ovals
This is my second post for today...

CAS-ual Friday: Getting Edgy

Given that I love clean and simple cards, the challenges at CAS-ual Fridays are perfect for me.  This week's challenge is "Getting Edgy".  Simply add some sort of punches, ripped, or other edge.


I have so many basic border punches, but there is such a trend right now toward big, dramatic edges.  Many companies are coming out with dies or super-sized punches to accomplish that edge.  But many of you already have a tool that works - Spellbinders Nestabilities - specifically the various Labels.  In this case, I took the biggest die from Labels 18.  I used it sideways and slid it onto my panel.  Then I rolled it into the Cuttlebug JUST to the point that the die starts to go under the paper.  (If you keep rolling you will get an impression of the remainder of the die).  Ta da!!  I have a big, dramatic edge!

  • Stamps: Our Daily Bread Bird and Butterfly Labels, Daisy Bucket sentiment
  • Ink: Papertrey Ink Ripe Avocado, misc markers
  • Paper: Papertrey Ink Ripe Avocado
  • Accessories: Papertrey Ink Simply Chartruese ribbon, Martha Stewart butterfly punch, Nestabilities Labels 18, Cuttlebug embossing folder

Saturday, June 25, 2011

It"s Pink Saturday!!

Hi Out There!
I hope everyone had a great Saturday...I am working this weekend...Hopefully helping those that need help and all that.....so since that is the case, and because it is late...this particular Pink Saturday post will be short and sweet! 
It is getting late and I am tired and have to be up early...I discovered a blog that is new to me and she had a great picture on her sidebar...I fell in love! 
Here it is...and the link to her blog is below that...enjoy!

Isn't that a great picture?
So that's all I've got this week...
I'll see you later in the week please stop in!


Linking up to Beverly's Pink Saturday at