Showing posts with label side dishes. Show all posts

Saturday, June 22, 2013

Yotam Ottolenghi's Basmati Rice & Orzo


This week I was feeling under the weather so I was craving something mild, easy, and basic.  Ottolenghi's Basmati Rice & Orzo was wildly aromatic but also perfectly comforting and very kid-friendly.

This is a rice dish that would be great with just about anything.  I served this rice with sausage and caramelized onions and it was really a fantastic meal that received high praise from my husband and daughter.  

This recipe is a little more time-consuming than cooking a pot of long-grain rice, but I like to change things up now and then so I feel like the extra time is worthwhile.  Also, cooking rice can be a tricky thing. Stir the rice too much and it will be a clumpy gluey mess.  I think the key to good fluffy rice is NOT STIRRING AT ALL, or rather stirring as little as possible.  Another important tip is to take the rice off the heat when it is done cooking and allow it to set for at least 10 minutes before you fluff it.  If you follow those steps you will almost always get perfect results. 


Basmati Rice & Orzo
Adapted from Jerusalem
by Yotam Ottolenghi & Sami Tamimi
Serves 6

1-1/3 cup basmati rice
1 tablespoon melted ghee or unsalted butter
1 tablespoon olive or canola oil
scant 1/2 cup orzo
2-1/2 cups chicken stock
1 teaspoon salt

Wash the basmati rice well, then place  in a large bowl and cover with plenty of cold water.  Allow it to soak for 30 minutes, then drain.

Heat the ghee and oil over medium-high heat in a medium heavy-bottomed saucepan for which you have a lid.  Add the orzo and saute for 3 to 4 minutes, until the grains turn dark golden.  Add the stock, bring to a boil, and cook for 3 minutes.  Add the drained rice and salt, bring to a gentle boil, stir once or twice, cover the pan, and simmer over very low heat for 15 minutes.  Don't be tempted to uncover the pan; you'll need to allow the rice to steam properly.

Turn off the heat, remove the lid, and quickly cover the pan with a clean tea towel.  Place the lid back on top of the towel and leave for 10 minutes.  Fluff the rice with a fork before serving. 
Theme: Potluck


Wednesday, December 5, 2012

Surf and Turf Fried Rice

This is a new way to celebrate the decadence of surf and turf.  A flavorful and scrumptious fried rice with strips of tender and succulent filet mignon married with little chunks of shrimp, stir fried in a red pepper, garlic and shallot sauce, then mixed with fluffy rice to make for one very happy main course or side dish.  If it sounds promising, that's because it is.

This recipe calls for 4 ounces of any lean steak.  You could easily use a sirloin or strip steak, but I chose to use filet because I wanted guaranteed tenderness and I just felt like indulging.  You only need to buy one steak after all.  It might as well be a good one!

 
Surf and Turf Fried Rice
Adapted from Madhur Jaffrey's Step-by-Step Cooking
Serves 2 as a main course or 4 as a side dish

1-1/4 cups long-grain rice
1 red bell pepper
1 shallot, or 1/2 small onion
2 small cloves garlic
salt and pepper to taste
1/4 teaspoon chili powder
4 ounces lean beef steak (I used filet mignon)
4 medium shrimp
2 cabbage leaves
4 tablespoons vegetable oil
chopped scallions, for garnish

Optional: 1 teaspoon of red curry paste and or red pepper flakes for added heat.    
                                         A few splashes of soy sauce

Put the rice in a bowl and wash in several changes of water, then drain.  Cover it generously with fresh water and leave to soak for 30 minutes; drain again.  Put the rice into a heavy-based pan.  Add 1-2/3 cup water and bring to a boil.  Cover the pan tightly, turn the heat to very low, and cook for 25 minutes.  Turn off the heat.  Keep covered and let the rice cool to room temperature.

Core, deseed, and coarsely chop the red pepper.  Peel and coarsely chop the shallot.  Combine the red pepper, shallot, red curry paste (if using), salt, pepper, chili powder, and red pepper flakes (if using) in a blender.  Blend to a smooth paste.  Add a few shakes of soy sauce, if desired.

Cut the steak across the grain into very thin slices.  Peel and devein the shrimp.  Cut into 1/4-inch wide segments.  Set aside.  Cut the cabbage leaves into very fine long shreds. 

Shortly before serving, set a wok over medium-high heat, then put in the oil.  When the oil is hot, add the spice paste from the blender.  Fry, stirring for 3-4 minutes until the paste turns dark red and the oil separates.  Add the beef and shrimp; stir and fry for 1-2 minutes.  Add the rice, breaking up any lumps with the back of a slotted spoon.  After breaking up the rice, go ahead and add the strips of cabbage, stir frying for a couple minutes or until the rice is heated through.  Garnish with scallions, and serve.

Theme: Potluck

Sunday, September 2, 2012

Hickory House Baked Beans

I love baked beans of every variety.  I love them out of a can....did I really just say that?  I love them made totally from scratch.  I also love them semi-homemade, which is what this recipe is. 

If you're in need of a good side dish for your upcoming Labor Day cookout try these Hickory House Baked Beans.  They take a little more effort than opening up a can of store-bought baked beans, but the nice thing is that they take on the flavors of your favorite barbecue sauce.  I added a little bit of dry mustard to mine, simply because I like to add dry mustard to all of my barbecue.  I also think you could replace the diced bell pepper with diced jalapeno for a little extra kick.  Flavor them your way!


Hickory House Baked Beans
Adapted from saveur.com
Serves 4-6

1/2 large red or green bell pepper (or maybe jalapeno)
2  15 oz. cans, drained cooked pinto or navy beans
1 cup of your favorite barbecue sauce
2 tbsp. dark brown sugar
1 tbsp. worcestershire
Optional:  1-2 teaspoons dry mustard or your favorite bbq seasoning

Preheat oven to 375ยบ. Stem and seed bell pepper, cut into 1/4" pieces, and put into a 2-quart or 8" x 8" baking dish. Add beans, barbecue sauce, brown sugar, and 1/2 cup water to dish and mix well. Drizzle worcestershire sauce on top. Bake until top is glazed-looking and browned, the beans start to peek up from the liquid, and the liquid is bubbling vigorously around the edges, 45-60 minutes. Let cool slightly before serving.
Theme:  Outside of Mexico


Wednesday, May 23, 2012

Cookbook Review: Weeknights with Giada

Weeknights with Giada:
Quick and Simple Recipes to Revamp Dinner
Hardcover
240 pages

Eight Chapters:  Soups & Salads; Bruschettas, Sandwiches, & Pizzas; Pasta & Grains; Meat, Poultry & Fish; Change of Pace; Breakfast for Dinner; Veggies & Sides; and Desserts

When I heard that Giada was coming out with a new cookbook I preordered it.  I knew I would love it and I was right.  Weeknights with Giada is full of family-friendly, super easy, inventive and fun recipes for the weeknights.  There are lots of days where I love to spend all day in the kitchen, but then there are also days where I need quick and easy and this book delivers.  On top of all that, the book is absolutely gorgeous, full of both family photos and gorgeous food.  You will find lots of Italian-inspired recipes in this book, but you'll also find that Giada branches out with recipes like Sweet and Spicy Greek Meatballs, Chicken Adobo, Thai Turkey Lettuce Cups, and Chicken with Peruvian Chile Sauce.  But most importantly, everything I tried was delicious!

**The recipes for each of the dishes below can be found by clicking on the recipe name.  The link will take you to the recipe on the Food Network.
Just for fun let's start where it counts.....DESSERT!!  Giada's Peanut Butter Cookies with Blackberry Jam.  These are no everyday peanut butter cookie.  These cookies have cocoa powder added to them, which is perfect for those of us who are addicted to the combo of peanut butter and chocolate.  I made some of the cookies with the blackberry jam and some without any jam at all.  Both were a huge success!  The recipe makes 10 huge cookies and believe me, they were gone in no time at all!
 From the Veggies & Sides chapter is probably my favorite recipe of the bunch, Giada's Scallion and Mozzarella Cornbread.  Holy cow is this stuff good!  The buttermilk in this recipe makes for an extremely tender and incredibly moist cornbread.  You can actually see the mozzarella in the cornbread....it is so cheesy.  And, we just loved the studs of olives and scallions running throughout.   I'm gonna go out on a limb here and tell you that this is probably the best cornbread I've ever had.  In fact, I'm making another version of it today.
If you're a potato lover, then you will fall in love for these Baked Potatoes with Sausage and Arugula.  A fluffy baked potato is topped with Italian sausage and a very cheesy creamy tomato sauce.  Since there is quite a bit of arugula mixed into the sauce I've deemed these healthy.  My family absolutely loved these and asked for more so I went ahead and made them again (twice in the same week).  This is a recipe that I can see myself making again and again, which is the mark of a very successful recipe.  Food bloggers rarely make the same thing twice, right?

All in all, this is a fabulous book and one that I am very happy to have in my collection.  In fact, I'll be sharing more recipes soon!

Recipes tagged to make: Literally everything...Shrimp and Sausage Cioppino; Burgers a la Pizzaiola; Ricotta, Lentil & Rice Rolls; Herbed Lamb Chops with Homemade BBQ Sauce; California-Style Chopped Salad with Shrimp; Sweet Corn & Basil Lasagna; Chicken with Tarragon & White Wine; Black Forbidden Rice with Shrimp, Peaches & Snap Peas; and Grilled Creamed Corn with Spinach and Parmesan....just to name a few!

Friday, April 27, 2012

Cookbook Review: The Pioneer Woman Cooks

The Pioneer Woman Cooks
Food From My Frontier 
by Ree Drummond
Hardcover
294 pages

Nine Chapters: Breakfast; Lunch; Soups; Starters, Party Food, and Drinks; Pasta and Pizza; Supper; Sides; Sweets; and Canning

I'm a big fan of Ree Drummond, aka The Pioneer Woman.  If it weren't for her then I never would have discovered food blogs, much less started one of my own.  Several years ago I was on a forum for bath and body products and someone mentioned The Pioneer Woman's site.  Out of curiosity I clicked on the link to her site and instantly fell in love.

I credit Ree with my discovery of food blogs.  Prior to clicking on her site I never even knew food blogs existed.  For years I had been alone in my love for food and cooking and suddenly a whole new door opened.  I became obsessed with food blogs and eventually I told myself that I could write one of my own.  The rest, as they say, is history.

I really enjoy following Ree along on her journey, whether it's on her blog or on her new Food Network show.  I enjoy everything she shares whether it's the footage of her ranch life, her kids, or her food.  I enjoy her personality and the fact that she doesn't take herself too seriously.  I think she's a real class act and I'm happy for her.  She's really carved out a wonderful career for herself.

I think The Pioneer Woman Cooks is a great book for any food blogger, but mostly I think this is a great book for the family cook.  There are so many wonderful recipes to feed your family in this book.  To be honest, I'm a little embarrassed to tell you how many recipes I have bookmarked.

I'd like to cook almost every recipe in Ree's new book, but here are the ones I managed to do so far.

First up are Ree's Make-Ahead Muffin Melts, which I wrote about on this post.  These little muffin melts are genius!  It's basically a make ahead egg spread that can be pulled out of the fridge in the morning, smeared on an English muffin, and broiled until hot and bubbly in mere minutes.  A very quick and tasty way to have a nice hot breakfast in the morning.  The best part?  You can customize these to suit your tastes.
Next up I chose Ree's Tequila Lime Chicken to serve alongside her Mexican Rice.  Ree's Tequila Lime Chicken is marinated in a mixture of lime juice, garlic, jalapeno, cilantro, olive oil and tequila.  The chicken is tender and flavorful and pairs so well with refried black beans, Mexican rice, and some corn tortillas.  My family really enjoyed this meal.
Tequila Lime Chicken
by Ree Drummond
Makes 6 portions

3 limes
5 garlic cloves, peeled
1 jalapeno, sliced
1 teaspoon kosher salt
1/2 cup chopped cilantro
5 tablespoons olive oil
3/4 cup tequila
6 boneless, skinless chicken breasts

Optional for serving:
pico de gallo
jalapeno slices
Refried black beans (heat two 14.5 ounce cans of black beans in a saucepan, then mash slightly)
Mexican Rice (recipe to follow)
Warmed flour or corn tortillas
Lime wedges
Avocado slices
Sour cream
Grated Monterey Jack cheese

Slice open the limes and squeeze the juice into a food processor or blender.  Add the garlic cloves, jalapeno slices, cilantro, kosher salt, olive oil, and tequila.  Blend the mixture until totally pureed.  Then add the chicken breasts to a large plastic bag and pour in the marinade.  Seal the bag and marinate in the fridge for several hours or overnight.  Remove the chicken from the bag and grill it over medium-high heat. Rotate the chicken 45 degrees on both sides to create nice grill marks, and continue grilling until the chicken is cooked thoroughly, 4 to 5 minutes per side.

Slice the chicken and serve it on a plate topped with pico de gallo and a jalapeno slice, surrounded by refried black beans, Mexican Rice, rolled-up warmed tortillas, and a couple of lime wedges.  You can also add some avocado slices, some sour cream...load it up!
Mexican Rice
by Ree Drummond
Makes a huge amount; enough for two dinners*

2 tablespoons canola oil
1 large onion, chopped
3 garlic cloves, minced
2 cups long-grain rice
One 10-ounce can Rotel Diced Tomatoes and Green Chiles
One 14.5 ounce can whole tomatoes
1 teaspoons ground cumin, or more to taste
1/4 teaspoon cayenne pepper
1 teaspoon salt
2 to 3 cups chicken broth
Chopped fresh cilantro, for garnish

Heat the oil in a large skillet over medium-high heat.  Add the onion and garlic and cook for 3 to 4 minutes.  Reduce the heat to low and add the rice.  Cook over low heat for 3 minutes, stirring constantly to make sure the rice doesn't burn.  Add the Rotel, whole tomatoes, cumin, cayenne, and salt.  Stir to combine and cook for 2 minutes.  Add 2 cups of the broth and bring to a boil.  Reduce the heat to low, cover, and simmer for 10 to 15 minutes more, or until the rice is done.  Add more liquid as needed; the rice shouldn't be sticky. 

Just before serving, sprinkle lots of freshly chopped cilantro over the top

*Note: This recipe easily makes enough rice for two full meals.  Plan accordingly.

Recipes I have bookmarked to make:   Carnitas Pizza; BBQ Chicken and Pineapple Quesadillas; Fried Chicken Tacos; Peach Whiskey Chicken; Apricot Shrimp Skewers; Pork Chops with Apples & Grits; and Honey-Plum Soy Chicken...just to name a few!

Monday, March 19, 2012

Tuscan-Inspired Pork Loin with Crispy Potatoes and LOTS of Garlic

This Tuscan-Inspired Pork Loin is a recipe I discovered back before I started blogging.  It happens to be one of the first insanely delicious meals that ever came out of my kitchen. I can't believe I've never posted it before.  This is easily one of our favorite meals.  

First I should warn you.  This recipe is definitely a meal for the garlic lover(s).  There are three cloves of garlic rubbed over the pork roast and then there is an entire head of garlic that roasts alongside the potatoes.  It's pure garlic heaven!  The result is the most wonderful and tender pork, but the star of this dish is really the potatoes.  Oh my gosh are these potatoes succulent and luscious (I totally stand over the pan and inhale a few before serving).  Er, did I just say that out loud?
POTATOES BEFORE
Speaking of the potatoes, you will want to cram as many as you can into your pan.  Don't follow the recipe below, which tells you to use only 2 potatoes.  Instead, measure your pan and fit as many potatoes as your pan will hold.  Believe me.  I cram them in there each and every time and everyone still ends up fighting over them.

POTATOES AFTER


Tuscan-Inspired Pork Loin with Crispy Potatoes and LOTS of Garlic
Adapted from The Ultimate Cookbook by Bruce Weinstein & Mark Scarbrough
Serves 6

2 large baking potatoes (use as many potatoes as will fit your pan)
1 whole head of garlic, plus 3 garlic cloves
4 tablespoons chopped fresh rosemary or sage
5 tablespoons olive oil
2 teaspoons finely grated lemon zest
1 teaspoon salt
1/2 teaspoon or 1 teaspoon red pepper flakes (optional)
One 2 to 2-1/2 pound boneless center cut pork loin, trimmed
freshly ground black pepper

Take your pork loin out of the refrigerator and allow to sit at room temperature while doing prep work. 

Cut the potatoes into 2-inch pieces (you can peel them, but the skin will get crunchy as they roast.) Place in a large bowl and cover with water by 2 inches.  Set aside at room temperature for 20 minutes so the potatoes lose some starch.  See note above***:  Don't simply make this recipe as followed with only 2 potatoes.  You will end up wishing you made more of them.  Instead, squeeze as many potatoes as will fit in your pan.  I use a 10" cast iron skillet and I can fit about 1-1/2 pounds red baby potatoes.

Meanwhile, position the rack in the center of the oven and preheat the oven to 375F.  Mix 3 minced garlic cloves, 2 tablespoons chopped rosemary or sage, 2 tablespoons olive oil, lemon zest, 1/2 to 1 teaspoon red pepper flakes (optional), and salt in a large bowl; rub this mixture all over the tied pork loin.

Drain the potatoes and blot dry with paper towels.  Place in a 12 - 14-inch oven-safe skillet (preferably cast iron).  Pour the remaining 3 tablespoons oil over the potatoes and set over medium-heat.  

Once the potatoes start to sizzle, cook, stirring occasionally, until they begin to turn translucent at their edges and brown a bit.  about 5 minutes.

Break up the garlic cloves from the whole head (do not peel) and sprinkle them among the potatoes; add the remaining rosemary or sage, sprinkling it among the potatoes.

Nestle the pork loin in the middle of the skillet.  Place in the oven and roast until the meat has browned, until an instant-read meat thermometer inserted into the center registers 155F, about 1 hour and 10 minutes, turning the loin once or twice and tossing the potatoes occasionally.  Grind some black pepper over the roast just before serving.


For A Pan Sauce:
Remove the pork from the roasting pan when done and toss the potatoes and garlic cloves before serving.  If you'd like to make a gravy, place cast-iron pan over medium heat, pour in 1/4 cup chicken broth or white wine, and bring to a simmer, scraping up any browned bits in the pan.  Skim the sauce for any fat, then reduce by half, about 1 minute.
This recipe comes from The Ultimate Cookbook by Bruce Weinstein & Mark Scarbrough, which came out back in 2007.  It is more of a tome (the size of Mark Bittman's books) than a cookbook.  There are no pictures, but there are 900 recipes packed inside and I never get tired of browsing through this book for new ideas.

Sunday, March 4, 2012

Lemonato with Patates Fournou Lemonates

 
Friday was literally a day of terror here in Kentucky.  Weather forecasters painted a very grim picture for the entire state of Kentucky, especially those of us who live in the central part of the state.  The threat of large tornadoes was imminent.  It was no longer a matter of "if" we had a tornado.  It was a matter of where and when.  A for sure thing. 

Schools across Kentucky dismissed the children at noon.  It was a chaotic scene up at the school with parents in a panic and children crying.  Then as the hours wore on everything across the state closed early, including the shopping mall.  Nothing was open.  Everyone was on lockdown.  It was eerie. We just sat and waited.  Like sitting ducks.  Sitting ducks without a basement.  

As the storm approached I felt numb.  In a way you have to make your peace with it all.  We watched as the storm parted and went directly north and directly south of us.  Tornadoes hit all over the state of Kentucky that day, but our entire city was spared.  A few cracks of thunder, a few lightning bolts, and a few minutes of large hail.  No damage.  The relief I felt when the storm was over was unreal.  I thought for sure we were going to lose everything that day.  We all have a tendency to take life for granted, but after hiding out in a tiny coat closet with your small children and a few favorite belongings it really opens your eyes. My heart goes out to all the people who lost everything, including their lives.  I watch the coverage and I think "that could've easily been me and my family."

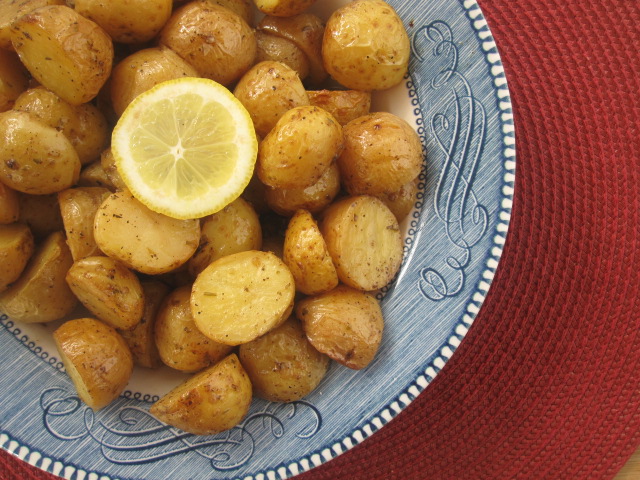
The events of this week called for a special and comforting Sunday dinner, a twist on the traditional pot roast and mashed potatoes.  This Greek pot roast is called Lemonato, or Lemoned, because it calls for the juice of one lemon near the end of cooking.  I was a little scared to add the juice of an entire lemon to a pot roast, but the flavor of the lemon wasn't really pronounced.  The addition of the lemon did, however, add a bright and vibrant flavor to the dish.  We really enjoyed it.  I served this roast alongside Patates Fournou Lemonates, otherwise known as Roast Lemon Potatoes. This was a delicious and comforting Sunday dinner. 

Lemonato
(Lemoned Beef)
Adapted from Food From Many Greek Kitchens 
by Tessa Kiros 2 tablespoons
Serves About 4-6

2 tablespoons olive oil
3 tablespoons butter
2-1/2 pounds beef roast (chuck roast/shoulder roast), sliced lengthwise into thin steaks 
salt and freshly ground black pepper
4-5 garlic cloves, peeled
1/2 small onion
juice of 1 large lemon

Note: Cut the roast into long slices, across the grain.  My roast was almost 3 pounds and I got 4 thick 2-3 inch slices

Heat the oil and butter in a Dutch oven, or a pot where the meat will fit compactly.  Brown the beef, sprinkling the done side with salt and pepper as you go.  Add the garlic and onion, saute for a moment to make lightly golden, then add 1 cup of water and put the lid on.  Simmer over very low heat for about 2 hours, turning it over a few times and adding 1/2 cup water and the lemon juice 15 minutes before the end.  It should be soft, with a good amount of lemony sauce.  Add a little extra water if needed.  Remove the onion and garlic (I left mine in).  Take off the heat and let rest in the pot, still covered, for 10 minutes before slicing and serving.


Patates Fournou Lemonates
(Roast Lemon Potatoes)
Adapted from Food From Many Greek Kitchens
Serves 6

2 pounds 10 ounces potatoes, peeled and rinsed
Juice of 1 large lemon
6 tablespoons olive oil
salt and freshly ground black pepper
1 heaping teaspoon dried oregano

Preheat the oven to 350F.  Halve the potatoes lengthwise then cut each half into 2 or 3 wedges, depending on the size of your potatoes.  Spread them in an 8-1/2 x 12-inch nonstick baking dish.  Splash the lemon juice and olive oil over them, and add salt and pepper generously.  Crush the oregano between your fingers, letting it fall over the potatoes.  

Turn the potatoes to coat them well with everything.  Drizzle 2 cups of water down the sides of the dish and give it a shufffle.

Roast until the potatoes are tender and melting and a bit golden here and there with still a bit of sauce in the dish, about 1-1/2 hours, turning and basting them every 20 minutes or so.  Add more salt and pepper to taste and serve hot.

Note:  I roasted my potatoes for a total of 2 hours and then broiled them at the end to get a little extra color.

Theme: Fight Scurvy--Eat More Citrus!


Wednesday, December 14, 2011

Garlic and Black Pepper Broccoli Gratin

  
I love broccoli.  My husband and kids....not so much. I normally get upset when my family refuses to eat certain foods, but in the case of broccoli....I don't mind at all.  That bubbly, cheesy, golden gratin up there was all mine. It sure is nice not to share sometimes.

In my opinion, broccoli calls for garlic so I took a basic recipe for broccoli gratin and added lots of garlic and of black pepper.  I love potatoes and all, but this broccoli gratin really blows any potato gratin out of the water.  I enjoyed  this 10 times better than your traditional au gratin potatoes. I think this would be a terrific holiday side dish.              

Garlic and Black Pepper Broccoli Gratin
Adapted from Apples for Jam by Tessa Kiros
Serves 4

Garlic & Black Pepper Bechamel Sauce:
3-1/2 tablespoons butter
3-4 garlic cloves, minced
1/4 cup all-purpose flour
1-1/2 cups milk, warmed
1/2 teaspoon salt
1 to 1-1/2 teaspoons freshly cracked black pepper
1/2 cup Parmesan cheese, plus more for topping

4-1/2 cups broccoli florets

Preheat the oven to 350F and grease a 4-cup shallow ovenproof dish that is suitable to take directly to the table.  To make the bechamel, melt the butter in a small saucepan over low heat.  Add in the minced garlic and cook for about 1 minute.  Whisk in the flour and cook for a few minutes, stirring constantly, then begin adding the warm milk.  It will be immediately absorbed, so work quickly, whisking with one hand while adding ladlefuls of milk with the other.  When the sauce seems to be smooth and not too stiff, add salt and pepper, and continue cooking even after it comes to a boil, for 5 minutes or so, mixing all the time.  It should be a very thick and smooth sauce.  Take the sauce off the heat and stir in the Parmesan cheese (reserving some or grating extra for the top).  Set sauce aside.

Bring a saucepan of salted water to a boil, and cook the broccoli for a few minutes until it has softened a little but is still bright green.  Lift broccoli out with a slotted spoon, letting the water drain off, and put it in the baking dish.  (Save the broccoli water for cooking rice or pasta, or adding to a roast instead of water).

Place the sauce over the broccoli, leaving some florets still showing.  Top with additional Parmesan cheese, and a little more black pepper.  Bake for about 30 minutes and then serve hot.  If necessary, broil for a minute or two to lightly brown the top.


Theme: Potluck


Wednesday, November 16, 2011

Little Spinach and Carrot Ramekins

Here's a question for you.  Do you find it difficult to talk about food and cooking to your non-foodie friends?  I find it nearly impossible.  In fact, it's about as awkward as talking about politics and/or religion. 

Here are just a few of the conversations that I've had lately.

Friend A:   "Kim, what did you have for lunch today?"
Me:    "Spinach and Carrot Ramekins."
Friend A:    "What the hell did you just say? Can't you just eat a sandwich like a normal person?" 

Friend B:   "So, do you cook every night?"
Me:  "No. Tonight I'm just making frozen pizzas and salad from a bag." 
Friend B:   (in a very accusatory tone) "Okay, so are you saying that frozen pizza and salad from a bag is not cooking?  Because if that's the case then I guess you're telling me that I never cook. Is that what you're telling me?"
Me:  "Well, I guess what I'm saying is that I'm making pizza and salad, but I'm not really cooking anything." (this conversation ended badly)

Friend C:  "Hey Kim, I'm on my way to the mall.  Wanna come?"
Me:    "I can't. My oven's preheating and I'm in the middle of pureeing carrots and baking veggie ramekins."
Friend C:   (big pause)  Um, okay....I'm sorry. Did you just say no to the mall?"  

All these conversations happened just this week.  I'm beginning to think that I speak another language or something.  Anyway, I thought I would share for several reasons.  First and foremost, I know you will all understand.  Secondly, it's actually pretty funny. And lastly, I have a feeling that some of you, if not all of you, have had similar conversations at one point or another. 

I chose these spinach and carrot ramekins because I've never really made anything quite like them before.  You basically make a carrot puree and add bechamel sauce and Parmesan cheese to it.  Then you blanch spinach, chop it, add bechamel, and more Parmesan cheese.  Lightly beaten egg is added to both the spinach and carrot mixture and the ramekins bake for about 45 minutes in a bain marie.  The preparation is a little bit fussy, but the end product is really pretty and definitely makes for a fun and unique main course with a nice salad on the side.

Little Spinach and Carrot Ramekins
Adapted from Apples for Jam by Tessa Kiros
Makes 10

Tessa says, "I use little individual ramekins (about 2-1/2 inches wide at the top, 1-1/2 inches across the bottom, and 1-1/2 inches high).  They look good in this size and are perfect servings for all-size humans.  These are baked in a bain marie so they stay beautifully moist."

4 medium carrots, peeled and chopped
5 cups loosely packed spinach leaves

Bechamel Sauce:
4-1/2 tablespoons butter
1/3 cup all-purpose flour
1-1/3 cups milk, warmed
salt and freshly ground black pepper
freshly ground nutmeg

3/4 cup grated parmesan cheese
2 eggs, lightly beaten

Preheat the oven to 350F and butter ten little 1/2 cup ramekins.  Cook the carrots in boiling salted water until they are soft.  Lift them out with a slotted spoon, puree, and put into a bowl.  Add the spinach to the boiling carrot water, and blanch for a few minutes until it is all wilted and soft.  Drain, leave until it has cooled enough to handle, and then squeeze out all the excess water.  Chop up finely and put in a separate bowl.

To make the bechamel, melt the butter in a small saucepan over low heat.  Whisk in the flour and cook for a few minutes, stirring constantly, then begin adding the warm milk.  It will be immediately absorbed, so work quickly, whisking with one hand while adding ladlefuls of milk with the other.  When the sauce seems to be smooth and not too stiff, add salt, pepper, and a grating of nutmeg, and continue cooking, even after it comes to a boil, for 5 minutes or so, mixing all the time.  It should be a very thick and smooth sauce.

Pour off any water that has collected in the bottom of the carrot bowl, then mix in 10 tablespoons of the bechamel along with half of the Parmesan.  Stir the rest of the bechamel and Parmesan into the spinach.  Taste each bowl, adding extra salt, pepper, or nutmeg if you think it's needed.  Add half the beaten eggs to each bowl, and mix them in well.

Divide the spinach mixture among the ramekins.  Rap them firmly on the table to flatten the mixture, then divide the carrot puree among the ramekins.  The mixture should just fill the molds.

Put the ramekins in a roasting pan and add enough hot water to the pan to come halfway up the side of the molds.  Move the pan to the oven and bake for about 45 minutes, or until the molds are puffed, golden, and firm.  turn the oven off and leave the pan in the oven for about 10 minutes.  Remove the ramekins from the pan, run a knife around the rims then turn them out onto plates.

Theme: Orange Skies


So, how about you?  Have you had any interesting or awkward conversations about food or cooking lately?

Monday, October 10, 2011

Cookbook Review: Ellie Krieger's Comfort Food Fix

It's that time of year again when we are all craving our favorite comfort foods and Ellie Krieger's  Comfort Food Fix couldn't have come at a better time.  Full of healthy comfort food recipes, Ellie's book is a treasure trove for anyone wanting to have their cake and eat it too. 

In Ellie's newest book, you will find 150 recipes to suit your every craving.  From Honey-Crisp Oven-Fried Chicken, to Country Fried Steak with Gravy, to something both decadent and chocolatey for dessert. You will really feel like you are truly indulging in your favorites, but without all the guilt.

The book is hardbound and has 304 pages with lots of beautiful photographs.  The chapters, along with some of the recipes I'd like to try are:

Chapter 1: Breakfast, Brunch and Bakery: Crispy French Toast Fingers with Blueberry Maple Sauce and Ellie's Honey Whole-Wheat Cinnamon Raisin Bread

Chapter 2: Snack and Starters: Five-Layer Mexican Dip with Chili Tortilla Chips and also Sesame Whole-Wheat Soft Pretzels, plus the "Everything" Parmesan Crisps

Chapter 3: Soups and Sandwiches: Broccoli-Cheddar Soup

Chapter 4: Meat Main Dishes: Horseradish, Cheddar and Caramelized Onion-Stuffed Burgers

Chapter 5: Poultry Main Dishes: Chicken Alfredo with Zucchini Ribbons, Spicy Chicken Fried Rice with Peanuts, Cincinnati Turkey Chili, and Chicken and Biscuit Potpie

Chapter 6: Seafood Main Dishes: Crispy Crab Cakes with Creamy Chili-Garlic Dipping Sauce

Chapter 7: Vegetarian Main Dishes: Autumn Vegetable Curry

Chapter 8: Sides and Salads: Herbed Squash Casserole, Rustic Mashed Potatoes with Blue Cheese, and Corn and Cheddar Spoonbread

Chapter 9: Desserts: I really want to try all the desserts, but I've narrowed it down to her Pumpkin Pie with the Better Basic Pie Crust for now.

First up, I made the Crispy Beef and Bean Tacos.  Ellie uses a lean ground beef and adds black beans to the taco filling.  As a bean lover, this is something that I've done before BUT the one thing I haven't done before is to make my own taco shells.  Instead of frying the taco shells, she brushes them with a little oil and bakes them in the oven like this:

As the tortillas bake, the sides drape down further creating a flat-bottomed taco shape.  My 10 year old daughter thought this was the coolest thing ever and I have to admit that I did too.
These Crispy Beef and Bean Tacos really hit the spot and everyone loved the oven-baked shells.  With flavorful toppings like tomato, red onion, romaine lettuce, cilantro and a little bit of cheese, these tacos rang in at 340 calories for two.  I would, and will, definitely make these again.
 Next up, and completely heavenly, were these Honey-Crisp Oven-Fried Chicken Thighs.  Meaty, tender, succulent chicken thighs are soaked in buttermilk for up to 4 hours and then brushed with honey and coated with crushed cornflakes, seasoning, and baked to perfection.  
I was incredibly impressed with this recipe.  Since the chicken thighs soaked in the buttermilk for 4 hours it was incredibly moist and tender.  The honey provided a touch of sweetness and the cornflake crust was very crunchy.  You could even hear the crunch when you took a bite!  My Mom and I were bowled over with this recipe. This is a recipe that will go into regular rotation here at my house. With very little fat, lots of protein, and only 330 calories per thigh, this is a good thing!
Did you know that you could have Country Fried Steak with Gravy with Smooth and Creamy Mashed Potatoes and not feel guilty?  Yep, it was news to me too!  I had no idea that cubed steak was already a lean cut of meat.  With a mixture of whole wheat and all purpose flour, these cube steaks are double-dipped to create a thick coating around the steak.  The gravy was nice and creamy and went perfectly with the Smooth and Creamy Mashed Potatoes (which by the way were made with only 1 tablespoon of butter in the whole batch).  A down-home comfort food dinner that is delicious and healthy, with about 610 calories total.


Paper Bag Popcorn was a fantastic, easy, and no-fuss snack that we enjoyed and will continue to enjoy for years.  In fact, I wish I'd known that you could make popcorn in the microwave using a paper bag earlier. I would have definitely saved lots of money on microwave popcorn.  Additionally, this paper bag popcorn can be seasoned with whatever seasoning blend you chose, from savory to sweet, and is only 100 calories per serving compared to 170 calories per serving out of the microwave bag.

However, being the chocoholic I am, it was these Dark Chocolate Pretzel Clusters that totally grabbed my attention when first paging through the book and it was these Dark Chocolate Pretzel Clusters that were my very favorite recipe I tried.  Goodness gracious these things are good!!  Chocolatey, crunchy, and salty, they are so ultra satisfying.  The best part is that they really couldn't be any simpler to make.  Just two easy ingredients.

Dark Chocolate Pretzel Clusters
Adapted from Comfort Food Fix by Ellie Krieger
Makes about 12 (I got 15)

Ellie says: "Chocolate with a salty crunch is all the rage now - even the mass market candy makers have caught on.  but some of us are long-time devotees.  Dark chocolate-covered pretzels have been a favorite of mine since childhood, so when I found myself with a bag of broken pretzels what else could I do but smother them in the best quality chocolate and turn them into a mouthwatering candy cluster."

4 ounces any shape thick-style salted pretzels (I used normal-sized twists)
6 ounces dark chocolate (60-70% cocoa solids), chopped

Note: I used Lindt brand chocolate 
Note:  I sprinkled a tiny dash of salt into the mixture as it melted
Line a baking sheet with wax paper.  Put the pretzels into a sealable plastic bag and crush them with a rolling pin or mallet into about 1/4-inch pretzel pieces.
Place the chocolate in the top of a double boiler set over barely simmering water.  Make sure the bottom of the pan does not touch the water.  Melt the chocolate, stirring frequently, about 1 minute.  Remove the pan from the heat.  Add the pretzel pieces to the chocolate and stir until well coated.  

Scoop heaping tablespoon-size stacks of the chocolate-covered pretzel pieces onto the prepared baking sheet.  Place the baking sheet in the refrigerator and allow to cool and set, about 20 minutes.  Store and serve at room temperature.

Serving size: 1 piece
Per serving: Calories 110; Total Fat 5g (Sat Fat 3g; Mono Fat 0.1g, Poly Fat .1g); Protein 2g; Carb 16g, Fiber 2g, Cholesterol 0mg; Sodium 130mg


I've always been a huge fan of Ellie Krieger's recipes.  I find that her recipes are always well-tested and extremely well-written.  In fact, in all the Ellie recipes I've tried I've never come across a bad recipe.  I've come to count on Ellie's recipes and believe that they are very tried and true.  I was super excited to see that Ellie had a third book coming out and even more excited when I learned that it had to do with comfort food.  I raced to the store and bought the book on the day it came out.   

If you like comfort food and are concerned about eating healthfully, then this book is for you.  I think you'll be very pleased with your purchase.

Disclosure: I bought and paid for the book on my own. All opinions are my own.

Wednesday, September 14, 2011

Breakfast Tacos and The Very Best Refried Beans

 So, once you start cooking from The Homesick Texan you realize that one beautiful meal turns into another and so on and really, that's just part of the genius of this book. These breakfast tacos were born with leftover carnitas and leftover jalapeno pinto beans. Oh the joy of it!

I was able to use my leftover jalapeno pinto beans to make Lisa's refried beans and let me just tell you now....these refried beans are without a doubt the very best refried beans I've ever tasted.  And, not to brag, but I do consider myself a bean connoisseur (okay, don't laugh at me). 

To make the breakfast tacos you need to have some refried beans, flour tortillas (Lisa says always use flour tortillas), meat of your choice (in this case I used leftover carnitas), eggs, cheese, and salsa for serving.

I began by converting Lisa's Jalapeno Pinto Beans into refried beans.  After pureeing the beans in the blender I cooked them down in a cast iron skillet with a tablespoon of canola oil, diced onion, and 2 huge cloves of garlic.  I can't believe how very different they tasted from the original Jalapeno Pinto Bean recipe.  These beans are phenomenal.  I couldn't keep my spoon out of the skillet.

 Refried Beans
Adapted from The Homesick Texan
Serves 8

4 cups cooked Jalapeno Pinto Beans
1/4 cup lard, bacon grease, or canola oil (I reduced this to 1 tbsp.)
1/4 medium yellow onion, diced
2 cloves garlic, minced (don't be shy)
Salt, to taste

In a blender, place the beans along with 1/4 cup of their cooking liquid (I forgot save the liquid and used water).

In a large cast-iron skillet, on medium-low heat melt the lard (or grease/oil).  Add the onions and cook until translucent, stirring occasionally, about 5 minutes.  Add the garlic and cook for 30 more seconds.  Pour in the bean puree and while stirring cook the beans until the oil is well incorporated and the refried beans are a little darker in color, about 5 minutes.  Taste and add salt.

 There are many versions of breakfast tacos out there, but with these homemade beans and the succulent leftover carnitas this was truly the ultimate breakfast taco.

Breakfast Tacos
Adapted from The Homesick Texan
Serves 4 (4 tacos)

1 tablespoon butter
4 large eggs, beaten
4 pieces of bacon, cooked and sliced or any other meat desired
salt and black pepper, to taste
4 flour tortillas
1 cup refried beans, heated
1 cup grated cheddar cheese
Salsa, for serving

Heat a large skillet, preferably cast-iron, on medium high, and melt the tablespoon unsalted butter.  When butter is melted, add the eggs and cooked bacon (or meat of your choice) to the skillet and gently scramble for about 3 minutes or until done to your liking.  Taste and add salt and black pepper.

Heat up the flour tortillas either in a skillet or by laying them on top of a gas burner turned on to a low flame.  When a tortilla starts to puff (about 20 seconds) turn it over and cook for another 20 seconds. 

Take a tortilla and spread 1/4 cup of refried beans in the center of the tortilla.  Add a quarter of the scrambled egg and top with 1/4 cup of cheese and salsa.  Fold in the bottom 1 inch of the tortilla and then roll from left to right until self-contained.

Note: This is a basic recipe, which you can experiment with and change to your heart's desire.  The variations on breakfast tacos are endless- you can also add breakfast sausage, chorizo, Mexican fried potatoes (see Monday's post), or leftover brisket.


This post is part of The Homesick Texan Cookbook Spotlight and Cook-Off sponsored by Hyperion and hosted at girlichef