I am a big fan of bean burgers. I've made chickpea burgers, black bean burgers, fava bean burgers, and now pinto bean burgers and I've loved them all. The good news is that everyone else in my house loves bean burgers almost as much as me so it's a total win-win situation.
As soon as I spotted this recipe for Pinto Bean Breakfast Patty Melts in The New Southwest Cookbook I knew it would be my choice for Week Two Blogger's Choice. These pinto bean burgers are seasoned with a heavy dose of cumin, black pepper, coriander, and garlic so they are mighty flavorful. Crunchy on the exterior and creamy on the inside this is one powerhouse of a breakfast that will keep you full way into the afternoon. They were a big hit at my house!
Check back on Monday, October 28th for a cookbook review and a chance to win your very own copy of The New Southwest. You don't want to miss it!

Pinto Bean Breakfast Patty Melts
Adapted from The New Southwest by
Meagan Micozzi of Scarletta Bakes
Serves 7
2 tablespoons extra virgin olive oil, divided, plus more for frying
3/4 cup diced yellow onion
1 cup grated zucchini
2 jalapenos, stemmed and minced
2 tablespoons minced fresh garlic
3-1/2 cups cooked pinto beans
(about 2-1/2 cans if using canned)
3/4 cup plain dry breadcrumbs*
2 large eggs, beaten
2 tablespoons ground cumin
2 tablespoons black pepper
1 teaspoon ground coriander
1 teaspoon salt
7 slices Monterey Jack cheese
7 English muffins, sliced, toasted
Note: I had to use a little over a cup of breadcrumbs to get the mixture to come together. Also, I think the 2 tablespoons of black pepper in the recipe might be a typo. We love black pepper but I only used 1 tablespoon just in case.
Heat 1 tablespoon of the oil in a large heavy-bottomed skillet over medium heat. Add the onion and saute until golden, translucent, and fragrant, approximately 5 minutes. Add the zucchini, jalapenos, and garlic and saute for just 2 more minutes. Remove pan from heat.
Meanwhile, place the beans in a large bowl and mash with a fork or potato masher. (Use a fork for chunky, uneven consistency.) Stir in the breadcrumbs, eggs, cumin, black pepper, coriander, and salt. Fold in the cooked onion mixture. Using a half cup measure, portion off and form seven patties. Freeze them on a wax paper lined cookie sheet to firm them up. They can be kept frozen at this point and you can cook them as needed or you can store them in the refrigerator if not using right away.
Once ready to cook and assemble your melts, heat 1 tablespoon of oil in a large heavy-bottomed lidded skillet over medium heat (I prefer cast iron). Add the patties and cook for 3 to 4 minute on each side, applying pressure to the top of the patties to flatten once you have a cooked side facing up. Note that you may need to work in batches so as not to overcrowd your pan, so you may need to refresh your oil between batches and wipe the pan clean.
Once patties are crisp on the outside and cooked through, top each with a slice of cheese, replace the lid on the pan and steam just 30 to 60 seconds to melt the cheese. Remove each patty melt to a toasted English muffin bun and serve immediately.

 |
| Every Sunday @ Kahakai Kitchen |

This post is part of The New Southwest Cookbook Spotlight sponsored by Hippocrene and hosted at girlichef.
If you'd like to keep tabs on who's making what from the The New Southwest, then head on over to The New Southwest event page over at girlichef.
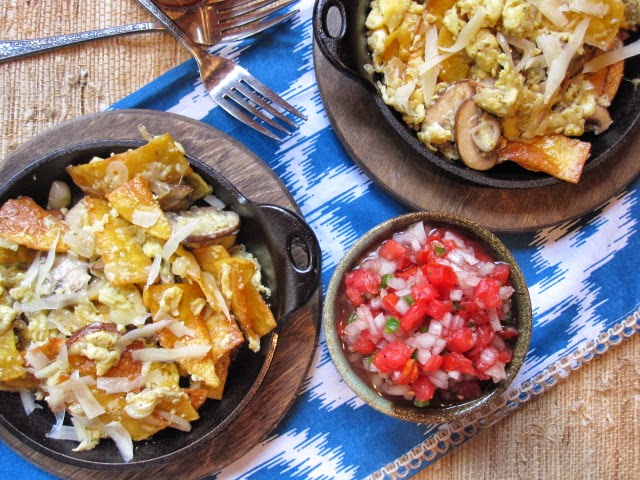
If you missed last week's "host choice" recipe, Mushroom and Leek Migas, please drop by The New Southwest event page. You will find links to each person's post, see their results, their spin, and their thoughts on that recipe. Also, check it all week long for updates on what people are making this week!
This post is part of The New Southwest Cookbook Spotlight sponsored by Hippocrene and hosted at girlichef.
- See more at: http://www.girlichef.com/2013/10/ChiaCupcakes.html#more
This post is part of The New Southwest Cookbook Spotlight sponsored by Hippocrene and hosted at girlichef.
- See more at: http://www.girlichef.com/2013/10/ChiaCupcakes.html#more
If you missed last week's "host choice" recipe, Mushroom and Leek Migas, please drop by The New Southwest event page. You will find links to each person's post, see their results, their spin, and their thoughts on that recipe. Also, check it all week long for updates on what people are making this week!
This post is part of The New Southwest Cookbook Spotlight sponsored by Hippocrene and hosted at girlichef. - See more at: http://www.girlichef.com/2013/10/ChiaCupcakes.html#more
This post is part of The New Southwest Cookbook Spotlight sponsored by Hippocrene and hosted at girlichef. - See more at: http://www.girlichef.com/2013/10/ChiaCupcakes.html#more