Showing posts with label Type: Easter. Show all posts

Saturday, March 23, 2013

WPlus9: Inspired by Easter Cookies

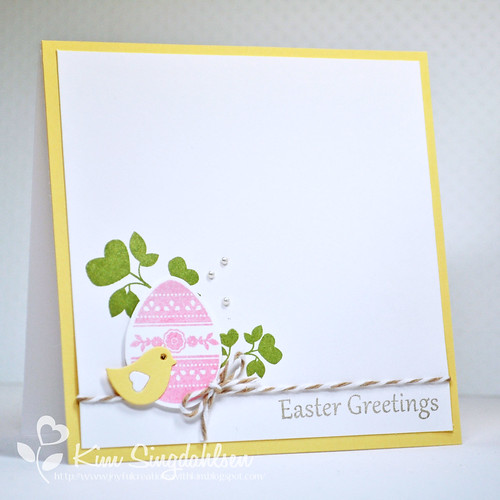
This week's mood board at WPlus9 includes two sweet little Easter cookies and a lot of white space!!!


I had so much fun earlier this week creating a card with a small little scene in the corner (see it here) that I used the same idea for this card!

Easter Greetings
I kept the colors with a little kraft added in for the cookie!  If I had the time to remake this card, I would do a better job with the ink color on the sentiment and I would move it over closer to the egg - but hopefully no one else stresses over these little details!!
  • Stamps: WPlus9 Easter Greetings, Love Birds (the branches)
  • Paper: Papertrey Trey Lemon
  • Ink: Stampin' Up Pear Pizazz, Pretty in Pink, Crumb Cake
  • Accessories: WPlus9 Folk Art Florals die, Timeless Twine Krazy for Kraft. misc pearls

Thursday, March 7, 2013

Easter Blessings Bunnies

I am experiencing definite mojo problems.  The two simple, simple cards that you are going to see here took me about 24 hours to make.  Obviously, not in total!  But I had just gotten the sweetest bunny dies and the CASology challenge this week is bunnies - easy peasy!!  NOT so much.  There are three bunnies in the die so I started with a trio of bunnies.  I tried them in kraft, in white, in bright polka dots.  I tried them in windows, on stitched squares, with and without embossing, with flower and sun punches.

Then I had one of those lucky accidents.  I use Elfa mesh drawers for storage.  All of my stamps are unmounted in CD cases and they fit perfectly.  6x6 paper pads fit perfectly.  During the night, the heavy top drawer bent and dropped and then the whole thing pancaked.

After some frustration and perhaps some choice words - enough so that I didn't take a picture of the avalanche - I just spent the last two hours re-organizing.  Not a bad thing.  I got rid of a few things.  Then I took the time to put the things that I used the most in the easiest drawers to get to - I think I am going to like it.  Everybody should experience an avalanche!?

The really, really lucky thing was that when my Papertrey sets had spread all over the floor - the top set was one I had totally forgotten about - Bitty Background Basics.  The light bulb went on - brightly - I set it aside and after I had finished picking everything up - these cards were born in about 5 minutes.  (In fairness, the bunnies and leaves and grass were already cut and the sentiment had been selected!!)


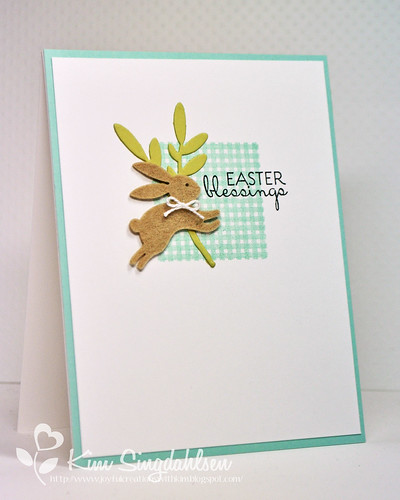
Easter Blessings boy

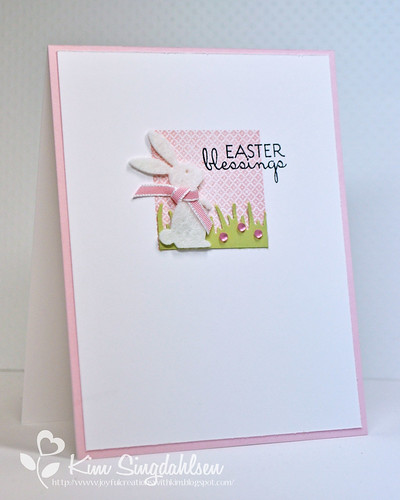
Easter Blessings girl


There is one other charming bunny in the die set that didn't make the cut on these cards - I got them here but they are also at Impression Obsession and other stores.

  • Stamps: Verve Egg-stra Special (sentiment), Papertrey Ink Bitty Background Basics
  • Paper: Papertrey Ink Aqua Mist, Spring Moss, Sweet Blush
  • Ink: Papertrey Ink Aqua Mist, Sweet Blush
  • Accessories: CC Designs Mistletoe Die, Martha Stewart grass border punch, Impression Obsession Bunny Set, Stampin' Up Pink ribbon, Papertrey Ink Kraft felt, misc white felt

Saturday, February 16, 2013

Retrosketches - It's Mine!

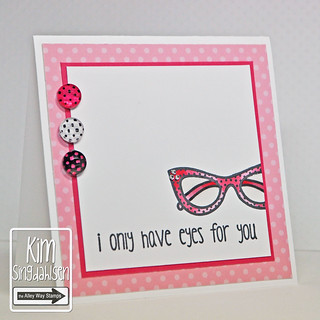
I have made it in the world of cardmaking - this week's sketch at retrosketches comes from a card of mine!!!  The good ladies at retrosketches took this card of mine (details here) and turned it into a sketch for everybody to try!

Eyes for You in Pink

I am absolutely thrilled!!

But I also had to create another card based on the sketch.  I discovered that's hard to do because I felt like I had to live up to the first one!! What do you think?

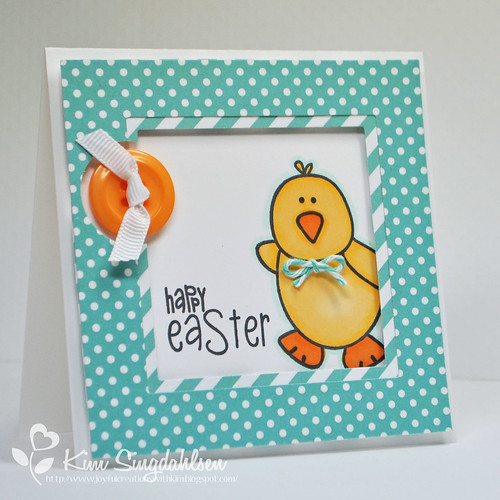
Happy Easter Chick
(It's hard to go wrong with that happy little guy!)
I am REALLY looking forward to seeing what you each create with this sketch - hope you have fun!
  • Stamps: The Alley Way Stamps Spring Has Sprung
  • Paper: Simple Stories dsp
  • Ink: Memento Black and Copics
  • Accessories: Papertrey Ink button, misc white grosgrain, 

Tuesday, March 20, 2012

Magic Card with Egg-Cited Cocoa

Every Tuesday in the Sweet 'n Sassy Forum on Splitcoast stampers, there is a tutorial and I got to put together today's tutorial!!  I have made magic cards in the past - but today I used this darling Egg-Cited Cocoa image.  I think it is SO fun to see the surprise when the recipient pulls the tag up and the image goes from black and white to color.


You can find the tutorial here.  

Have fun!!

  • Stamps: Sweet 'n Sassy Egg-Cited Cocoa
  • Paper: Stampin' Up Peach Parfait, YoYo Yellow, Kiwi Kiss
  • Ink: Memento black, copics
  • Accessories: Nestabilities square and scalloped square, acrylic sheet, SU Crushed Curry ribbon


Monday, March 19, 2012

CAS Sketch: Peace be unto you

Today's Clean and Simple challenge at Splitcoast was to use a sketch as found on a card by Arizona Maine.  What a stunning card!  Then I made the mistake of peeking at the gallery before I did my card (usually a big NO-NO because I get intimidated).  Sure enough, amongst all the other beautiful cards were two by design team buddies of mine that you HAVE to check out - Blue Skies by Bridget and Easter Tulips.  I was definitely intimidated.

So I sat down to watch the first video of this session of Online Card Classes called Creative Chemistry 101 by Tim Holtz.  I am GOING to learn all of those amazing blending techniques that, right now, I can only drool over, but this video was all about terminology and product types.  I decided to sit down with some distress pads and do a pre-class card using a minimal amount of blending and a spritz of Perfect Pearls...


I am happy with the results - although it would be hard to be unhappy given the theme of the card! - and I am anxious to see what I am able to do after a few weeks of classes.

  • Stamps: DRS Designs (crosses), sentiment in Close To My Heart He Is Risen
  • Paper: Papertrey Lavender Moon and Classic Kraft
  • Ink: Ranger Distress Inks in Milled Lavender, Evergreen Bough, Stormy Sky, Versafine black
  • Accessories: Fiskars squeeze punch, Perfect Pearls mist, Ranger blending handle and foam.

Monday, February 27, 2012

Razzleberry and White: He Lives

Pin It
This card is so NOT what I had envisioned when I got this stamp set!  It was going to be a classic kraft/white/subtle Easter card.  But I saw this morning's Splitcoast Clean and Simple challenge and then saw this stamp set sitting square in the middle of my craft desk - I knew it could work.  The Razzleberry adds a regal tone and the white would keep it fresh and peaceful.


The pink on the cross is actually glitter.  Have you ever noticed that "clear" glitters generally have a color cast?  I grabbed the nearest glitter and wish I would have looked more carefully.  The clearest glitter that I have found is Martha Stewart's - I buy it in giant bottles at Michaels.  This cross does not use Martha Stewart - had I stood up and walked three steps, I would have had that clear glitter.  Teaches me to be lazy!

  • Stamps: Sweet 'n Sassy He Lives
  • Paper: Stampin' Up Rich Razzleberry, white
  • Ink: Stampin' Up Rich Razzleberry
  • Accessories: Stampin' Up Razzleberry Ribbon and Scalloped Border, Sweet 'n Sassy cloud dies, Martha Stewart Butterfly Punch, Impress Sparkle Glitter


Friday, February 10, 2012

Two Looks for Tender Words

Every Friday, Sweet 'n Sassy Stamps is doing a look back at older sets.  Today, I contributed two cards for the set Tender Words.

The first is soft and sweet.  I will be using this as an Easter card...
Pin It

Then in an entirely different direction, I also made a sympathy card.
Pin It


I love sets with multiple uses!!

Easter card:

  • Stamps: Sweet 'n Sassy Tender Words
  • Paper: Stampin' Up Blushing Bride, Pear Pizzazz
  • Ink: Memento black and copics
  • Accessories: Sweet 'n Sassy Lacey Eyelet Border die, misc ribbon
  • Challenge: Sketch from Technostamper

Sympathy card:
  • Stamps: Sweet 'n Sassy Tender Words
  • Paper: Stampin' Up Crumb Cake, So Saffron, Black
  • Ink: Memento black, colored pencils
  • Accessories: Stampin' Up border punch and thin black ribbon, misc button
-------------------------------------------

The Easter card is for the Technostamper Sketch Challenge.  Mary Jo provides the code for me to show you all the other entrants in the challenge - it becomes a blog hop! 


Thursday, February 9, 2012

He Is Risen!!

Pin It

I just got a Stampin' Up order and HAD to find an excuse to use this beautiful stamp.  I've stated many times that I am a cardmaker that needs a starting point - sketch, colors...something.  So I found a sketch by one of my favorite cardmakers that she made for a new sketch challenge at Scrapbook Essentials BC.  I cheated a little as I didn't add a sentiment at the bottom, but I like the focus that the sketch puts on the stamp...


What would be perfect on this card is little gold beads or pearls at the base of each scallop to beautifully frame the image.  But my cards are for our church card ministry and the addition of 20+ beads on each of the four cards we make of this design becomes costly.  I think that's part of the reason I tend toward simple cards - I am always watching the bottom line!  (Of course, my husband regularly points out - and probably accurately - that if I gave the money to the church that I spent on my supply stash, they would make more than they do through the ministry.  But what would be the fun in that!!?)

Here's a close-up of the touch of glitter that I added to the dove...


  • Stamps: Stampin' Up Easter Dove
  • Paper: white
  • Ink: Versamark
  • Accessories: Cuttlebug embossing folder (dots), Sizzix embossing folder (leaf), misc ribbon, detail gold embossing powder

Thursday, February 2, 2012

It's Here! It's Blog Hop Day!!


Welcome to the Sweet 'n Sassy Stamps February New Release Blog Hop!  This month's release is so exciting  - it was even released a week early as a surprise! Get your warm beverage and tasty snack, and get ready for some amazing inspiration from the Design Divas!
I love this hop because I am surrounded by incredibly talented cardmakers and I love seeing what they have done (and I have the same stamps so I can CASE them all!!)
You probably came from Korin's blog but if you started with me, you should head back to the Sweet 'n Sassy Stamps Blog to start from the beginning.
I have two ENTIRELY different sets to show you today.  The first is charming little Cocoa popping out of an Easter egg...


This set is called Egg-Cited Cocoa.  I used Echo Park Dots & Stripes, also available in the store.  And the heart die is also from Sweet 'n Sassy - the Hearts and Stars Scallop Border.  (The layout is from a sketch found at Cardabilities.)
Then on an entirely different note...


It's the Rose Collage set and it is gorgeous.  There are 16 different sentiment to go inside the banner so it is completely flexible.  The two butterflies are on the main collage stamp - but there are also two separate stamps so it is easy to stamp and cut out.  (The colors are from colourQ.)
Next...for your hopping pleasure...is Giovana.  Have fun!


Be sure to make plans to join us for our new release party tonight; the fun takes place over in our member company forums on Splitcoaststampers.  We'll have great fellowship with crafty friends, challenges, and a prize drawing!  The excitement starts at 8:00 PM EST.
Now, take a look at what the other Design Divas have created to show off this amazing batch of February stamps:


Don't forget, the entire February release is available in the store right now; you can order the stamps individually or at a discounted bundle price!  Head over to get yours today!


The challenges that I used are:


Friday, March 25, 2011

Sun-Inspired Easter

This morning's Splitcoast Free For All challenge is to be inspired by the sun.  There is nothing more inspirational than the sun/son scene in this image.


I am in the middle of making Easter cards for our church cardmaking ministry.  It is a wonderful time for cards as each is so very inspirational.  Check out my post from last night for five other Easter cards.
  • Stamps: Wax Fruit Company digi
  • Ink: copics
  • Paper: Stampin' Up Pear Pizzazz, Regal Rose
  • Accessories: Stampin' Up dot embossing folder, ribbon punch, Smooch Pearlescent Top Coat, Nestabilities Label 5
  • Challenges: Splitcoast Free4All: Sun and Color Challenge: Pear, Rose, Saffron

Thursday, March 24, 2011

Friday Focus: Bows

Bows...it's a love/hate thing.  So often, a bow is the perfect finishing touch on a card.  But I know that my group of church cardmakers run the other way from cards with bows.  There are very few people out there who feel that they can make a perfect bow. 

But there are so many ways to do it - and so many tools available to help - here are just a few ways that I do it. 

JUST A KNOT!
Your "bow" doesn't actually have to be a "bow".  Sometimes a simple knot serves the purpose.


All the focus on this card is on the cross - the layers around it are minimal - so I just used a quick "knot".

I have resolved with my Friday Focus posts to not assume anything.  I can't tell you how many times I have been crafting with others - they do something in their usual way - and I look at them in astonishment because their "usual" way had never occurred to me.  It seems that even with the basics, we all have things to learn.  So, here is basic knot-tying (with a tip as to how to make these bows go different ways!)


Cut a piece of ribbon slightly longer
than the piece it is going around.

Wrap each end around to the back
and adhere with a piece of tape.

Cut another piece of ribbon and start
your knot. Tie the first part of the knot.
Realize that for a knot, you do the
same "twist" twice.  For the first
"twist", tie the knot in the way
that is comfortable for you (as if you
were tying your shoe). 
 
To get the "bow" to lie this way, do
your second twist in the "uncomfortable"
way.  (I know this type of knot has an
actual name - I just prefer to think
comfortable/uncomfortable).  For
me, comfort is the right loop up and over
and then back under the left.  Bringing
the left side up and over is awkward.

If you would rather the "bow" lays
along your ribbon this way, just
do both "twists" in the way that
is comfortable for you - like
you are knotting a shoe.

BUT - before you do this, check
out the next tutorial on the
"cheater's bow".
In fairness, I have to tell you that with thick ribbon, tying a knot can often get quite bulky.  If you have a good adhesive, just tie a single "twist" in that second piece of ribbon (not the two twists that comprise a knot).  Pick the good side of your knot, apply adhesive to the other side (Zip Dry is my favorite) and glue it on!


CHEATER'S BOW
This is a quick and easy way to get the "bow" that lies in the same direction as the ribbon (see last picture above).  We use this A LOT in our church cardmaking group because it is so very simple and doesn't scare people like bows do.

FYI: the pearls match perfectly IRL!

Cut a piece of ribbon longer than
the panel - don't skimp on this piece
because you will be tying part
of a knot in it so you need some
extra length.

Tie the first part of a knot - leave it loose.

Thread a small piece of ribbon through
the knot before you pull it tight.
(The kraft ribbon is just so you can see it)

Pull it tight.  Trim it. So very easy!
You can manipulate it at this point, e.g.
if you want it at a jaunty angle, you can
pull on the top part on one side and the
bottom on the other side.

Wrap the ends around the back
of the panel and tape them.

Bunny Ears Bow:
Now it's time to get into actual bows.  To be honest, this is the first time that I have used this type of bow (I hope it doesn't show!).  But at our last church cardmaking gathering, I was demonstrating the Bow-Easy and a couple of ladies said they could tie perfect bows without a Bow-Easy.  Huh??  I'd never heard of anyone casually saying they could tie bows.  It turns out they simply used that child's method - the bunny ears bow.  It works!


Make two loops from your ribbon.

Cross over like you are starting to
tie your shoe.

Finish the simple knot.
 
When you pull the bow, don't
worry that it gets really big - you
can always pull the ends and
shrink it again.


For my finished card (see first photo in this section),
I took the ends of the bow around back for a different
look.  You could just as easily trim the ends and
adhere the bow as above.


TOOL #1: Magic Bow Maker
I recently stumbled on this tool while reading blogs.  Lee at Stampingleeyours sells them through her blog.  Here's the tool:


I have seen people rig their own version of this tool.  I recently saw a picture of someone who used two pencils, rubber bands and a mesh paper holder.  But Lee's tool is quite reasonably priced and it has two huge advantages: (1) you can easily change the size of the bow by simply moving the pegs and (2) she has a really nice pictorial tutorial that comes with it.


One thing that I particularly like about Lee's tool is the ease of making double bows. It's a nice, unique touch on this simple card.
I am walking a fine line here as I don't want to steal from Lee's instructions as the instructions are part of her product, yet I also want you to realize how simple the tool is to use.  So I am going to give a basic overview, but realize that her instructions go over this in explicit detail - so if mine doesn't make sense, don't fault hers!!

I am also concerned about my instructions, because one of the major pros of this product is that I find it more intuitive than the next product that I am going over - the Bow-Easy.  So, if my instructions don't seem intuitive to you - please realize that Lee's will!


Place the pegs the appropriate
distance apart.  Wrap the ribbon
around the pegs.  In this case,
I wrapped twice, but you can
do a regular bow or even wrap
more times!

Wrap the center of the bow by
bringing one side down, to the back...
 
...and over the top to the front.


Then simply tie the two ends together.

Here it is from the front.  Just lift it
off the top of the pegs and adhere
it to your card.

TOOL #2: Bow-Easy
The Bow-Easy is a very popular tool right now.  I purchased mine a year or so ago from an E-Bay seller that sells nothing but Bow-Easy's.  But if you do a Google search you will find that many, many on-line stores now carry it.

I have gotten used to using and find it a VERY handy tool.  However, it is not particularly intuitive.  When I take it to my monthly church cardmaking gatherings, I have to re-teach it each month.  So if you don't make many bows, you may not find this at all easy to remember and do.


You need two "arms" to make a bow.  See the upper left of the picture below - those two pegs make a bow.  Then see the upper right part.  There is a big bow you can make - but one of the arms is split into two other "arms" - you can use those to make a smaller bow.  So, by using space effectively, you can make seven different sized bows with this one tool.  (FYI: There is a bigger bow-easy that makes larger bows particularly for wreaths and flower arrangements.)

I'm going to do my best with instructions here - but if you have a new Bow-Easy and want instructions, I would highly recommend you go to YouTube and find a video of the process - it's much easier to see!

Hold the end of the ribbon on the left
side of the two arms that are the
right size for your bow.

Loop your ribbon around the
two arms.  I don't cut the ribbon until
this point - I cut it just beyond the
Bow-Easy.

Take the part of the ribbon that the
previous picture shows dangling
to the right - and poke it down the
crease between the two arms.

Pull it around the back-side and up
again through the crease.
This may seem complicated, but
the next picture shows what you
have accomplished...

This is the backside of what you
have just done.  By pulling the ribbon
through the crease and around, you
have formed your bow!

Now we need to anchor the ribbon.
You would think that you need a
leg of the bow pointing down
and to the right as shown above.
But for a brief moment, you have
to suspend logic.  Instead of
going down and to the right,
you do exactly the opposite...

Pull your ribbon to the LEFT side
from the bottom to the TOP, so
it's headed totally the wrong way!!
Don't pull it tight.  See the loop that
is formed.  Guess what happens
when you now pull the ribbon through
that loop....

It's headed the right way!

Pull the bow tight BEFORE you
take it off the Bow-Easy.  This is
NOT a normal bow and you will
not be able to tighten it once
you pull it off the Bow-Easy.

FYI: I have seen it mentioned that the Bow-Easy is a problem if you have ribbon printed on one side.  If you wrap the loops so that the print is appropriate on the outside, the legs of the bow are actually backwards.  I haven't found this to be a problem - just before you pull it tight, flip the legs over to the correct side.  When you pull it tight, they stay where they belong!
-----------------------------------------

If you have made it all the way through this post, I do hope you have found at least one useful tip or tool.  As I said at the very beginning - bows are a love/hate thing.  We all love them on our cards, but most of us HATE doing them.  Hopefully this post will help turn you into a bow-lover!


Lemon/Aqua/Kraft Cross:
  • Stamps: Sweet 'n Sassy digi
  • Ink: copics
  • Paper: Papertrey Kraft, Lemon Tart, Everyday Blessings dsp
  • Accessories: Stampin' Up white taffeta and scallop border punch
  • Challenges: the sweetest thing Sweet Sunday Sketch Challenge (turned sideways)


Sweet Kraft and Pink Bunny:
  • Stamps: Ichiyo bunny (I have no idea where I got this), Papertrey Tags for Spring sentiment
  • Ink: Stampin' Up Crumb Cake, a light pink copic
  • Paper: Stampin' Up Crumb Cake, Pink Pirouette
  • Accessories: EK Success corner punch, Stampin' Up Pretty in Pink Taffetta and embossing folder, Michaels brand pearl flourish


Three Crosses:
  • Stamps: DRS Designs (crosses), Our Craft Lounge Prayers and Blessing (sentiment)
  • Ink: Stampin' Up Elegant Eggplant
  • Paper: Stampin' Up Elegant Eggplant, Certainly Celery
  • Accessories: Offray ribbon, Stampin' Up embossing folders, Stampin' Up gems colored with copics
  • Challenges: clean&simple Fall To Layout and Pals Paper Arts: Embossing


Calla Lillies Easter:
  • Stamps: Calla Lillies digi from Wax Fruit Company
  • Ink: copics
  • Paper: Stampin' Up Pear Pizzazz, black, Bazzill white
  • Accessories: Stampin' Up Rose Grosgrain, Magic Bow Maker

Springtime Vintage Cross:
  • Stamps: Verve Everlasting Life (cross), sentiment unknown  (FYI: the Verve set has spectacular sentiments - they were just all too big for the circle.)
  • Ink: Stampin' Up Always Artichoke
  • Paper: Stampin' Up Very Vanilla, Always Artichoke, Pear Pizzazz, Baja Breeze, Springtime Vintage dsp
  • Accessories: misc scallop and circle punches, Stampin' Up Baja seam binding, Stampin' Up mini flower punch (in punch trio), Stampin' Up pearls