Showing posts with label relief society. Show all posts

Wednesday, March 27, 2013

tulle pom-poms + garland tutorial


I promised a tutorial after my last post. It took a little longer than anticipated. I ended up having my granddaughter, Madi, spend two whole days with me. I like to give her my full attention when she visits. She's also a talker, so getting anything done is a little difficult. :) She is seriously one of the most hilarious little people I know.

Then I was called to a new position at church. I know. I did not see that coming. I loved my calling as RS Meeting Coordinator and I will miss working with so many wonderful women. More on that later.

Okay, let's get this party started.


Because I knew I would use this project often, I made a mini version of all the the pom-pom tutorials I could find. There were about six. I found this method was most simple and created the prettiest *pouf.*


SUPPLIES:
  • 6" tulle (4 yards for each pom-pom)
  • crochet thread (I tried regular thread and fishing line, but found both made it difficult to see my stitches and broke when I pulled them tight. Crochet thread works great.)
  • needle with large eye
  • scissors
  • Fishing line for garland. (I just used what was in the garage, 12 lb. test)

INSTRUCTIONS:
  1. Cut four yards of tulle and approximately 3 feet of crochet thread. Thread your needle and tie a nice big knot at the end so you don't accidentally lose your gathers.
  2. Make a running stitch (up, down, up, down) the full length of the tulle, gathering lightly as you go. Make your stitches about 1/2" and 1/2" inch apart. Don't worry about keeping completely straight, it all works out in the end.
  3. Gather the tulle tightly on the string, making sure it's not twisted.
  4. Tie a knot with the two ends (pull together tightly), then tie a few more for good measure.
  5. Twist and pull on the layers to form a pom-pom.
Yep, it's that simple.


To make a garland, simply stitch through the center of each pom-pom with monofilament (fishing line). I use clear 3M hooks to hang mine. We leave the one in Ella's room up all the time. Both Kate and Tayler want to make garlands for their little's rooms after seeing this one. I feel some girls' time coming on. :)


MINI POM-POMS
I made mini pom-poms for our spring RS birthday party. I wish I'd known about these pre-cut 3" rolls then, it would have saved me a lot of time and grief. 


The process for mini pom-poms is the same, with one slight difference. Instead of one strip of tulle, you will cut two strips approximately 60" long, and layer them on top of each other before stitching. Gather your tulle tightly and tie the string in multiple knots.


Couldn't be more darling. :)

ADDITIONAL IDEAS FOR POM-POMS:
  • Use as decor for baby showers, birthday celebrations, weddings, and little (or big) girls' rooms.
  • Attach to a dowel and add ribbon for an instant fairy wand.
  • Tie mini pom-poms to bare branches for spring decor.
  • Use to top a gift in place of a bow. (Totally doing this for birthday parties.)
  • Attach to a little girl's headband for a "pouf" of style.
Any other ideas?

SOURCES:
Paper Mart is my go-to source for tulle. The 25 yard rolls at my local craft stores are $4.99. Paper Mart has them for $1.35, and it's the same quality. The garland I made for Ella's room has 12 pom-poms, so it cost me about $3.00 to make. They also have100 yard rolls of tulle, that are a quarter more than the craft store's 25 yard rolls. Even with shipping included, it's a huge savings. (And their shipping is super fast.)

I just noticed Paper Mart has added 12" and 18" pre-cut rolls of tulle. Fabulous! Thinking mega pom-poms for Ella's birthday party would be wonderful. I'll need to play around with the length.


Also check out the polka dot tulle and shimmery tulle.

Happy spring crafting.

Wednesday, March 13, 2013

RS birthday celebration 2013


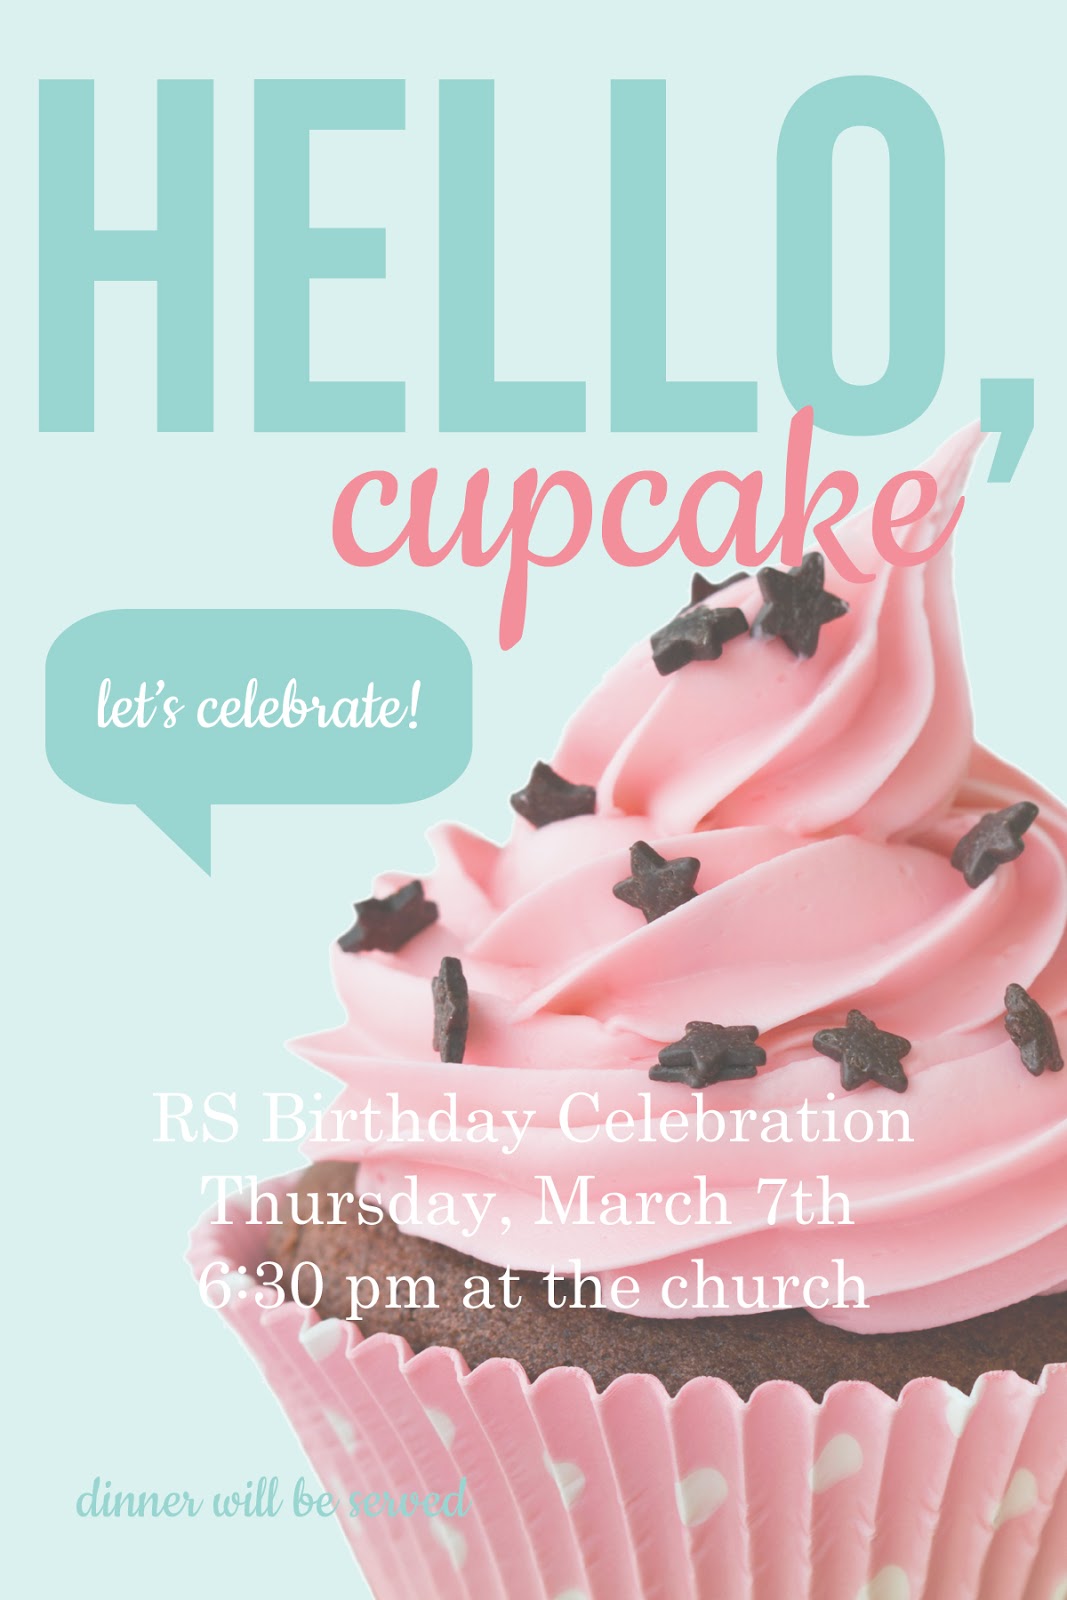
Our annual Relief Society birthday celebration was last week and I would chock it up as a great success. Our theme was "Small and Simple Things."

I have to admit, this are my favorite invitation I've created to date. I feel like I'm coming into my own style and loving it. :)

I've always been one to take a great idea and tweak it to fit my needs or make it my own. I've realized that's not the case with everyone. So many of you contact me wanting to recreate what we've done for our Relief Society meetings, and I think that's great! I'm flattered, actually. So from now on, I'll share as much as I can. :)


Our decor was super simple. We've had a very, very long winter here in Utah, so we wanted something that shouted spring. These balloon flowers are bright, cheery and large enough to not get lost in a gigantic cultural hall. They're also easy to make. I love the colors Tracy chose--pink, orange, and teal. We strung them across the cultural hall on fishing line. (Note: Tracy used 9" balloons since they were the only ones available. If we had to do it over, we would have blown up the flower centers a little larger to hide the tied together mess better.)

We ended up getting triple duty from the balloons. My friend Crystal, told me her daughter Abby was having a birthday party two days after the social, and that the balloons were the same colors as the invite and decorations. I told her to take them when we were done. She was thrilled. Crystal then took them to Tracy's home, who used them for her daughter's party the next day. Love it!

The streamers were cool too. Tracy made them from plastic table cloths she cut it strips, then pulled on the edges to "ruffle" them. The cost of decor for the night ended up being minimal.

I had these lanterns from Patrick and Ashlee's wedding last year. They lined the walkway to the reception center. I just added a simple pink sheer ribbon bow and set them in the center of the tables.


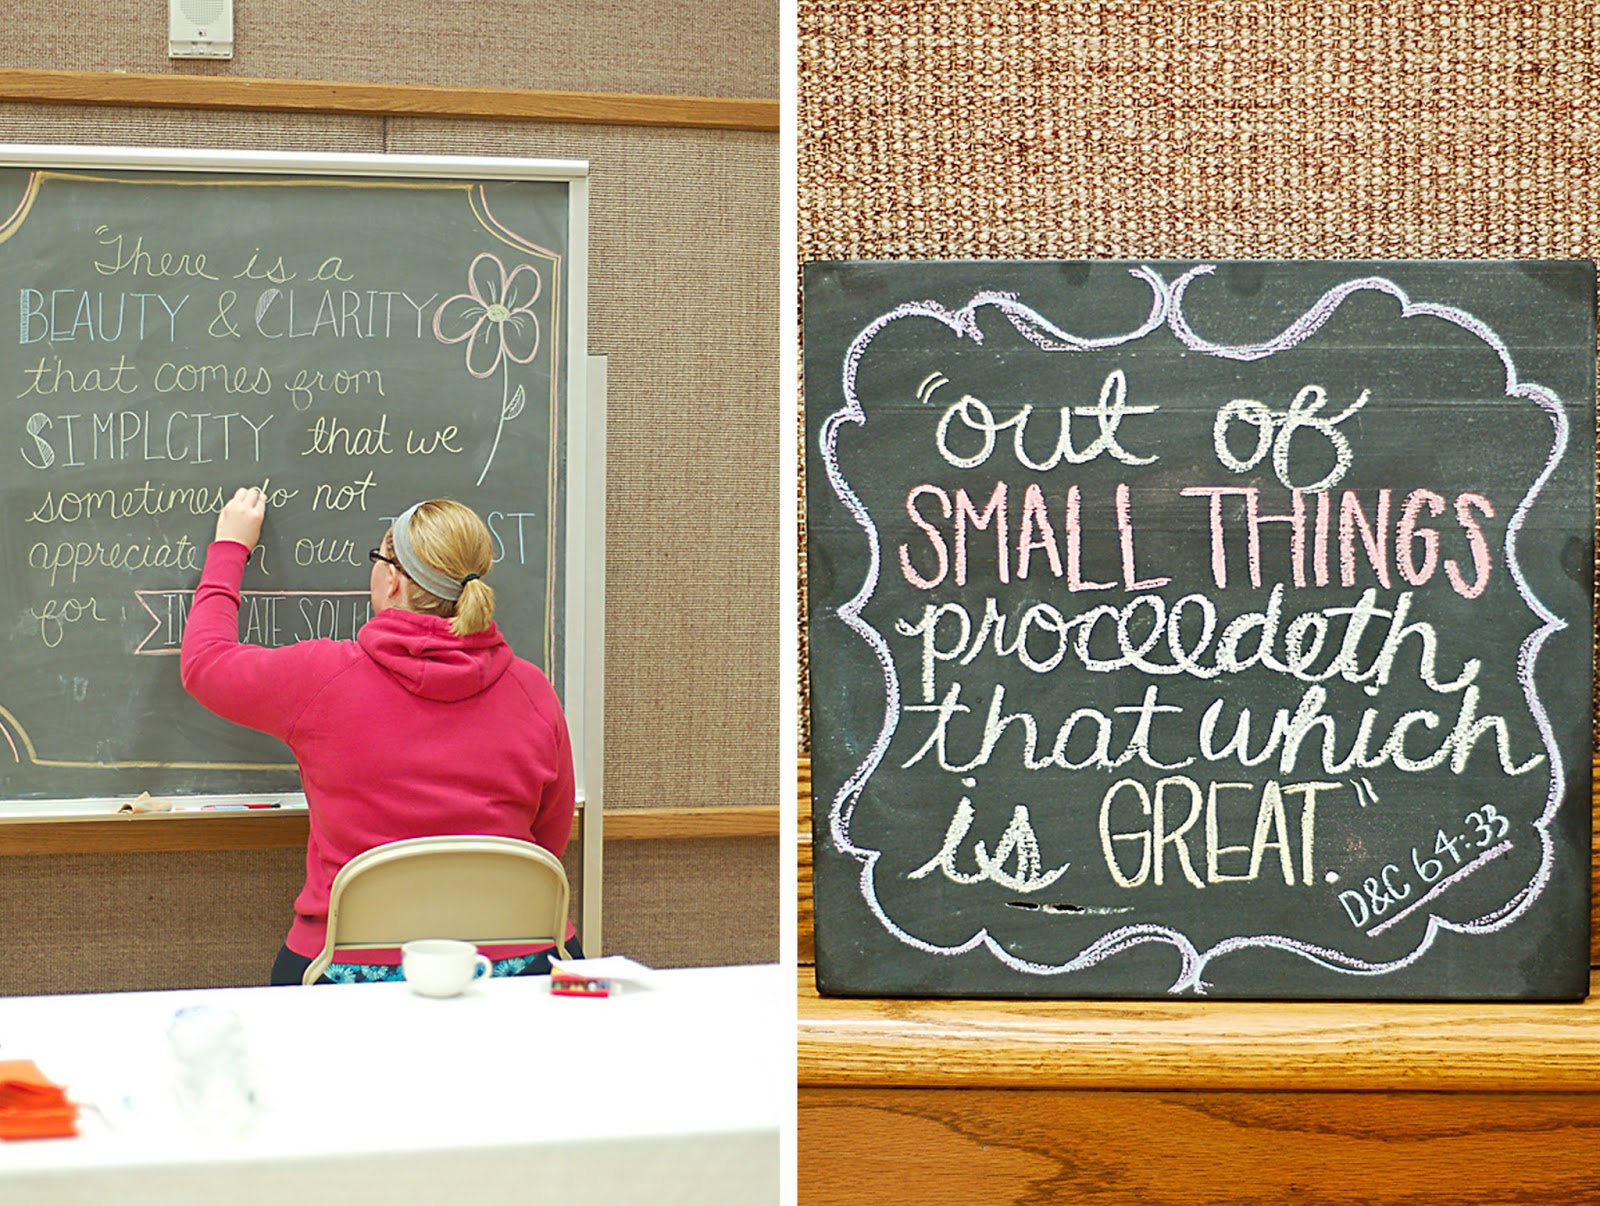
I asked Erin Winters to create some chalk art for us. It was the perfect finishing touch to our decor. She chose the perfect quote and scripture for our theme. 

Here's the quote she used:
"There is a beauty and clarity that comes from simplicity that we sometimes do not appreciate in our thirst for intricate solutions." -Dieter F. Uchtdorf
I love it.

And I love President Uchtdorf. Seriously, who doesn't? My daughter-in-law Ashlee, is a fantastic hair stylist. (I'm not just saying that because we're related. ;)) She told me the first time she met President Uchtdorf, she kept thinking, "He has the greatest hair!" So the first time Lynn went to Ashlee to get his hair done cut (sorry, hon), he told her, "I want President Uchtdorf hair."


For our dinner, the presidency made these scrumptious ham and cheese poppy seed sliders. They were a hit. Marci bought rolls from a local bakery (Shirley's). Just a personal note, I'm not a fan of mayo, so if I were to make these for my family, I think they would be just as good if I left it off. What do you think?


For the rest of the meal, they had the sisters sign up to bring a favorite salad or dessert.


As we finished up dinner, Gail Tilley, our Stake RS President, gave a great message and led a discussion centering on our theme. She's hilarious and we all love her so much.


I chose this quote--one of my absolute favorites--to go along with our theme. I gave a 4x6 print to each of the sisters who attended the celebration as a little swag. Once again I have to give credit to Bobbi for this quote layout. I used her same quote for last year's RS celebration, after seeing it on Pinterest and tweaked it just a little to fit our theme. Now I'm using the layout again. Thanks again, Bobbi! (*Remember to have the auto enhance turned OFF when you print these or you will get a very funky color.)


We also included service in our celebration. Marci (our RS President), suggested care packages for the missionaries serving from our ward. We loved the idea. Because Patti has a missionary son out right now, I delegated that task to her to organize. 

Patti announced our project and sent out a list to all the sisters of suggestions for items we could include in the packages. We brought them the night of the celebration. Here's the list of suggestions:
  • ties
  • treats and/or snacks
  • mints
  • socks
  • photos of Christ or the temple to give away
  • CTR rings to give to kids
  • stamps
  • hair clips or ties
  • written story of your conversion
  • your written testimony

Anything else you'd add? We also added a copy of the David A. Bednar quote from the meeting. Patti also had note cards so we could jot a quick note of encouragement and love to those serving. 


And of course there was lots and lots for socializing, something we're all very good at. :)

We accomplished our goals--socialize, service, and bringing the spirit to our meeting. I'd love to have you share any details of your favorite RS meetings.

Resources:
Hello, cupcake invite psd. (find someone in your ward with Photoshop Elements and have them add your information.
Hello, cupcake invite jpg. (Use a different program to add your information.)
balloon flower tutorial
ruffled tablecloth streamers tutorial
ham and cheese poppy seed sliders recipe
David A. Bednar quote

Also shared at these fabulous blogs:
Whipperberry
Chic on a Shoestring 

Monday, February 25, 2013

one simple recipe: heavenly hot chocolate


Here in beautiful Utah, we've had a far more extreme winter than usual. There have been record breaking low temps and snow accumulation totals. Brrr! That's led to far too little socializing among neighbors and friends.We decided to warm things up a bit with a good old-fashioned Relief Society social.


It was a rousing success. Keeping it simple, allowed everyone to socialize and reconnect. And if there's chocolate involved, you're pretty much guaranteed success. Not just any chocolate, really good chocolate. :)

Our resident foodie, Breanna Smithson of Breanna's Recipe Box, showed us how to make homemade hot cocoa. Seriously, I will never use powder again. It was so, so simple and amazingly delicious. 


Here's Breanna's recipe:

Hot Chocolate
1 1/2 cups whole milk
1/3 heaping cup dark chocolate chips (if you like a sweeter cocoa, use semi sweet)
1/8 tsp. kosher salt

In a small saucepan, heat milk over medium heat. Place chocolate chips and salt in a glass measuring cup and add steaming milk. Stir mixture until it looks chocolately, then pour into blender. Blend on high for 10-15 seconds. Pour hot chocolate back into the saucepan and heat until steaming. Pour in cups and add shaved dark chocolate. Enjoy!

Servings: 2

Using dark chocolate definitely made this a more "grown-up" version of hot cocoa. It had a bit of a bittersweet taste which I love. Breanna also made a quick video to demo the process. It's super fun to watch, so go check it out.


Along with the cocoa, we had a large variety of homemade scones--cranberry, blueberry, lemon poppyseed, chocolate chip and lemon ginger. (Thank you RS Presidency--Marci, Tirage, Marina, and Tamsen!) We all pretty much broke out the knives so we could taste each one. They were all wonderful. 


If I had to choose a favorite though, I think it would be Marina Jensen's lemon ginger scones. Yum!

Notes from Marina: I only baked my scones 18 minutes. I also drizzled the scones with a glaze made from powdered sugar and lemon juice.

Both sweet and simple makes for a great meeting. Here's to staying warm and cozy. 

Friday, February 22, 2013

helen's quilt

I have a friend, Helen, who is sweet and caring and can always make me laugh. Seriously, she's hilarious. She's also authentic to the core and very knowledgeable of the gospel--all things I very much admire about her. One thing she apparently is not, is graceful. :)

While painting a room in her home a few weeks ago, she took a major dive off of or onto (?) a chair and got a spiral fracture in her leg. I'd describe what that is, but it's super gross and would make you cringe. I just did--eck. Following her surgery, she's been at a rehab center for physical therapy. As much as I'm sure everyone there is enjoying her humor and antics, I know she's going nuts without her family and friends.


To give Helen a little comfort and remind her we're thinking of her, some friends got together and made her a quilt. Actually, Jen Ostler did most of the work, the rest of us got to help. The whole thing came together in three days. I know...amazing!


JEN'S PROCESS FOR A GROUP QUILT:
  • Purchase or pull together fabric from your stash. (Be sure to use your friends favorite colors.)
  • Pre-cut all the pieces and stack into blocks.
  •  Send out an e-mail (Jen used our ward's Google group) for everyone to either come over and sew a block or two or take one home and do it. (It took me about 20 minutes to sew and press two blocks.)
  •  Sew the blocks together with the sashing and borders. Layer quilt top, batting and backing.
  •  Make a run to a favorite quilt shop--or three--for a backing.
  •  Send out or do the quilting yourself.
  •  Give to someone who can bind a quilt lightening-fast (that's Monica Steelman).  
 
Jen embroidered a sweet message before sewing on the sashing.


After much contemplation, the extra little band of cream between the border patterns, was just what it needed. Great choice Jen, it's perfect. :)


I love the backing. Another friend, Amber Bonner, used scraps of the fabrics to make a matching bag. It's beautiful! 

Love you, Helen. We're ready for you to come home!

NOTES: The original pattern is for a baby quilt that measures 40 1/2" x 51 1/2". Helen's quilt is 60 x 76. Total blocks: 36. Fabric used: 9 fat quarters, 1 1/2 yards for sashing, 1/4 yard for border 1 (2" finished), cream scraps for border 2 (1" finished), 1/2 yard for border 3 (4 1/2" finished), and 1/2 yard for binding cut at 2 1/4", approximately 4 yards for backing (depending on if you use fabrics from the front for piecing). Purchase Simplify With Camille Roskelley: Quilts for the Modern Home for original pattern.

Also shared here:
Chic on a Shoestring Decorating
Whipperberry

Wednesday, September 12, 2012

super {simple} saturday 2012

I'm excited to share our collection of projects for Super Saturday 2012. For those of you who don't know, Super Saturday is a sewing/craft day we have each October for the sisters in my ward of The Church of Jesus Christ of Latter-Day Saints. (Yep, I'm a Mormon.) My calling in the Relief Society (women's organization) is the Meeting Coordinator. This event is a great time to socialize, learn new skills, create projects that strengthen our homes and families and be treated to a yummy lunch.

We've focused on simple projects that focus on creating memories and traditions, celebrations, strengthening family and preparedness. Each project has a time element suggestion, so consider whether you want to work on projects at home or finish them at Super Saturday.

*To my ward: see RS announcements for date, time and location.
*I've updated this post with tutorial and download links.

A-FRAME TENT
Taught by: Ruth Dangerfield


What child wouldn't love a special place to play, hide, read or nap? This A-frame tent easily folds up when not in use and can be personalized with your own fabric. Simple straight lines make this a great beginning sewer project. Because we know it will be popular, there is a limit of two per family. (Think Christmas gifts!)

Cost: $6.50
Please bring:
2 1/3 yards of fabric or canvas
matching thread
sewing machine
scissors or rotary cutter and mat

Time element: 1- 1.5 hours
Tutorial here.

FABRIC BUNTING
Taught by: Jen Ostler


all-occasion version

Christmas version

Fabric buntings create instant party decor and can be used over and over. They're also great a touch of color in a child's room, play room or craft room. Jen has designed two styles to choose from: an all occasion version with vintage inspired fabrics or festive Christmas prints for the holidays. These buntings have a layer of quilt batting and are backed with muslin. The edges are cut with pinking sheers or a decorative rotary cutter. Straight stitching makes this a great beginner sewing project.

Cost: $9.50 each

All supplies are provided.
Please bring:
cream thread for the all-occasion bunting or white thread for the Christmas bunting
sewing machine
rotary cutter and board

Time element: 1.5 hours


COOKING CLASS
Taught by: Breanna Smithson


Our own resident foodie, Breanna Smithson, will be sharing some favorite simple pumpkin and squash recipes with us. Yes, there will be taste samples.:) Check out Breanna's blog for more awesome yummy-ness.

No charge
Class will be held after lunch at 1 pm and last approximately 30-45 minutes. Please sign up to attend.


POLYCORD BRACELETS
Taught by: Patti and Bridget Belnap


These bracelets are all the rage! (My son, Patrick, is the manager at an outdoor recreation shop and can't keep the supplies in stock.) Not only do they look cool, but they can unwind to supply 8-10 feet of polycord in an emergency situation. An assortment of colors will be available to choose from (including BYU blue and that OTHER Utah University red :)) These would make great stocking stuffers or a great addition to your 72 hour kits.

Cost: $2.00 each
All supplies are provided.
Please bring: scissors

Time element: 30 minutes
Tutorial here.

FILL-ABLE FRAME PRINTABLES (+ dry erase marker)
designed by: Kim McCrary

Share the love with your spouse and children or countdown to a special day or holiday with these printables specially designed for our Super Saturday. Frame each design (you provide the frame) and use a dry-erase marker (provided with each printable) to fill in the blank right on the glass. Then just wipe off to pen a new message each day. Amazing! These would make great gifts.


great for spouses.

available with pink, green or gray bird.

available in green, blue, red or orange.

Cost: Awesome, Rock, Birdie and Wanted to Say (5x7) $2.00/Countdown (8x10) $3.00

Time element: 1 minute :)
You are Awesome Because
You Rock Because

Sources:
Expo Low Odor Fine Tip Dry Erase Markers 

FABRIC PUMPKINS (set of 3)
Taught by: Marina Jensen


These pumpkins created with designer upholstery fabric will add a touch of style to your fall decor or Thanksgiving table. Real wood stems add an element of texture. You will learn to make two different versions and can mix and match which fabrics to use.  

Cost: $7.00
All supplies provided.
Please bring: scissors

Time element: 1 hour


RIBBON BRACELETS
taught by: Crystal Lindley

available in white, turquoise, pink or black


These sweet little ribbon and pearl bracelets will be a welcome addition to any little (or big) girls' accessory collection. They tie on to the wrist for a comfortable fit and are available in white, turquoise, pink or black.

Cost: $2.00
All supplies provided.
Please bring: scissors

Time element: 30 minutes
Tutorial here.

{Paintable} FRAMES
Taught by: Tracy Burns

Display by Jen @ Tatertots and Jello

Wedding photo {Liza and Will} in Brooklyn frame

Chalkboard in Balboa frame

See Grace frame here.

Imagine of the possibilities of these darling frames that are showing up everywhere! They're perfect for showcasing family photos (think collage) or for weddings too. We will provide black, white and cream paint or you can bring your own vibrant colors. Choose from three different styles: Balboa (bracket shape), Brooklyn (scalloped shape) or Grace (oval center). The price of these unfinished frames is amazing. I purchased a painted one for more than double the cost!

Cost:
4x6 ($5.50)
5x7 ($8.00)
8x10 ($11.50)
11x 14 ($15.50)
16x20 ($22.00)
(other sizes available at Cut It Out.)
All supplies provided (unless you want a different paint color).

Time element: 30 minutes + dry time for distressing edges


OTHER NOTES:
  • Please sign up to attend lunch and/or for Breanna's class even if you don't plan on doing projects (so we have a count).
  • You are welcome to order kits/supplies to do projects at home with your Young Women, but this event is for the RS Sisters. 
  • You must pinky PROMISE you will pick up  your own messes! We had an issue with that last year and I will track you down and Stephanie B. said she'd help me TP your house if you don't! :)
  • Bring your other unfinished projects or just come hang out with us.
For Order Form click here or here. (must be accompanied by payment.)