The Quilt Alliance ( an organization I adore) promotes telling the story of your quilts, an important part of quilt making and quilt history. This is the story of my new quilt!
It has never been a secret that I adore, love, drool over ,covet ( add anything else that may fit here) Liberty of London fabrics! The first time I saw them was on the internet and I was stunned at the beauty of the designs. At that time, I was not quilting yet and could not figure out exactly what I would do with those lushious pieces of art. That all changed quickly after making my first quilt five years ago. The world of Liberty of London was calling to me ( not really but the voices in my head sure were loud). I purchased my first sets of 4 in squares of Liberty and I was tickled pink! I took them out and lined them up in rows, arranged them them in color order and then randomly then I very carefully put them back... I obviously was not ready.
Fast forward a few years and a few projects later. I learned that all those squares would look so much better if I actually used them, that they were meant to be sewn into, pincushions, Aeroplane bags, pouches and mini quilts. Their loveliness has a synergistic effect...one is gorgeous...a bunch together and BAM! It is a wonderful thing to experience.
A pincushion for a friend
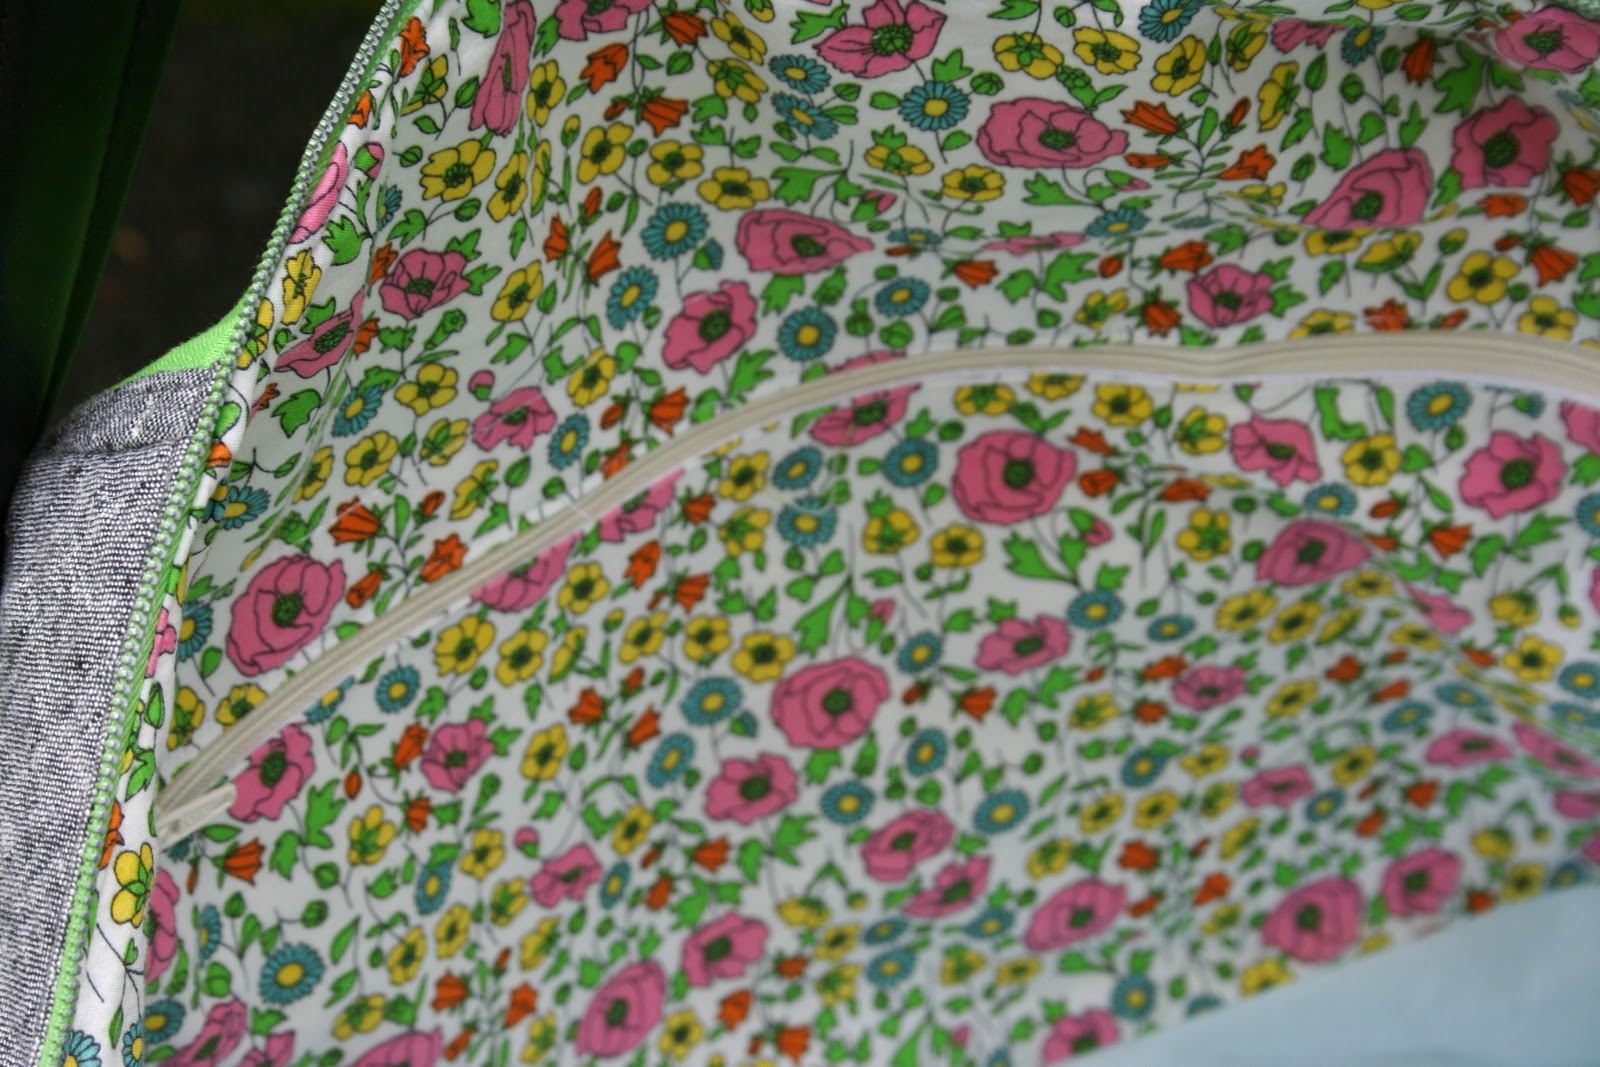
Cathedral window Aeroplane Bag
A mini quilt
I was given the opportunity to experience it in a huge way that started this past May. In Portland, I received an email. I honestly thought it was not a real email because the person sending it to me has such a fun sounding name it could not be business related so I was going to skip to the next one. I could not get the name out of my head so I went back and opened it...OMG!!!!! Sara was there in bed and I SQUEELED with delight...SARA...OMG!!!!!! I think I may have been shaking a bit too. It was from Michelle at Liberty of London asking if I wanted to do a guest post for their blog. I started looking for the candid cameras and could not believe it was true...ME? No...really...ME?
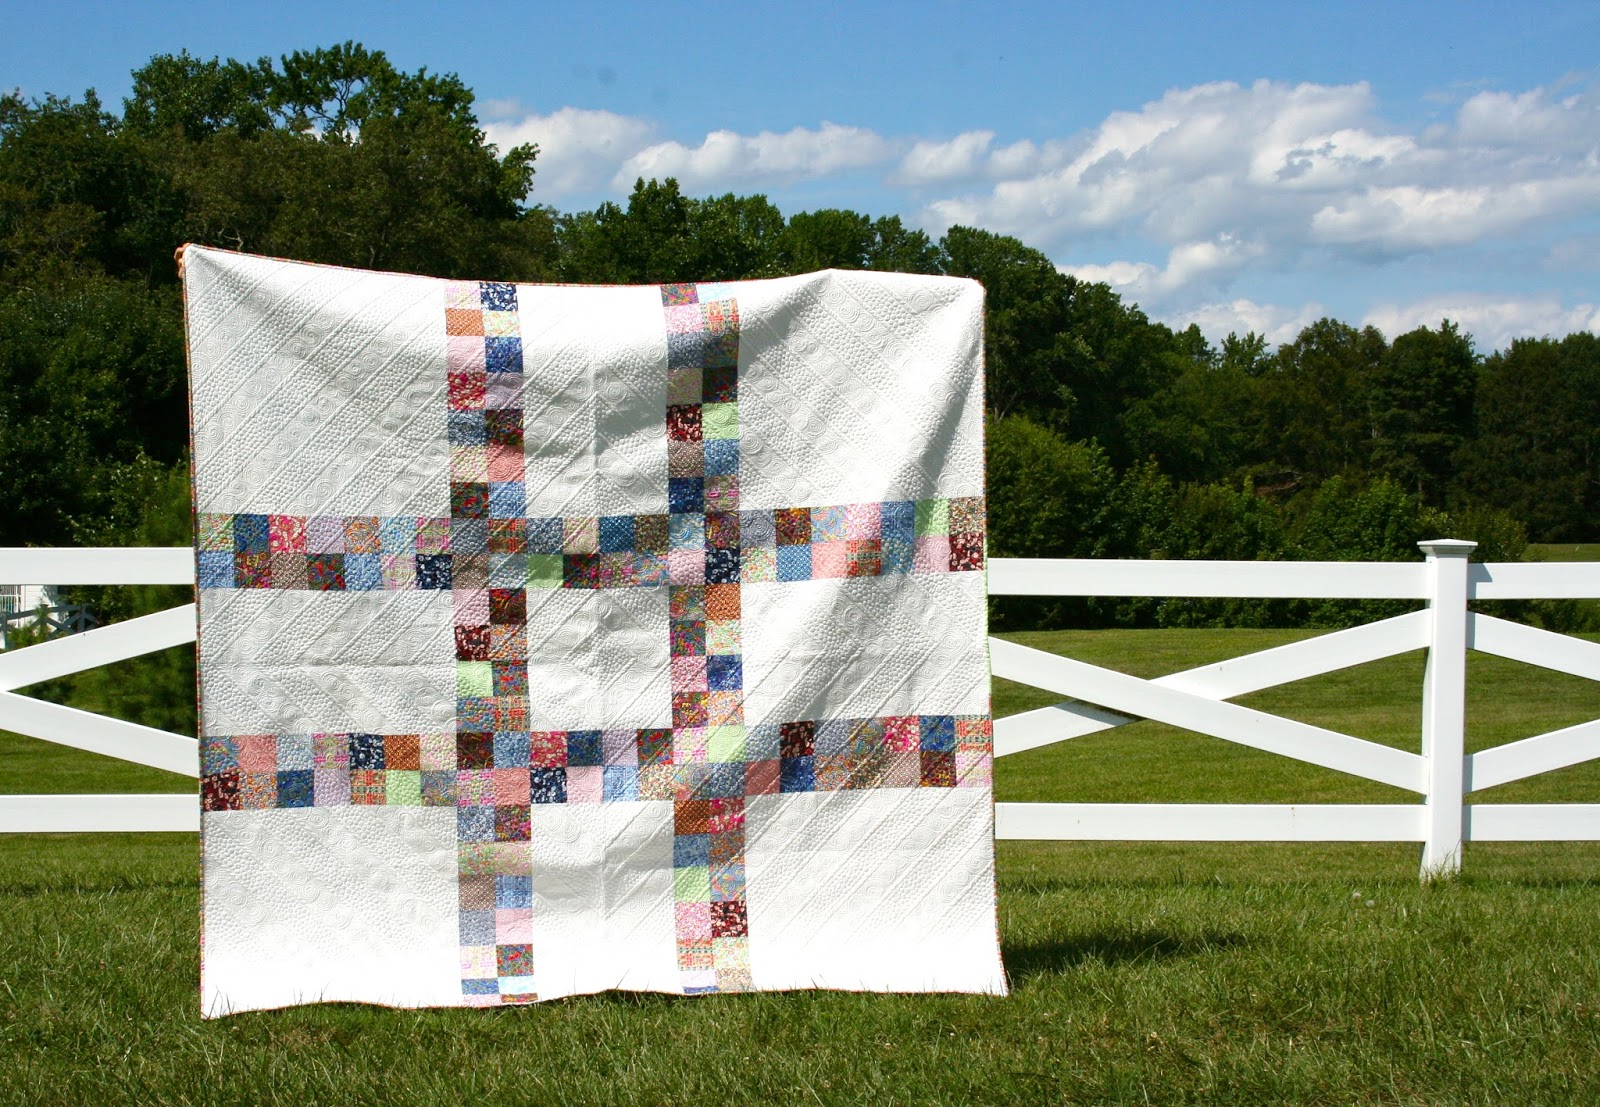
Okay, I can do this! They will want me to make a little bag or something and it will be fun...nope...a QUILT! A full sized honest to goodness quilt...ALL LIBERTY! OH...Ummmmm...hmmmm. A TUTORIAL and a quilt. WOW and yes please! The collection I am lucky enough to work with is the newest Liberty Lifestyle craft fabric Stile. The LOVEtag Tutorial can be found on the Liberty Lifestyle Blog. The LOVEtag is a simple patchwork that any level of sewer can try. This is the perfect beginner project! When you are visiting the Liberty blog, check out the other great tutorials to try, like the Dresden Pouf from Holly DeGroot .
The LOVEtag is a HUGE hashtag, according to Thomas, a sexy hashtag,lol! I love it, I love the quilting ( Lisa was AMAZINGLY kind and lightening fast). The quilt top was made in two and a half days, we were leaving on vacation and I was up at 4 am finishing it and piecing the back together to have it in the mail to Lisa that Friday morning since she was moving and had an insane schedule too.
This is the first quilt I have ever handbound! It took me forever but I did it. I had been having issues with smaller projects with needles bending during binding. It was not fun and ended up really hurting my fingers. On my visit to Kelly Ann's Quilting I asked her for recommendations and she was like an angel...the perfect hand binding needles...BOHN! Small sturdy and perfect for the job. I was able to do the entire 88x88 quilt with no pain or bending. In fact, I think I could use the same needle for another quilt!
I am pretty happy with the binding and now I have the right tool I will get more practice!
When the binding was completed I needed to get photos. This was going to be a challenge, lots of rain and no tall people...time to construct!
Katy and I gathered some tools. There is a hammer and some vice grips in there too ;o)
and made a line across our play structure. I am pretty sure our neighbors think we are crazy by now!
Too many trees and not the right lighting...sigh
Later that day I decided to try again in my favorite spot where the sun is always shining and the kids can RUN!
I still had an issue with how to hold the quilt up since the little man is no where near the right size. Lo and behold a neighbor on a golf cart came through while we were there! I flagged her down and asked if she wouldn't mind helping a crazy quilt lady out. I handed Adam the camera...and I am really proud his eye was on getting the quilt in the frame,lol!
So, after a bunch of words and stuff, here are the photos I was able to take.
The quilting is exquisite. The quilt master Lisa Sipes did her magic on this one. She used Aurifil 50 wt in white and lots of it! I cannot even remember how many thousands of yds she told me she went through. She made the Aurifil look like it is dancing on the fabric...SO AWESOME! The batting I used was Pellon. It was two layers of Natures Touch for a little extra pouf!
Then we had some fun!
and of course what photo session can be complete without a photo bomb!!!!!
I love this quilt more than a little :o)
Showing posts with label Liberty of London. Show all posts
Wednesday, August 14, 2013
Saturday, May 11, 2013
Liberty of London Cathedral Window Aeroplane Bag for Market!
First, THANK YOU to everyone that came and entered for the Sew Mama Sew Giveaway Day! I was BLOWN AWAY from all the comments given. I am working my way through reading them all ( yes, I do that) since I get such a kick out of you guys. My online peeps are the bestest!
I always look longingly at sewn bags and bag patterns. You see, I am NOT a bag sewer. I really am not. I can sew them but it can be difficult for me since I am one of those people that needs a LOT of hand holding ( read photographs) to be able to sew bags. I am not a great pattern reader, I am a visual girl. When Sara came up with the pattern for the Aeroplane Bag and I saw everyone making one, I thought...maybe baby ;o) I called Sara to ask how hard is it REALLY...in gogoterms? She knows I am not a bag sewer and promised I could do it and and not pull all my hair out and say adult words ( truth be told I did say a few but it had to do with the pleather not the pattern). I said okay and this is the bag I made for Market.
The gorgeous model is my fabulous daughter that agreed to help today without a complaint...I am sure I will be asked for something later today.
I made cathedral windows from my very small stash of Liberty of London (some from my stash and some that were gifted to me by the super sweet Katy from The Littlest Thistle) and had been thinking they would be good for a bag someday. I have a lot of these "someday" projects,lol! I used Essex Linen for the complimentary exterior and interior fabrics and pleather for the straps and bottom of the bag.
If you are afraid of making cathedral windows, don't be! They are easy and beautiful. I made a Cathedral Window Pincushion Tutorial awhile back so you can try just one. I promise you will change your mind about these beauties or at least have a really cute pincushion ;o)
A quick note on the pleather. It is not as forgiving as fabric, you sew through it and the needle holes STAY! That being said, it is easy to work with and you can use Pellon Shape Flex with it. You need to have a press cloth and no water. Your iron CANNOT TOUCH the pleather! It will ruin your pleather and make a huge mess on the iron. To me it was worth the little extra effort and care.
To sew the pleather, I used a leather needle and Aurifil 40wt thread and love the results. The 40wt is a bit thicker than the 50wt I usually use and you could probably even go with the 28wt and have amazing results.
The flipside is a cathedral window exterior pocket!
I used a vintage zipper in this cool green that Lindsay provided! Thanks Lindsay!
The interior is a Liberty of London scarf I bought from Target a couple of years ago and have just stashed until that perfect project came along.
If you are going to Market next week ( OMG!!!!! IT IS THIS COMING UP WEEK!!!!!) Look for my bag and say hello!
I really LOVE cathedral windows!
and hint hint...there may be a Sew Sweetness pattern giveaway coming up this week if I can get may act together before I get on the plane Thursday ;o)
Monday, March 11, 2013
Liberty of London pincushion and Bernina attachment praise!
Do you have one of these gray things on your machine and wonder WTH is THAT and why does it POP off all the time?
Jump back to last week, before the snow. I was thinking I wanted to do more practice with free motion quilting and challenge myself to more designs, get more comfortable with the feel and do a real quilt. I asked some of my quilty friends ( I love them) and Teri Lucas suggested a presser foot that I do not have. I popped into my local quilt shop Quilt and Sew and talked to Kiki and she showed me what they had available. They did not have the foot I was searching for but they did order it!!! The other suggestion was this attachment made for the Bernina. I already have two sets of glasses and was skeptical that this would make a difference, I was WRONG!
That thing is the cover is for this attachment!
The set comes with three different magnification lenses, an adapter and the big gray circle is for hand held use.
It helps SO MUCH!
I have a very very very small stash of Liberty of London charms. I bought some a couple of years ago and then Katy from The Littlest Thistle sent me a bag that she made for me with some more inside last year , AWESOME GIFT!
I wanted to try the new attachment out and decided to make a super cute small New York Beauty pincushion for someone special. This was the perfect way to practice since I needed to use 1/8 in seams on this tiny beauty. Here is how much clearer it made sewing for me!
I think it turned out PERFECT!
The back is not so perfect but that is because I needed to stuff it a little bit more. I did the paper piecing with Aurifil 50wt and the topstitching with a beautiful 28wt. All the Liberty of London are the yummy lawn fabrics. I did add a some Pellon Shape -Flex to the back of the top for lots of pin use without damaging the lawn. Shape flex is so light that the feel of the fabric that you are fusing it to remains the same but is gives it some OOMPH! I will say it again...I LOVE me some MAGIC IN THE MIDDLE!!!!!
I am very happy with my purchase, I love my Bernina! I hope that my friend will enjoy her pincushion and I look forward to getting my new foot and exploring into the world of free motion quilting with a dhm.
Thursday, October 25, 2012
Wonky Shattered Window Cathedral Block {tutorial}
My week...my turn to share my fun block!!!!!
So happy to be here and many thanks and a shout out to Bree at My Crafty Crap, my Magic in the Middle friends at Pellon, and the gang at Free Quilt Patterns for organizing this fantabulous sew along!!!! You are some kinda wonderful!!!!!
To download a pdf version of this pattern please visit Pellon Projects
Y'all are going to look at this tutroial and say "WAIT ONE COTTON PICKIN MINUTE", we've seen this before!" I simply used the first part of my cathedral window pincushion to save me some time and photo shots :o)
I like to think of this block as a new modern twist on an old lovely favorite. This block is SO EASY to do since it is the exact SAME as the traditional window it is just folded differently...you will see :o)
Draw a line and sew over the line
Line up the other two (top and bottom) draw a line and sew
Hand stitch the the inner centers, just a couple of stitches will do!
This is where the "Magic in the Middle" ( I giggle every time I say it) comes in to play
Cut your pieces out for each inner square and attach the wonder under to the back side of the fabric, peel the backing and then iron on to the craft fuse ( or batting and you need to use two pieces of Wonder Under when using batting since batting is not fuseable)
Place in the center and use you iron to fuse the wonder under to the center of the block
Take your point
and fold it at an angle, it will be wonky, not perfect! go around the block folding your angles
Sew the angles into place
This is how the back looks...I rather think is is SUPER COOL!
Add your solid 1.25 in border, then play with your scrappy 1.5 in pieces then attach and your block is COMPLETED!!!!!
Hope you have as much fun creating this block as I did!!!! I
p.s. just in case black is not something for you I did one white one little white window just so you could see...
So happy to be here and many thanks and a shout out to Bree at My Crafty Crap, my Magic in the Middle friends at Pellon, and the gang at Free Quilt Patterns for organizing this fantabulous sew along!!!! You are some kinda wonderful!!!!!
To download a pdf version of this pattern please visit Pellon Projects
Y'all are going to look at this tutroial and say "WAIT ONE COTTON PICKIN MINUTE", we've seen this before!" I simply used the first part of my cathedral window pincushion to save me some time and photo shots :o)
I like to think of this block as a new modern twist on an old lovely favorite. This block is SO EASY to do since it is the exact SAME as the traditional window it is just folded differently...you will see :o)
A new modern twist on a beautiful classic.
This is a super easy and fun wonky funky shattered glass window. The block measures a 12.5in unfinished block. By using the traditional folding method that most of us are familiar with, it is an easy way to make a new favorite with very little extra effort. The lines are edgy and the colors bright to give the block a stained glass look. This block can be made without the border as a regular Cathedral window quilt and has a very different looking back compared to the traditional quilt. By using Pellon wonder under with craft fuse, it makes a great home dec project by giving the extra crispness to the fabric. Using Pellon wonder under and Legacy batting will give a softer finish for a quilt. Either way, it is a great project and I am very thrilled to be invited to play!
Fabric Requirements:
4 10.5in sq of background fabric
4 4.25in sq of inner window fabric ( I used Liberty of London Bloomsbury Gardens)
2 1.25inx9in strips of solid
2 1.5x 10.75strips of solid
Scrappy strips are 1.5 x of various lengths to sew and trim as final border
Materials Needed:
4 4.25in sq Pellon Wonder Under
4 4.25in sq Pellon Craft Fuse or Pellon Legacy Batting
Thread (I use Aurifil 50wt)
Sewing machine
poster board or file folder for easy measurement
hand sewing needle
Cutting:
Cut the fabrics and interfacing to the sizes mentioned above
Assembly:
Cut your solid square 10.5 inches
Cut your template, I used a folder I found in the filing drawer, to 9 inches
Cathedral windows are mostly folding and ironing. Fold the corner over the edge of the template and iron into place. Then repeat on the other three sides.
Next fold the edges down and press. Repeat on the other three sides and you will have...
This!!!!! Woo Hoo!!!!
Take the template out at this point
Fold your square in half and press
This is what it looks like if you fold one side back
Fold the opposite way and press again. When you open your square it will look like this
Time for more folding. Fold the outer corners in and press
It will look like this when all four have been pressed
Now do it all again. Fold each of the corners in and press
Done with the folding/ ironing part!!!! Make four more of these folded babies!
This is where the tutorial changes including the color
Line the edges up
Draw a line and sew over the line
Line up the other two (top and bottom) draw a line and sew
Hand stitch the the inner centers, just a couple of stitches will do!
This is where the "Magic in the Middle" ( I giggle every time I say it) comes in to play
Cut your pieces out for each inner square and attach the wonder under to the back side of the fabric, peel the backing and then iron on to the craft fuse ( or batting and you need to use two pieces of Wonder Under when using batting since batting is not fuseable)
Place in the center and use you iron to fuse the wonder under to the center of the block
Take your point
and fold it at an angle, it will be wonky, not perfect! go around the block folding your angles
Sew the angles into place
This is how the back looks...I rather think is is SUPER COOL!
Add your solid 1.25 in border, then play with your scrappy 1.5 in pieces then attach and your block is COMPLETED!!!!!
Hope you have as much fun creating this block as I did!!!! I
Make sure to share your windows in the flickr group!!!!!
p.s. just in case black is not something for you I did one white one little white window just so you could see...
Subscribe to:
Posts (Atom)