First I have to say thank you to Sara! Thank you Sara for hosting another fun and awesome sew along/blog hop for Christmas and a huge thanks to all the bloggers that put in their time and effort for some really fabulous blocks!!!!
Mine is the last block for the 12 Days of Christmas Quilt a Long. I hope you enjoy making it :o)
I decided to do the peppermint candy. My great grandmother Bubba, her given name was Elvie, would always have hard candy at her bedside. The kids would go and sit with her, play Hi Ho Cherry-O, eat hard candy and ask her to take her false teeth out. This was before cable and when she did it was a great thrill!
Christmas I was allowed to spend a bit of extra time with my Bubba at her bedside with her loving smile, kind words,and hard candy so here is my Christmas candy peppermint block...

If you have Go! Baby, these are the inner quarter circles of the drunkard path, if not

Here is an easy way to make them
4in square piece of paper

Mark 3 inches up and 3 inches over

find something in your house that has a circular side big enough to connect the two marks, I used a cute little planter I bought at Lowe's on clearance!

It will be close to perfect ;o)

I used a rotary cutter ( for paper only of course) to cut it out, and there is your quarter circle!!!!

Match up one print and one solid and sew together

When you have four completed, they should look like this

Line them up

and sew

After they are together ( I changed colors to keep you awake ;o), Cut down the center both ways

You will end up with these cute guys!

At this point make sure you have the right combo of print/solid

Sew the sides of two quarters together to make half circles

Line them up as best you can and sew to make a whole

Then iron that sucker flat!

For the wrapper ends, you will need two more of the quarter circles in white

On your ironing board fold one side in
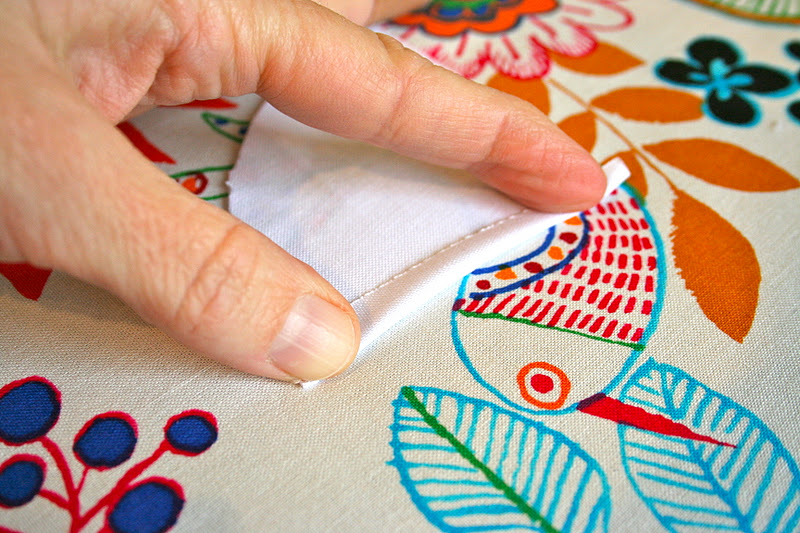
Press and repeat on the other side

Fold each side in again and press

The before and after

Stitch down the sides that you just pressed to secure them

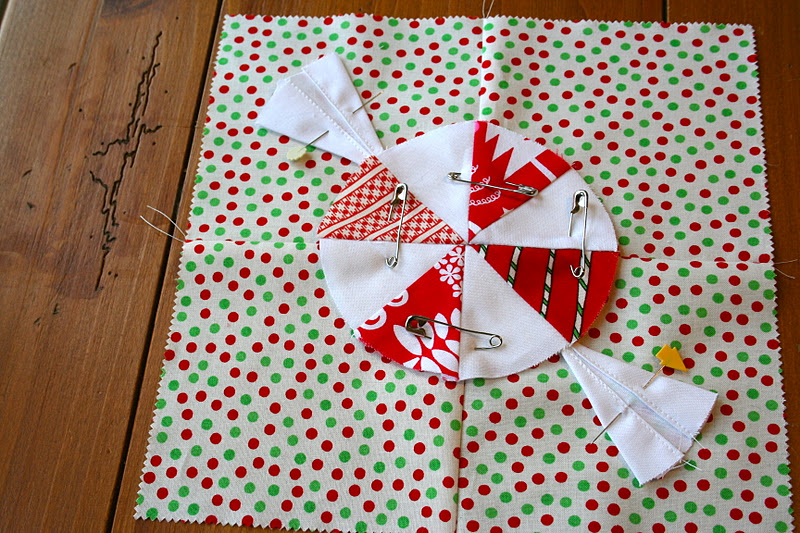
I used 5in charms for my backing only because I did not have enough of this fabric and this is what I wanted to use, you can just use a 10 inch square if you have something you like :o)


Time to put this together! You can either lay it on an angle or

straight, I prefer the angle

To give it a little more 3-d pow, I used a bit of batting behind the candy ( thank you Jeff for the idea! )

I used a little batting spray and then pinned it down
Using a blanket stitch I appliqued the candy

Then the wrapper

I finished off by stitching the wedges

The final step was adding 2.5 in white sashing around the block. It is a 13 in block so you can trim it down to what you need.
YUM! Peppermint candy!!!!


Thank you so very much for stopping by :o)
Linked to Sew and Tell Friday

and Fabric Tuesday

Kim
No comments:
Post a Comment