Showing posts with label free downloads. Show all posts

Wednesday, April 24, 2013

simple celebrations: hello kitty party + printables


We kinda have a crush on Hello Kitty around here.

Ella turned seven this month, and at the last minute decided she wanted a "friends" party with a Hello Kitty theme. She must have caught me on a good day, because I gave the okay. Not one to usually do something like this so late in the game, I figured I could throw something together quickly if I kept things super simple.

Am I sharing the printables? Well, of course.

Hello Kitty fill-able invitation (add your own details using Photoshop or Photoshop Elements).

So here's the rundown of the festivities, starting at the top left.  

1. My version of an ice cream cake went together in about 15 minutes (with Tayler's help).
2. I put together a simple game on the trampoline. The girls jumped around while Lynn threw balls over the net. If a ball touched anyone, they went out. Last girl standing was the winner. The game lasted forever because they kept wanting to play.  
3. I used my balloon flowers again, this time creating them in colors to match Kitty's flower. Actually, my daughter-in-law Tayler, made them all! She'll be making them again for Piper's first birthday soon. 

4. For a craft project, I planned to have each of the girls design their own pin/button. It was a huge hit and they each made multiples. My friend Jen, just bought a button making machine to use at Girls' Camp and for other occasions and loaned it to me. Thanks, Jen!  
5. I gave Ella a budget for the goodie bags and she chose the items she wanted (all from Target.) I also designed and made an HK button for each of the girls and my daughter Kate, found pink and orange mini buckets to package everything in. Thanks, Kate!
6. The silly birthday girl in her Hello Kitty dress. Kate and I found matching ones for Ella and my granddaughter Madi, at Old Navy for about $7 each. 
7. Our granddaughter Piper, decided that hangin' with her Poppa was much more fun than those noisy, cray-cray girls. :) Check out that one little tooth--so darling!
8. The aftermath.


I created this 16 x 20 Hello Kitty welcome poster for the front door. It's only $6 to print at Costco or Walmart and Ella now has it on her bedroom door.


 Hello Kitty printable for 1 1/4" buttons
2" Hello Kitty toppers or tags

I did learn a few things raising my bigs, one being that the the simple parties and celebrations really are the most memorable--for everyone. I also figured out that my expectations were always far greater than my little ones. This little party is proof. I was able to put it together in just a few days and for about $60 total. Ella loved it and the girls had a delightful time. How do I know? They didn't want to leave.:)

Happy Birthday, Ella Bella! Big loves.

P.S. Send me photos if you use these printables for your own Hello Kitty themed party. I want to see!

Also shared at:
Chic on a Shoestring

Wednesday, March 13, 2013

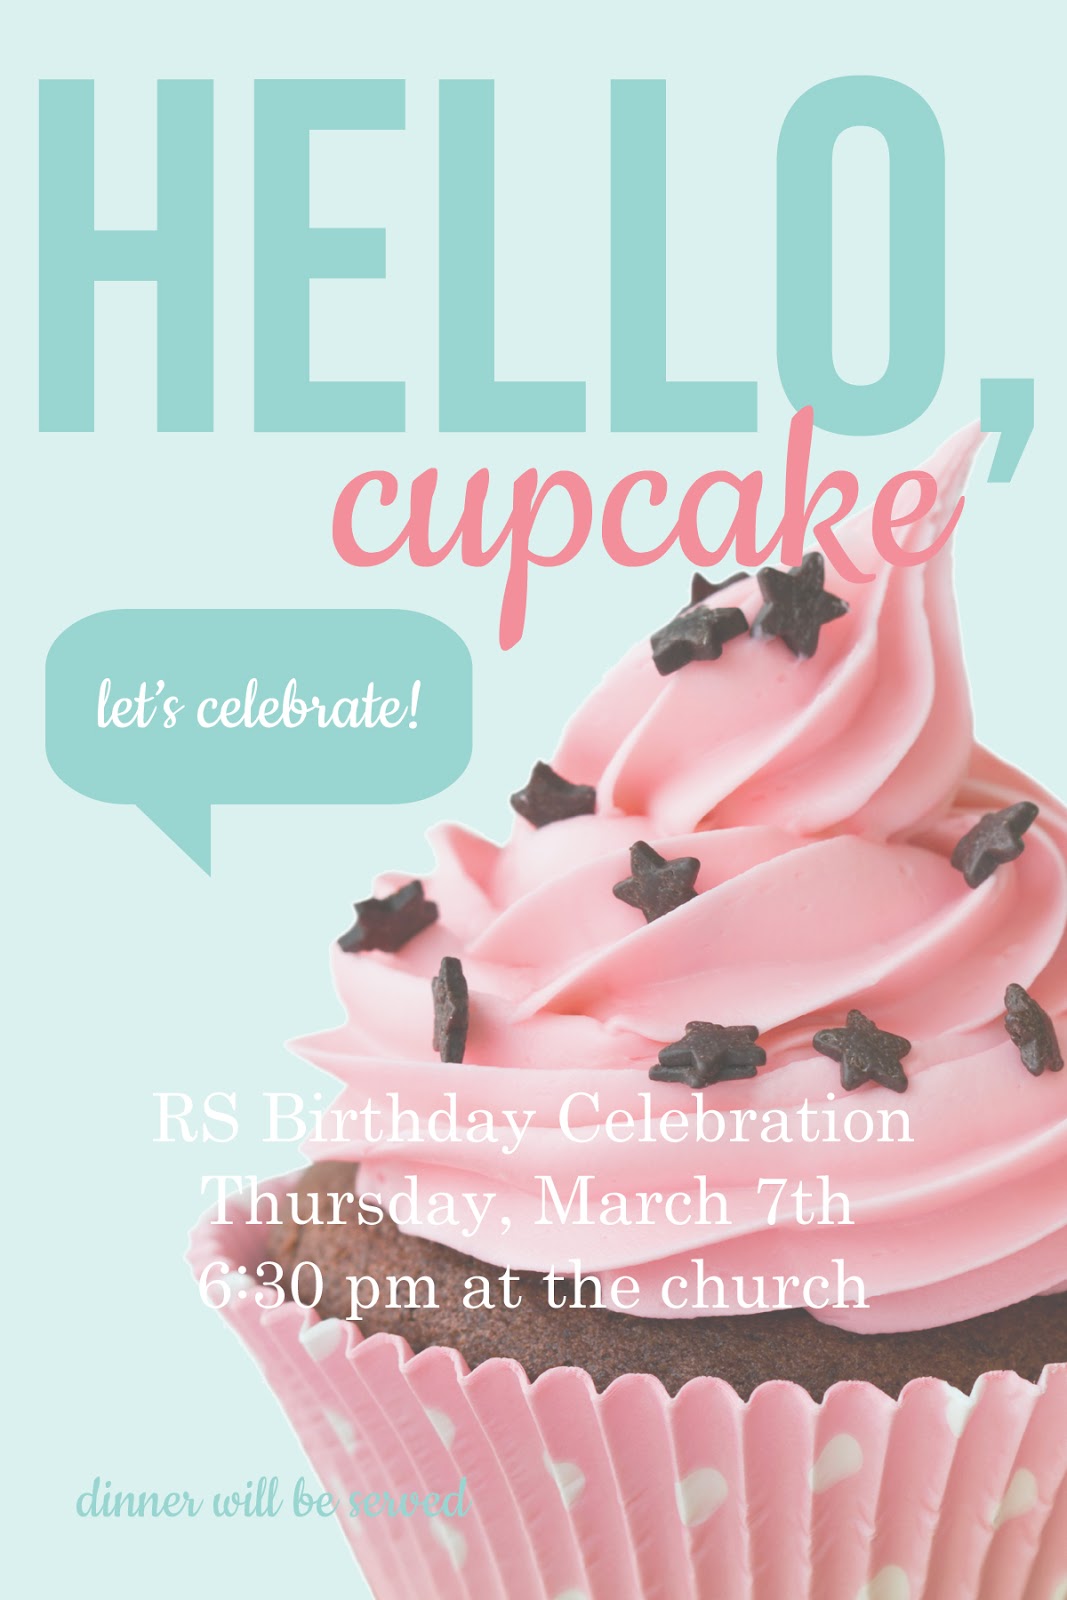
RS birthday celebration 2013


Our annual Relief Society birthday celebration was last week and I would chock it up as a great success. Our theme was "Small and Simple Things."

I have to admit, this are my favorite invitation I've created to date. I feel like I'm coming into my own style and loving it. :)

I've always been one to take a great idea and tweak it to fit my needs or make it my own. I've realized that's not the case with everyone. So many of you contact me wanting to recreate what we've done for our Relief Society meetings, and I think that's great! I'm flattered, actually. So from now on, I'll share as much as I can. :)


Our decor was super simple. We've had a very, very long winter here in Utah, so we wanted something that shouted spring. These balloon flowers are bright, cheery and large enough to not get lost in a gigantic cultural hall. They're also easy to make. I love the colors Tracy chose--pink, orange, and teal. We strung them across the cultural hall on fishing line. (Note: Tracy used 9" balloons since they were the only ones available. If we had to do it over, we would have blown up the flower centers a little larger to hide the tied together mess better.)

We ended up getting triple duty from the balloons. My friend Crystal, told me her daughter Abby was having a birthday party two days after the social, and that the balloons were the same colors as the invite and decorations. I told her to take them when we were done. She was thrilled. Crystal then took them to Tracy's home, who used them for her daughter's party the next day. Love it!

The streamers were cool too. Tracy made them from plastic table cloths she cut it strips, then pulled on the edges to "ruffle" them. The cost of decor for the night ended up being minimal.

I had these lanterns from Patrick and Ashlee's wedding last year. They lined the walkway to the reception center. I just added a simple pink sheer ribbon bow and set them in the center of the tables.


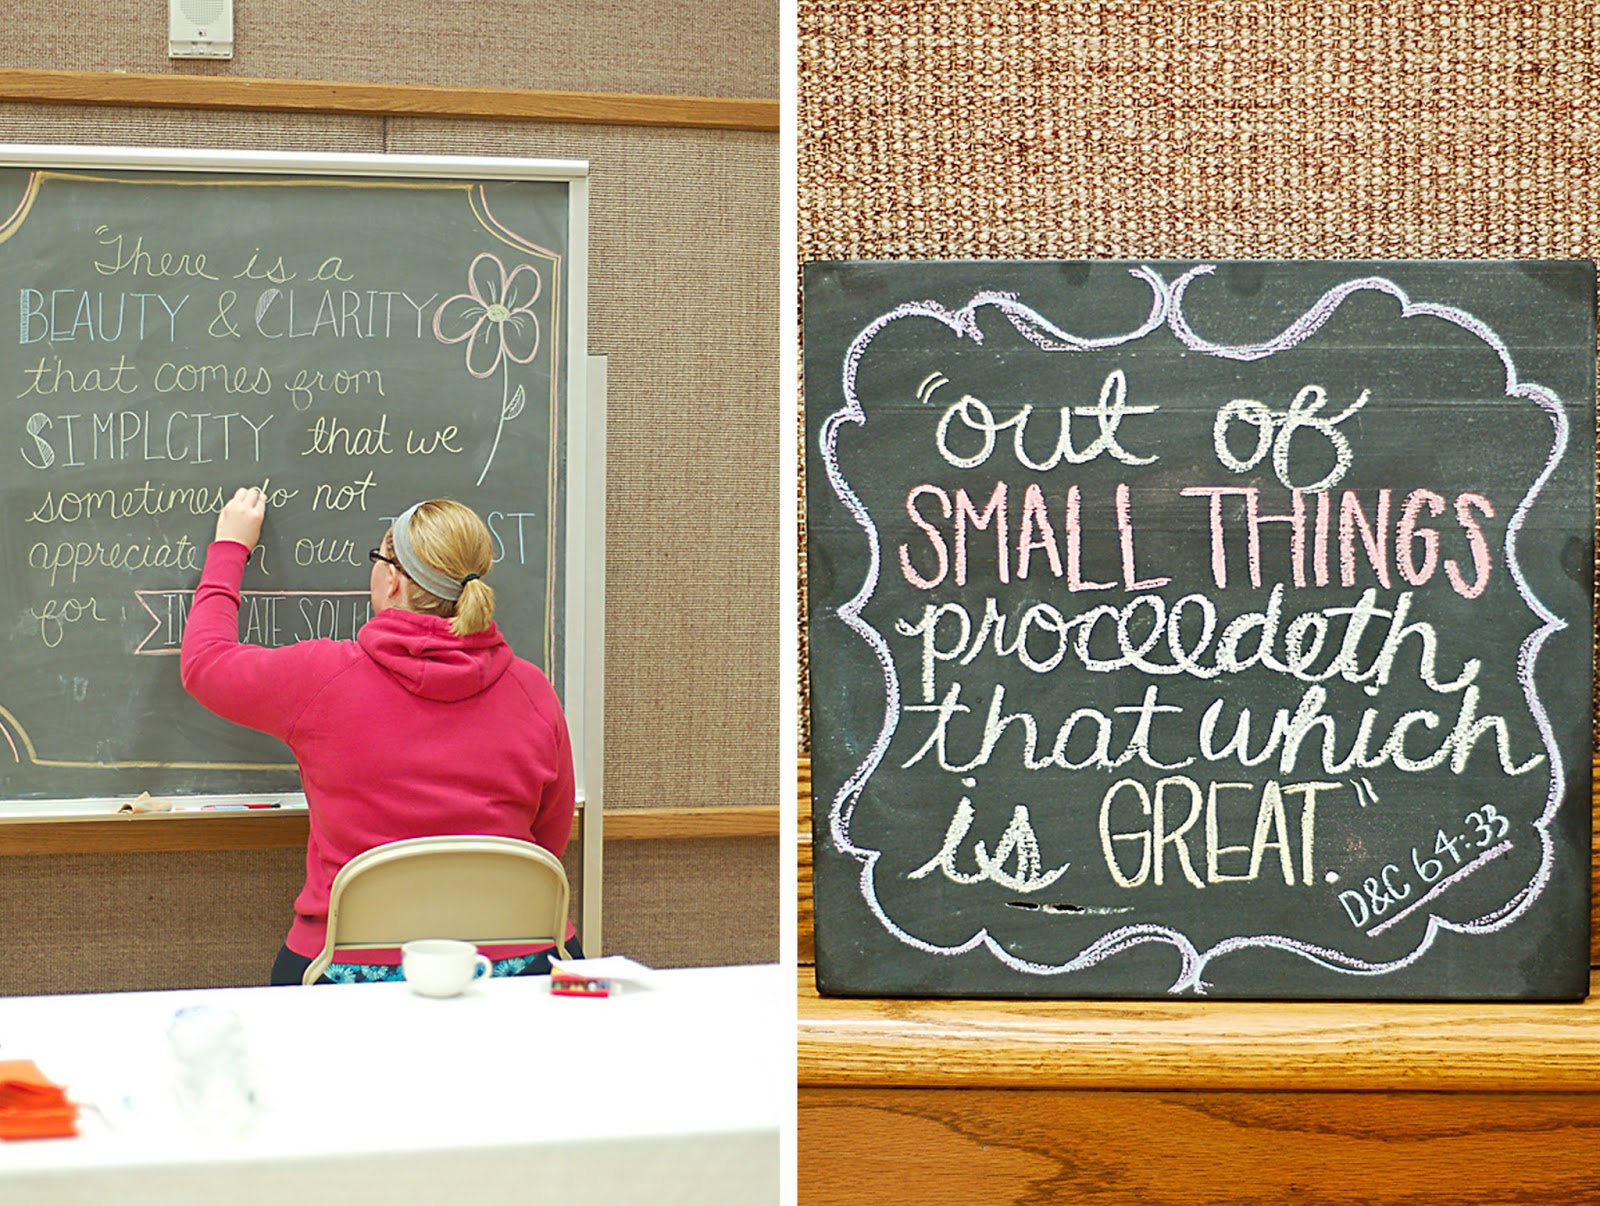
I asked Erin Winters to create some chalk art for us. It was the perfect finishing touch to our decor. She chose the perfect quote and scripture for our theme. 

Here's the quote she used:
"There is a beauty and clarity that comes from simplicity that we sometimes do not appreciate in our thirst for intricate solutions." -Dieter F. Uchtdorf
I love it.

And I love President Uchtdorf. Seriously, who doesn't? My daughter-in-law Ashlee, is a fantastic hair stylist. (I'm not just saying that because we're related. ;)) She told me the first time she met President Uchtdorf, she kept thinking, "He has the greatest hair!" So the first time Lynn went to Ashlee to get his hair done cut (sorry, hon), he told her, "I want President Uchtdorf hair."


For our dinner, the presidency made these scrumptious ham and cheese poppy seed sliders. They were a hit. Marci bought rolls from a local bakery (Shirley's). Just a personal note, I'm not a fan of mayo, so if I were to make these for my family, I think they would be just as good if I left it off. What do you think?


For the rest of the meal, they had the sisters sign up to bring a favorite salad or dessert.


As we finished up dinner, Gail Tilley, our Stake RS President, gave a great message and led a discussion centering on our theme. She's hilarious and we all love her so much.


I chose this quote--one of my absolute favorites--to go along with our theme. I gave a 4x6 print to each of the sisters who attended the celebration as a little swag. Once again I have to give credit to Bobbi for this quote layout. I used her same quote for last year's RS celebration, after seeing it on Pinterest and tweaked it just a little to fit our theme. Now I'm using the layout again. Thanks again, Bobbi! (*Remember to have the auto enhance turned OFF when you print these or you will get a very funky color.)


We also included service in our celebration. Marci (our RS President), suggested care packages for the missionaries serving from our ward. We loved the idea. Because Patti has a missionary son out right now, I delegated that task to her to organize. 

Patti announced our project and sent out a list to all the sisters of suggestions for items we could include in the packages. We brought them the night of the celebration. Here's the list of suggestions:
  • ties
  • treats and/or snacks
  • mints
  • socks
  • photos of Christ or the temple to give away
  • CTR rings to give to kids
  • stamps
  • hair clips or ties
  • written story of your conversion
  • your written testimony

Anything else you'd add? We also added a copy of the David A. Bednar quote from the meeting. Patti also had note cards so we could jot a quick note of encouragement and love to those serving. 


And of course there was lots and lots for socializing, something we're all very good at. :)

We accomplished our goals--socialize, service, and bringing the spirit to our meeting. I'd love to have you share any details of your favorite RS meetings.

Resources:
Hello, cupcake invite psd. (find someone in your ward with Photoshop Elements and have them add your information.
Hello, cupcake invite jpg. (Use a different program to add your information.)
balloon flower tutorial
ruffled tablecloth streamers tutorial
ham and cheese poppy seed sliders recipe
David A. Bednar quote

Also shared at these fabulous blogs:
Whipperberry
Chic on a Shoestring 

Friday, January 18, 2013

valentine's printable: sharing the love

digital papers and clip art from Cocoa Mint

Remember these darling matchbook valentines I made for Madi and Ella last year? I still love them. Apparently Ella Bella does too. When she saw them on the computer, she said she wants to use them again this year, only change the photo to a more current one. Is that allowed? Sure would be simple. :)


I changed them up a bit, so I could share with my friends--yes, that's you! Instead of a photo, your sweet girlies can just fill in the blanks. If you simply must add a photo and have Photoshop Elements, drop me a quick e-mail and I'll send you the psd. file.

Valentine's Matchbooks

xox

Shared at: Whipperberry
The 36th AVENUE
Chic on a Shoestring Decorating

Tuesday, October 23, 2012

free printable: countdown fill-able frame


The most popular fill-able frame print from our recent Super Saturday was the "days until" countdown. I had many attendees order them by the dozen, with the intent of using them for Christmas gifts. Such a fun and simple idea--just add a frame + dry erase marker.


The inspiration for my design came from this countdown on eighteen 25. I love the number background print they used.


For my family, I printed one of every color for different occasions and keep them all in the frame together.

This FREE download is available to those who subscribe to All Things Simple via e-mail or rss feed, and/or follow me on my soon-to-be All Things Simple Facebook page. (Thank you so much!)


blue version HERE
green version HERE


happy red version HERE
happy orange version HERE


orange version HERE
red version here HERE

There are two different red and orange versions because I was playing around with the colors and decided to include them all. You can choose between a brighter version or a more muted one, depending on your taste or home decor.

PRINTING TIPS:

1. Try Different Processors.
Your colors will come out very different depending on which photo processor you use. I liked the green and blue prints from Costco, but the red and orange ones were very dark (too much brown) and a bit dingy. Even though they were much more expensive, I had those the red and orange ones printed at my local Walmart. They have a machine that uses powder rather than wet chemicals to process photos. I love them every time. Each Walmart has different machines though, so ask.

2. Color Test
If I'm printing an 8x10 or larger or a bulk quantity of prints, I always ask for a color test. Simply send through a 4x6 portion of you print and don't worry about what gets chopped. My local Walmart does this for free since I have so many prints made there.

3. Turn Auto Enhance OFF
I know I say it every time, but leaving the Auto Enhance option on will change the color of your print--and it won't be pretty. At Costco, you can turn it off permanently in your account settings--love that. At Walmart, even if you change it on-line, it doesn't stay on. I have to physically go there to order my prints--that stinks.

Enjoy!

I also shared this printable here:

The 36th AVENUE

Friday, October 5, 2012

arcadia california/president foster missionaries

Our oldest son, Patrick, served a two year mission for our church in South Carolina.


This photo was taken right before he left. He's so young. He was a cocky jock who knew pretty much everything. I still had a hard time letting him go. :)

Patrick LOVED his mission--the people, teaching the gospel, the opportunities for service and the experiences. And he loved and adored his Mission President, Leroy Barrett. Patrick served as Assistant to the President for a period of time, so they worked very closely together.

When Patrick came home, not only was his testimony of the gospel of Jesus Christ was strengthened, but he had learned many valuable life lessons taught both by experience and President and Sister Barrett.


My friend, Delayne, is one of my favorite people in the world. She's uplifting and happy and fun and crazy, and she has been a great comfort to me in some very difficult times. Love, love, love her.

She asked if I'd do a quick word art of "Fosterisms" she could present to her Mission President at a mission reunion tonight. Just the way she still talks about President Foster, it's very obvious he had a great impact on her life. As I worked on the word art, it was also very apparent that she lives the lessons he taught. That's pretty cool.

Delayne wanted the other reunion-ers to have access to the word art and quotes, so I told her I'd put them on my blog. They are all available in both blue and green.

vision word art blue
vision word art green
character blue
character green
make it happen blue
make it happen green

Enjoy!

Sunday, September 30, 2012

awesome printable

I'm sharing my 5x7 "awesome" printable today.


It's another version of the fill-able frames we're doing for Super {Simple} Saturday 2012. This is Ella's favorite and the one she chose to be framed for her room.  

It's such a simple way to let someone know you appreciate them or give your littles--or bigs--positive reinforcement.


We love it when Ella willingly shares her "special" toys with Madi.

Click here to download. (*For personal use only please.)

Place the print in a frame and use a dry-erase marker on the glass to write in the details. You can wipe it off (no water needed) and use it over and over.

*Remember, when you have this printed, make sure the "auto enhance" is turned OFF, otherwise the colors will be very, very different and that would not be awesome.

Enjoy,
Kim

P.S. I'd love it if you'd leave a comment, letting me know who you're printing this for and one reason you think they're awesome. :)

Monday, September 10, 2012

we rock! + you rock printable

I've been consumed with Super Saturday projects and details lately, resulting in no posts for awhile. But I am super excited to share everything--soon.

Like many children, our Ella loves rocks. And they're all very special for different reasons. She has an extensive collection and can tell you exactly where each one came from. 


Last weekend, Ella created this family of rocks. There's me, her, Annabelle (Patrick and Ashlee's dog) Patrick (older bro), Ashlee (older bro's wife) and Dad.


Yep, she's the sparkly Princess one who's highlighted and covered up with a piece of toilet paper. The rest of us just kind of sit there being all boring and dull. I guess I know how we measure up. :)


Speaking of rocks, here's a little sneak peek at one of the projects for Super Saturday. (I know, I can't wait.) I created a series of 5x7 fill-able frame printables and this is one of my favorite. Place the print in a frame and use a dry-erase marker on the glass to write in the details. Just wipe it off (no water needed) and use it over and over.


Originally Ella wrote the message, but I smeared it when I was carrying it with a bunch of other stuff. It was so sweet in her 6 year old writing. Ella adores her older brother, but she also blames everything on him. "What is that smell?" It's Patrick. "Wow, this is a big mess!" Patrick did it, not me. "Why is there no chocolate left?" Patrick ate it. Of course he's never around when it happens. It's hilarious.

Patrick has special little dates with Ella where he'll pick her up and they'll go get a special treat, to breakfast, or somewhere fun. He really does rock as an older brother. :)

So I have an issue. Well many, but this one I'm willing to share. ;) Actually, it's more of a strong belief. I've seen the "I *heart* you because" printable on blogs and Pinterest, and I think it's darling. But, (here's the personal issue/strong belief part) I spent too many years telling and showing my children, I love you no matter what. We had a saying--"I love you and there's nothing you can do about it." Oh my, did my children test me to see if I really meant it! So...when I see, "I love you because you cleaned your room," I struggle. There. Now you know.


So I changed things up a bit.

Because you rock for stopping by--thanks so much!--here's the printable. (*For personal use only please.)

Remember, when you have this printed, make sure the "auto enhance" is turned OFF, otherwise the colors will be very, very different.

Let someone in your life know they rock.

P.S. I'd love if you'd leave a comment, letting me know who you're printing this for and one reason they rock. :)

I linked this project up here:

Lil\'Luna

The 36th AVENUE

Thursday, July 26, 2012

free printable: back to school

Have you shopped for school supplies yet?

paper--check.
pencils--check.
crayons--check.
chocolate--check.

What, no chocolate? It's an essential you know.

My brother and sister-in-law--who both teach fourth grade--asked me to design a wrapper for chocolate bars they could give their students at their teacher meet and greet. Here's what I came up with.


Fourth graders are at the age they like the "coolness factor" rather than cutesy, so I went for something that was still fun without being too grown-up. I designed these to fit around the 1.55 oz. Hershey bars. (The chocolate is great frozen and dipped in peanut butter by the way.) The bars are pretty inexpensive to buy in the full size packages and easy to find this time of year with it being "smores" season.

I asked Steve and Deanna if they would mind if I shared with the rest of my teacher friends. You could also have your child give one to their new teacher. Works both ways, you know. :) So here you go. The green and blue version is here, and the multi-colored version is here.

I'd recommend printing on a lightweight shiny paper as the colors will be more vibrant, but it still looked good on regular printer paper. Then just line up the front and adhere together on back with double stick tape. Super simple. I know I'm going to get asked, so the fonts I used are Sofia and  JF Ringmaster. Love them both.

Enjoy!

Kim

Tuesday, December 6, 2011

sweet moments and scripture advent download

My experience has been, that recognizing and being grateful for those sweet and simple moments that touch our hearts is what makes life most meaningful and memorable. You can't make them happen, they just do. And you smile, offer a little prayer of thanks, take a picture with your heart, and know. And then they happen even more often. That's why I love Christmas so much. It's filled to the brim with opportunities to find and cherish those little moments.


I purchased this Fisher-Price nativity collection for the girls this year.


They love it and play with it often.


Madi had it all to herself a couple of weeks ago and I watched her hold the baby Jesus in her little hands and just look at him. I wondered what she was thinking until she asked me, "Grandma, is this 'a child of God'?" It was one of those sweet little moments when you want so much to say just the right thing. I simply replied, "Yes, that is Jesus and he is a child of God, and so are you."


I know that each December as I unpack the Little People nativity, I'll remember that moment.


Last year Ella went with our friends the Lindleys, to a live nativity up the road in Alpine, Utah. She talked about it all year and really wanted to go again, so we added it to our activities advent list. We took both girls this past weekend. Ella felt so important being the "leader" and showing us how things worked and where to go. 

We walked up the hill with Roman soldiers on horses directing us that "all are to be counted." We walked through Bethlehem and saw live camels, llamas and donkeys. We met the three wise men who told us the significance of each of the gifts they gave to the infant Jesus. And we watched actors work with leather, metal and wool.

As we sipped hot cocoa, we walked to another barn where a quartet in the loft was playing Christmas music. I knew what was coming and the emotion began to surface. We were just outside the door and could hear a sweet newborn crying. I didn't even try to hold back the tears. The sight that welcomed us was so beautiful--Mary, Joseph and the newborn babe wrapped in swaddling clothes. It was so noisy outside, but in that humble little room in the corner of a barn, it was quiet, and everyone spoke in whispers.

I watched the sweet couple as they tried to comfort the crying baby. I could feel their anxiousness as their efforts, at first, were unsuccessful. And I realized, as first-time parents, Mary and Joseph would have had those same feelings. I took in the surroundings and felt humbled. It was a sweet moment witnessed and it brought the scripture account in the New Testament of the birth of our Savior to life.


I mentioned last year that one of the things I loved most about the Christmas season, was crawling into bed each night and reading a series of scriptures that followed of the life of Christ. I looked forward to that time and enjoyed feeling the Spirit as I read.

The list of scripture accounts is from a scripture advent our primary leaders handed out to each child to read with their family. It's a good one. I wanted my older children to have the same list, so I created a more "grown up" version just for them. (Truth be told, I also had a hard time reading the other versions--yes, this was the year for bi-focals and I love them!). If you'd like your own copy, download here. I know it's a little late, but you can easily catch up. (The original was found on Sugardoodle, taken from the December 2008 issue of the Friend magazine.)

I hope your Christmas season is filled with many sweet moments.

Wednesday, September 28, 2011

tutorial: halloween thumbprint tags

 This one's for Allison. She's a reader who e-mailed me and asked if I'd be willing to share my template for the Halloween thumbprint tags we made for Ella's preschool last year.


Remember these? I still love them. Here's the original post.

When I started blogging way back when, it was mainly for my family and friends and the Relief Society in my church ward. Because of Pinterest, that has changed. I'm getting mega hits each day and so many nice e-mails and sweet comments. It's so fun. Thanks so much everyone, it really makes me happy. Because I posted projects--but not many tutorials or downloads--I am very open to sharing information, templates, creating tutorials, etc. Just be patient with me. :)

Okay, back to the project.


Originally I had Ella stamp her thumbprint multiple times on white cardstock. Then she made them into jack-o-lanterns by adding stems and silly faces. (It kept her very busy.) I chose my favorite one, scanned it, added words around it in Photoshop Elements, and duplicated it.


You can still use this process in an editing program, or to make things simpler, I created a blank template for you to create your own tags. Your little goblins can stamp their thumbprints in each circle and create jack-o-lanterns. Each tag will be an original work of art. I chose a variety of generic wording to choose from.


Help your little one stamp their thumbprint with a cheery orange ink pad in the lower part of the circle (this will leave room for the hole and string for hanging). Then they can add stems and faces. It's getting close to bedtime, per the sad faces.


Use a 2" hole punch upside down to center the circles and punch.


I used a micro circle punch for the hole and crochet thread for hanging. I love crochet thread for so many things. It's a nice lightweight string, very inexpensive and one skein lasts forever.


Now help your little Picaso tie their tags to a special bag of treats.