A year or so ago, I was with three very experienced cardmakers and we were watching one of them do something very basic but in a way that was new to all of us - and the rest of us just shook our heads and said "why didn't I think of that"? That moment made me aware of the fact that we often get so focused on new tools and techniques that sometimes we overlook the basics. So here are my basics of glittering.
Here's the card...
First, I am at heart a clean and simple cardmaker - so easy is ALWAYS better. I almost never glitter small, detailed parts of the image. I typically glitter the entire image panel or, at most, a large portion of the image. This keeps it simple.
Second, get a large bottle of glitter (see recipe at bottom). Then dump your bottle into a flat, square Tupperware. I don't know about you, but I spent a lot of years carefully sprinking glitter onto my image, then tapping it off onto a scrap paper, then using that scrap paper to funnel the glitter back into the bottle. Putting it in a Tupperware makes it so much easier! My Tupperware stays full of glitter year round!
Third, pull out your create-a-sticker machine. I know many, many crafters have this sticker-making machine, but few of us actually use it. Mine is only ever used for glittering, but it's an inexpensive machine and so worth it for this process!
The steps are simple....
Put your image (or in this case, my patterned paper) through the Xyron UPSIDE-DOWN so the sticky ends up on the top surface.
Roll it through the machine and it comes out face-down on the paper. (This is terrible paper to demonstrate with because there is pattern on both sides. I am glittering the polka-dot pattern which is on the other side.)
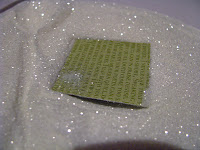
Peel it off and dump it in your Tupperware of glitter and you have a totally glittered square of paper!
I also glittered the ornament on the Cocoa image. Larger portions of an image are also quite easy to do using the same techniques. All you have to do is create a reverse mask.Put your masked image, face-down, through the Xyron.
Peel off the mask and dump the image into your Tupperware of glitter.
As with all basic techniques some of you have been doing this all along. Some of you may have even easier ways of doing it. But some of you just had a light bulb come on. I know that I did the first time that I saw glitter in a Tupperware!!
I hope you all can find time these last few busy holiday weeks to get good and glittery!!!
- Stamps: Sweet 'n Sassy A Cocoa Kind of Christmas
- Paper: Stampin' Up Melon Mambo dsp and CS, Lucky Limeade dsp and CS, Tempting Turquoise dsp
- Ink: copics
- Accessories: silver "pearls" from Michaels, Nestabilities Oval and Lacey Oval, Stampin' Up embossing folder, Creative Impressions snowflake brads, misc white grosgrain and silver cord, Martha Stewart Crystal Fine Glitter (4.5 oz. bottle - it's big!), Xyron 2.5" create-a-sticker machine
- Challenges:
Just Add Ink: (My apologies to the Just Add Ink ladies if you have to remove my link. JAI has a strict no advertising policy. I re-read their rules and it says you can't LINK to a product so I made sure not to link anything. But I did obviously mention a couple of product so I totally understand if you have to remove my card. However, I was so inspired by the colors and the silver balls in your photo that I definitely wanted to mention the challenge!)


No comments:
Post a Comment