Friday, September 30, 2011

ideas for general conference

I have been so cranky lately. I have a lot on my plate at the moment (though that will eventually pass, I know), Ella's transition into Kindergarten has not been as easy as we'd hoped, I'm being released from serving on the RS Board which I've loved, and I cleaned out the food storage room awhile back and am totally avoiding organizing that part of my life. Mostly, I think I just need some direction.


I've been reading Daughters in my Kingdom: The History and Work of Relief Society with the sisters in my ward. I'm having a hard time getting past the preface, because I keep re-reading parts. I know, that's good. I've been particularly pondering this quote by Belle S. Spafford:
"The average woman today, I believe, would do well to appraise her interests, evaluate the activities in which she is engaged, and then take steps to simplify her life, putting things of first importance first, placing emphasis where the rewards will be greatest and most enduring, and ridding herself of the less rewarding activities."
I think it's time to re-evaluate again. As with everything else in life, it's a process. I've felt a bit off balance lately. I thought I knew what I'd be doing next, but I was wrong. Which means there are most likely even greater blessings in store. I'm just not very good at waiting sometimes.

So I'm really looking forward to General Conference this weekend. I'm headin' in with some questions.


And because Miss Ella stays completely focused on each and every speaker all four sessions...ha! ha! ha! ha! ha! and ha! Yes, it's a rare photo.


What you don't see is this. Elles gets to eat those marshmallows when she gets a bingo and she LOVES marshmallows. I even caught her during the prayer very carefully placing those little bunnies on squares so no one would hear her moving. :) Her primary teacher brought her a little packet of goodies and this was part of it. It also had a notebook with the temple on it and a new pen. I can't remember the rest, but Ella loved it.


My friend, Jen, told me about the conference packets on SugarDoodle. They make one for each conference and they're great. Jen makes a conference binder for each of her kids and I thought it was such a great idea I did the same thing for E. The activities kept Elles busy for a long time. I love the First Presidency as toilet paper roll puppets, and even better with their "pets." I wonder if their wives print out these things and keep them in a scrapbook as part of their family history? I would if my husband showed up as an illustration--or toilet paper person. :)

Another thing Jen does with her kiddos is "conference cash." The kids can earn it by working hard, doing chores and  for good behavior before conference and by completing pages from their conference packets and binder during conference. Jen sets up a store--special goodies, dollar store toys, etc.--where her little consumers can spend their cash. They LOVE it!


I found this Conference Squares game on lds.org. I printed one out for Patrick too. He and Elles are very competitive, even though there's a 23 year age difference. Yep, it's true! :)


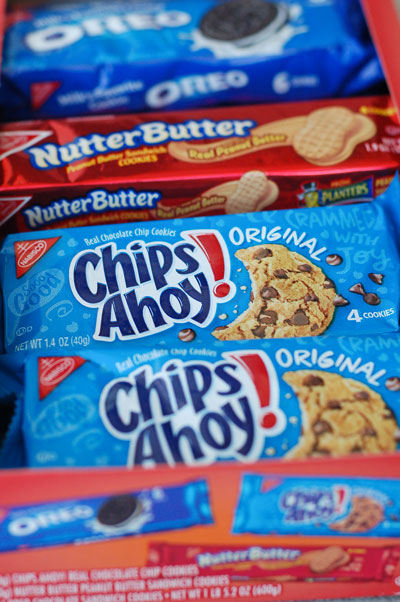
We also have special "conference cookies" during the afternoon sessions on Saturday and Sunday. No special recipe, completely store-bought. So what makes them special? I don't normally buy store-bought cookies. We prefer homemade any day. But Ella looks forward to them. This package pretty much covers the three of us: I like the Nutter Butters, Lynn loves Chips Ahoy!, and Ella prefers the Oreos. 

I used to diligently take notes during each conference address. I think it helped me focus better. Patrick once asked me why I had little hearts throughout my notes. I explained they were thoughts, feelings and inspiration that came to me during conference or scriptures I specifically wanted to ponder or read again. Knowing I'll soon have each address in print I now just jot down the inspiration so my hand doesn't get so tired. :) I also do this during Education Week and come away with pages of inspiration. It's the part I love most.

Lynn and Patrick look forward to the Priesthood Session of conference on Saturday evening. They go to dinner beforehand and Patrick's best friend and his father, along with our long-time friend and home teacher, Ron, join them. Ella and I have "girl time."

I love the simple things and traditions that make the weekend so enjoyable for all of us.

Have a great weekend.

A personal journal for my little guy

When we were in NC the kids had such a great time discovering everything! There were trees ( not like we do not have those in VA), fungus in aqua, orange and in all sizes, waterfalls galore, rocks and stones and loads of other things to boot.

Katy and her cousin Liz were collecting specimens of all sots of things on my grandparents property and pulled out the guide to figure them all out. I thought it would be great if they could have journals for the next time we are in the mountains to document what they found. 

Then I remembered how four year old boys sometimes forget whose journal is whose so I decided to let Adam help me make his own personal journal.


I had him write his name on a 2.5 inch scrap of Kona white and stitched over it a couple of times. It is his writing so he knows it is his and his alone :o)

Inspired by the tutorial on V and Co. and added a crayon pocket on the front since an explorer cannot be without something to write with out in nature!


The back

The inside flap


Crayons!!!!


So the next time we are here he will have a place to put treasures and notes to remember his adventure


Linking up to Sew and Tell Friday. Feel free to come and see the other great sew and tells there :o)
Kim :o)

Linking to Sew Modern Monday

I {heart} sketches (and JAI)

Thanks so much to Jen for posting a reminder that it is the last day of the month and time for a new sketch challenge.  I cannot believe I almost missed September because (1) I haven't missed a sketch yet this year and (2) I actually ordered stamps JUST for this challenge.

The sponsor this month is Skipping Stones Designs - a company out of South Dakota - my home state!!  I have wanted this set for some time so it was a great excuse to order.  You should have seen my happy dance when it came postmarked Rapid City, South Dakota - my home town!!

I needed some help with colors for this card.  I had actually decided I simply didn't have time to make any cards today - so whatever I made had to go quickly.  I scanned this week's challenges looking for something with Crumb Cake and Just Add Ink had it.  Unfortunately, it also included Calypso Coral which is at the top of my "problem" colors - it's so in-your-face, I have a terrible time including it.  I tried to mute it on this card by using white ink.


  • Stamps: Skipping Stones Heartsong
  • Paper: Stampin' Up Pool Party, Calypso, Crumb and white
  • Ink: Stampin' Up Pool, Calypso, Crumb and Papertrey White
  • Accessories: Cuttlebug embossing (on Crumb), Sizzix/Tim Holtz embossing (on Pool), Stampin 'Up Crumb Cake seam binding and Antique brads, Nestabilities circle and lacey circle

Thursday, September 29, 2011

OLW: Show and Tell with Janelle

Susan's One Layer Wednesday challenge is to CASE a card from Janelle's Show and Tell blog .

If you haven't been to Janelle's blog - be SURE to get there.  I sat down yesterday morning with my first cup of coffee and two hours later was still reading.  Besides sharing beautiful cards, Janelle shares her journey with brain cancer.  She is doing it with courage, grace, humor and incredible faith.  She was diagnosed August 1, just before her daughter's wedding, but instead of feeling sorry for herself - she is sharing her bald spot and her "selfishness" regarding pork sliders and the claustrophic mask she has to wear for treatment.  And, each day, she includes scripture that has inspired her.

I found many, many cards that I want to CASE - but I want to do them exactly as they are which have multiple layers.  The challenge is to do a One Layer card - so I settled on this card (which I also want to do exactly as is with the ribbon tags) - but for today I was inspired by the black and white with the brilliant splashes of color.  Plus this card had the additional advantage of getting one more set out of my over-flowing box-of-stamps-that-will-not-be-put-away-until-they-are-used!


I use my Nestabilities dies as a stencil to draw frames.  It was amazing for me when the lightbulb came on and I realized I had a fantastic source of squares and rectangles!!


Now...I want to include some technical blog chatter.  (Just skip to the bottom if you only want the card recipe!)

A number of blog readers are saying they suddenly can't comment on some blogs. I've had the problem, so let me share a few things that I found.  I haven't completely solved the problem at my end, so if anybody knows more than I do - maybe we can conquer blogger by working together!!

In August, I started getting the warning "Your current account does not have access to view this page" while I was simply trying to comment.  These are blogs that I have commented on in the past - so I couldn't figure out what was happening.

I found this entry in the Blogger Help forum.  It seems a lot of people started having this problem in August!
Of course, these computer advice articles are always written in a language that I haven't mastered - but I figured out two things:

1) The blogs that can't be commented on have an Embedded Comment Form (vs. a Pop-Up).  I double-checked the blogs that I was having problems with and none of them were pop-up.  At this point, I did change my blog to a Pop-Up comment window so others didn't have a problem with mine.  (In Blogger, go to Settings, Comments and you can select the type of comment form.)

2) When someone cannot comment, their computer is having a problem with "authentication and cookie-filtering".  I am definitely already out of my comfort zone - but I do know this is my problem because I also have problems with two on-line stores and I get a "cookie usage" problem.  It's just too coincidental that two things have "cookie" in their problem description!  (See if you can put things in the cart at All That Scraps and Crop Stop - if you get cookie usage problems - we are in the same boat!)

I did try the remedies selected in the article but it didn't solve things for me.  And I have tried the remedies that come up with those online stores (in Internet Explorer, select Tools, Internet Options, Security and change your security level).  But...my security level is set at medium, which is the lowest mine will go.

Personally, I didn't research any further.  I do most of my blog commenting on my iPad which doesn't have the problem.  And I can always order from those stores on my iPad so I have an easy work around.

If anybody has dealt with this - or is inspired by my description to research further - let me know what you find out. 

Hope this helps someone!

  • Stamps: Stampin' Up Printed Petals, Papertrey Signature Greetings
  • Paper: white
  • Ink: Stampin' Up markers in Pure Poppy, Daffodil, Limeade, Pacific and Orchid
  • Accessories: gems colored with copics, square nestabilities

celebrate: look who's three!


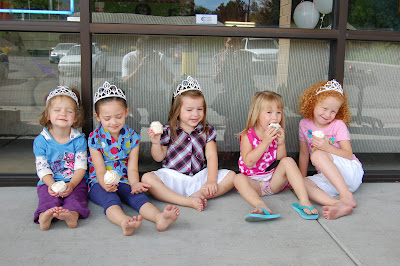
Our sweet little granddaughter, Madilyn, turned three last week. She loves to have her nails done, so Kate decided to give her a nail spa party. She made arrangements with the nail place she has her own nails done to have each of the party guests get a manicure and pedicure.


It was quite a simple party since someone else was doing most of the work. Kate brought balloons and made up gift bags for each of the girls. How darling are those bags? They were filled with little girl make-up, nail polish, jewelry and ring pops. Each also had a crown for the princesses to wear while they were being pampered. :)


One of the highlights was choosing from all those nail polish colors. Of course, the more obnoxious and bright the color the more the girls liked it.


The nail artists didn't use any harsh chemicals like they do for grown-ups.


And some girls (uh hem...Ella), really enjoyed being pampered. E kept the vibrating chair going to entire time and was very relaxed. I think we're in trouble. :) I love the nail art on Ella's nails. When the artist added glitter, it was all over!


Madi loves purses--a slight understatement. She carries them around loaded with all her little treasures. She loves to play with Kate's wallet, so when asked what she wanted for her birthday, all she would say is, "A black wallet with three dollars and some coins." Okay. (And then she asked Grandma and Poppa for everything else.) :)


The girls enjoyed cupcakes with pink sprinkles (Madi's request). (Guess I should have waited until after the manicures to take the cupcake photo. Oh well.) Then Madi opened her gifts. It was a great little party and the girls had a delightful time.

Time for a Go! Baby Giveaway!


I am back from beautiful North Carolina ( many thanks for all the support and kind words from my friends here. You guys are amazing!!!!!)  and so it is time to have the Go! Baby giveaway!  This one is for a Go! Baby and three dies of your choice.

You have four possible entries:

1. Let me know what three die choices you would choose ( I am drooling over too many at the moment)
2. Leave a comment letting me know if you are a follower already or a new follower ( the more the merrier!!!! And thank you!)
3. Sign up for the Accuquilt email here and come back and leave a comment
4. "Like" Accuquilt on Facebook here and leave a comment here letting me know :o) *Please do not write on the FB wall for an entry, just hit the like button and come on back here :o)*

Closed to new entries


Thanks everyone and Good Luck!!!!!!


Kim :o)

Wednesday, September 28, 2011

stop....

Another of my DT projects I submitted for Bella Blvd. I took these photos of my eldest about 2 months ago and it took my breath away at how grown up he looked!!!!
Do you spy that cute little bat pin from My Little Bit Of Whimsy! ....and today I received in the mail some cutie patootie moustache pins, I can't wait to play with them.

Till next time...

tutorial: halloween thumbprint tags

 This one's for Allison. She's a reader who e-mailed me and asked if I'd be willing to share my template for the Halloween thumbprint tags we made for Ella's preschool last year.


Remember these? I still love them. Here's the original post.

When I started blogging way back when, it was mainly for my family and friends and the Relief Society in my church ward. Because of Pinterest, that has changed. I'm getting mega hits each day and so many nice e-mails and sweet comments. It's so fun. Thanks so much everyone, it really makes me happy. Because I posted projects--but not many tutorials or downloads--I am very open to sharing information, templates, creating tutorials, etc. Just be patient with me. :)

Okay, back to the project.


Originally I had Ella stamp her thumbprint multiple times on white cardstock. Then she made them into jack-o-lanterns by adding stems and silly faces. (It kept her very busy.) I chose my favorite one, scanned it, added words around it in Photoshop Elements, and duplicated it.


You can still use this process in an editing program, or to make things simpler, I created a blank template for you to create your own tags. Your little goblins can stamp their thumbprints in each circle and create jack-o-lanterns. Each tag will be an original work of art. I chose a variety of generic wording to choose from.


Help your little one stamp their thumbprint with a cheery orange ink pad in the lower part of the circle (this will leave room for the hole and string for hanging). Then they can add stems and faces. It's getting close to bedtime, per the sad faces.


Use a 2" hole punch upside down to center the circles and punch.


I used a micro circle punch for the hole and crochet thread for hanging. I love crochet thread for so many things. It's a nice lightweight string, very inexpensive and one skein lasts forever.


Now help your little Picaso tie their tags to a special bag of treats.

Cards for First Communion

My pastor asked me a few weeks ago to do 24 cards for our kids who are taking their first communion this weekend and, of course, I waited until the last minute.

I find this type of card so difficult to do - a serious occasion...for kids (5th grade)...for boys AND girls.  I want a few special touches on the card, but yet I have to make a lot of them so they need to be quite straightforward.

I have definitely felt better about my first communion/confirmation cards in the past.  I like this card, but I think it fails in the "appealing to kids" category.  But...as my husband pointed out...the kids will see it for about 10 seconds, then their parents will decide what to do with it!

  • Stamps: Club Scrap Sacraments, cross is Clear Dollar Designs
  • Paper: Stampin' Up Rich Razzleberry, black and white
  • Ink: Black
  • Accessories: Cuttlebug border embossing, Stampin' Up Razzleberry ribbon

Tessa Kiros' Finnish Cinnamon and Cardamom Buns


Last week at I Heart Cooking Clubs we said goodbye to Jamie Oliver.  This week we are welcoming in a new chef,  lady chef Tessa Kiros!  I couldn't be more excited to cook Tessa's recipes. 
I've owned my Tessa Kiros cookbooks for a long time and I'm so excited to have a reason to open them up and start cooking.  Tessa's cookbooks are so beautiful and her writing style is very personal, with many family stories and memories sprinkled throughout.  Tessa has a multi-cultural background and has traveled many places, therefore her recipes range from Finnish to Greek to Italian and even South African.  It is going to be a very exciting six months!
*photo credit Brenda Benoit

This week we are welcoming Tessa to I Heart Cooking Clubs and in my mind there is nothing more welcoming than the aroma of fresh baked bread and cinnamon. Throw in some cardamom and I'm completely in love! These are the perfect hand-held treat to enjoy first thing in the morning or for a leisurely afternoon break with a cup of tea or coffee. 
The dough is rolled out into a rectangle and spread with softened butter and cinnamon/sugar.


 Tessa says: "These gorgeous buns were always a part of my childhood.  They are found everywhere in Finland - and probably all over Scandinavia - in tearooms and houses.  Everyone makes their own and they freeze beautifully so you can just pull out a few when a craving sets in.  Don't be put off when you see that the buns needs to rise for a couple of hours.  You can get the dough together really quickly and then leave it alone without even a glance.  The rolling and cutting can be a little tricky the first time you do it, but the second time will be easy."
The dough is rolled into a log and cut on the diagonal

 Cinnamon & Cardamom Buns
Adapted from Falling Cloudberries by Tessa Kiros
Makes about 35 buns

For Dough:
1 cup lukewarm milk
1/2 cup sugar
1 (1-ounce) cake fresh yeast
1 egg, lightly beaten
1/4 pound plus 1 tablespoon butter, softened
2 teaspoons ground cardamom
1 teaspoon salt
5-1/4 cups all-purpose flour

For Cinnamon Butter:
2 teaspoons ground cinnamon
1/4 cup sugar, plus 1 tablespoon for sprinkling
5-1/2 tablespoons butter, softened
 1 egg, lightly beaten

Put the milk and sugar in a bowl and crumble in the yeast.  Let stand for 10 minutes, or until the yeast begins to activate.  Add the egg, butter, cardamom, and salt, and mix in.  Add the flour, bit by bit, mixing it in with a wooden spoon until you need to use your hands, and then turn it out onto the work surface to knead.  It may seem a little too sticky initially, but will become compact and beautifully soft after about 5 minutes. Put the dough back in the bowl, cover with a clean cloth and then a heavy towel or blanket, and leave in a warm place for about 2 hours, or until it has doubled in size. 

To make the cinnamon butter, mix together the cinnamon and sugar.  Divide the butter into four portions and set aside. 

Put the dough on a floured work surface and divide it into four portions.  Begin with one portion, covering the others with a cloth so they don't dry out.  Using a rolling pin, roll out a rectangle, roughly about 12 by 10 inches and 1/8 inch thick.  Spread one portion of butter over the surface of the dough with a spatula or blunt knife.  Sprinkle with about 3 teaspoons of the cinnamon mixture, covering the whole surface with quick shaking movements of your wrists.  Roll up to make a long dough sausage.  Set aside while you finish rolling out and buttering the rest of the dough, so tha tyou can cut them all together.

Line two large baking sheets with parchment paper, or bake in two batches if you only have on sheet. Line up the dough sausages in front of you and cut them slightly on the diagonal, alternating up and down, so that the slices are fat V shapes, with the point of the V about 3/4 inch and the base about 2 inches.  Turn them so they are all the right way up, sitting on their fatter bases.  Press down on the top of each one with two fingers, until you think you will almost go through to your work surface.  Along the sides you will see the cinnamon stripes oozing outward.  Put the buns on the baking sheet, leaving space for them to puff and rise while they bake.  Brush lightly with beaten egg and sprinkle a little sugar over top.

Let the buns rise for half an hour and preheat your oven to 350F.  Bake them for about 20 minutes or until they are golden.  Check that they are lightly golden underneath as well before you take them out of the oven.  Serve hot, warm, or at room temperature and, when they are cool, keep them in an airtight container so they don't harden.
Notes: This dough comes together like a dream and is so easy to work with.  This would be a good recipe for a beginner/novice bread baker.  We loved these rolls, but next time I would add a bit more butter and cinnamon/sugar mixture to the inside of the dough before rolling.  We found that we wanted a little more cinnamon flavor.  Other than that, they were really fun and just the right size for popping in your mouth!

Theme: Welcome Tessa!


Tuesday, September 27, 2011

OLW Sentiment-a-mania with a Sketch

This week's One Layer Wednesday challenge is to create a card where the sentiment is the focus or shares the focus equally with the image.  Less Is More has a sketch for us this week.


I came home from Archivers yesterday with a Christmas sentiment stamp that I needed like a hole in the head, but it was so unique and stylish - a set designed by Ali Edwards at Technique Tuesday.


I knew that I wanted to use that first sentiment with a star in the upper corner, but my CAS card has taken me hours!  First I tried glitter paper and a Christmas star punch - broke the punch, and the star looked lost by itself. 

Then I tried a few dozen ways to add a blue square - punching, sponging, glimmer misting, etc. - when I finally hit on this technique to ink an acrylic block - I was thrilled!

But then came the simple little star.  The glitter paper was too gold - it needed to be whiter, so clearly I would just add glitter.  Have you really looked at different "white" glitters?  Some have a pink cast, some blue, some are too white with no glitz, some show dark flakes.  Yuck!  I cannot tell you how many glittered stars I have on my desk - not to mention the glitter on my PJs, carpet and even eyebrows!  The final star - which is NOT my Christmas star punch as that broke at the beginning of this saga - is a combo of Crystal Effects (or Glossy Accents) covering the star with some no-brand glitter all over it. 

I wanted the sentiment to be slightly sparkle - a "moonlit" sparkle - so after I stamped it, I just sprinkled it with the same glitter - no embossing powder or heat-and-stick - and enough flakes stuck to give me the effect.  You know how glitter sticks to everything - I don't know how long it will stay, but so far it has resisted me trying to blow it off.

So...now that you are thoroughly tired of me whining - here's the card.  I really like it - but it definitely wasn't worth the hours I put it on it - particularly given that it should have been a 5 minute card!!


  • Stamps: Technique Tuesday Good Cheer
  • Paper: white
  • Ink: Ranger Distress Inks in Tumbled Glass, Stormy Sky and Faded Jeans
  • Accessories: Emaginations Star punch, glitter, Stampin' Up Crystal Effects